Oracle Database Replication Methods (and their Pros and Cons)

Modern computing demands have forced businesses to ensure high availability and data accessibility while tackling various networks simultaneously. That’s why it’s crucial to get 24/7 and real-time access to key business data from your database—and for many businesses, that database is Oracle. Whether a business is looking to process millions of transactions or build a data warehouse, Oracle is the go-to option for handling critical enterprise workloads. 

In today’s digital age, organizations must scale up their systems and build an ecosystem that helps them seamlessly access data from their Oracle database to improve the efficiency of their operations. To achieve this, they can use database replication — a technique that enables data access to a wide range of sources (e.g., servers and sites). Since it allows real-time data access, database replication maintains high-data availability and addresses a major concern for enterprises.

Why Replicate an Oracle Database?

Replicating an Oracle database makes it easy to distribute, share, and consolidate data. With replication, businesses can synchronize data across different locations, share data with vendors and partners, and aggregate data from their branches — both international and local.

Companies use Oracle database replication to create multiple copies of an organization’s database. These synchronized copies pave the way for distributed data processing, backups for disaster recovery, testing, and business reporting.

Some benefits of Oracle database replication include the following:

  • Enhance application availability. Since database replication copies data to several machines, it’s easier to maintain access to your application’s data. Even if one of your machines is compromised due to a malware attack, faulty hardware, or another issue, your application data will remain available 24/7.
  • Enhance server performance. It’s a common practice in database replication to direct data read operations to a replica. This allows system administrators to minimize processing cycles on the primary server and prioritize it for write operations.
  • Enhance network performance. Maintaining multiple copies of the same data is convenient for minimizing data access latency. That’s because you can fetch the relevant data from the location where the transaction is being executed.

For instance, users from Europe might face latency problems while trying to access Australian-based data centers. You can address this challenge via Oracle database replication, so a replica of your data is placed closer to the user.

A common example of Oracle database replication can be found in money transfers and ATM withdrawals. For example, if you withdraw $150 from an ATM, the transaction will be immediately copied to each of your bank’s servers. As a result, your information will be updated instantaneously in all branches to display $150 less in your account.

Similarly, an e-commerce website that uses an Oracle database has to ensure visitors from different countries can view the same product information at each site. Database replication helps them to achieve this goal by copying their product details for each site.

4 Ways to Replicate An Oracle Database

Choosing the right approach to replicate your Oracle depends on several factors, including the goal of your replication, the size of the database, how the performance of the source systems is affected, and whether you need synchronous replication or asynchronous replication.

Here are some of the common ways to replicate an Oracle database.

1. Full Dump and Load

In this approach, you start by choosing a table you want to replicate. Next, you define a replication interval (could be 4, 8, or 12 hours) as per your requirements. For each interval, your replicated table is queried, and a snapshot is generated. This snapshot (also known as a dump) is used as the substitute for the previous snapshot.

This approach is effective for small tables (usually less than 100 million rows). However, once the table grows in size, you will have to rely on a more reliable replication strategy. That’s because it takes a considerable amount of time to perform the dump.

2. Incremental Approach (Table Differencing)

Table differencing is an approach in which a copy of the source table is periodically compared to an older version of the table and the differences are extracted. 

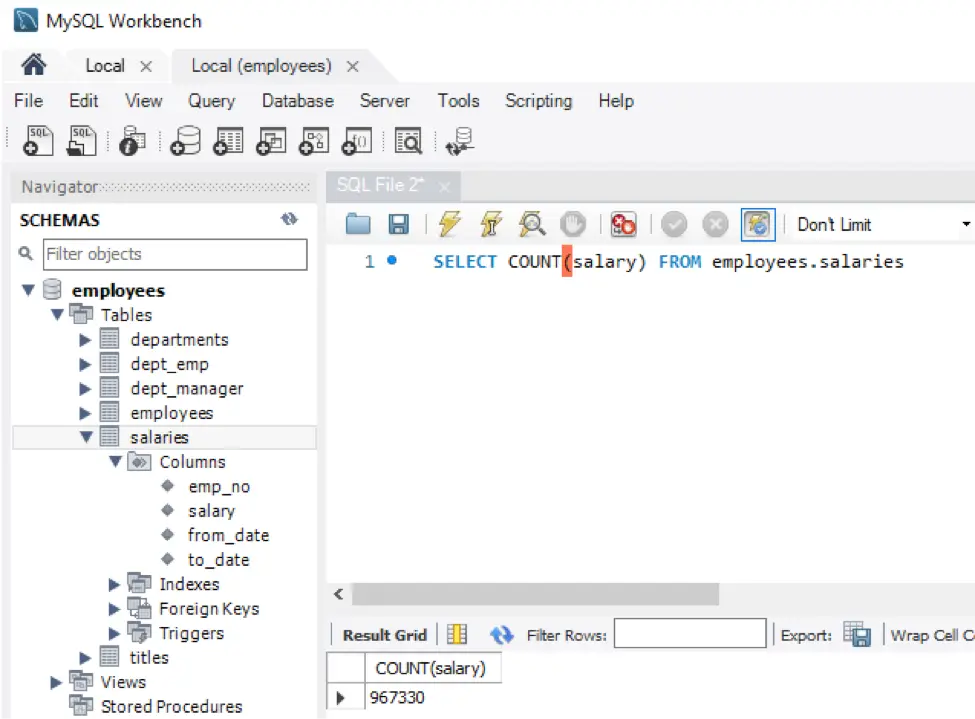
For example, use the following command to get the difference between the two tables, named new_version and old_version.

SELECT * FROM new_version
MINUS SELECT * FROM old_version;

This command gives you the inserts and updates that are present in the new_version of the table. However, when the time comes to load data into the target database, you have to make sure to replace the table’s old version with the new version (so you can compare it to a future new version of the table).

The incremental approach provides an accurate view of changed data while only using native SQL scripts. However, this method can lead to high computation and transport costs. In addition, it isn’t ideal for restoring data. For instance, if you want to go through the files that were backed up incrementally on Wednesday, you’ll first have to restore the full backup from Tuesday.

3. Trigger-Based Approach

This approach depends on triggers — a function you can set up to execute automatically whenever a data change occurs in your database system.

For example, you can set a trigger that inserts a record into another table (the “change table”) whenever the source table changes. You can then replicate your data from the Oracle database to another database.

Oracle comes with a stored procedure to set any trigger and monitor the source table for updates. Triggers help to achieve synchronous replication. However, this approach can affect the performance of the source database because triggers cause transactions to be delayed.

4. Change Data Capture

CDC image

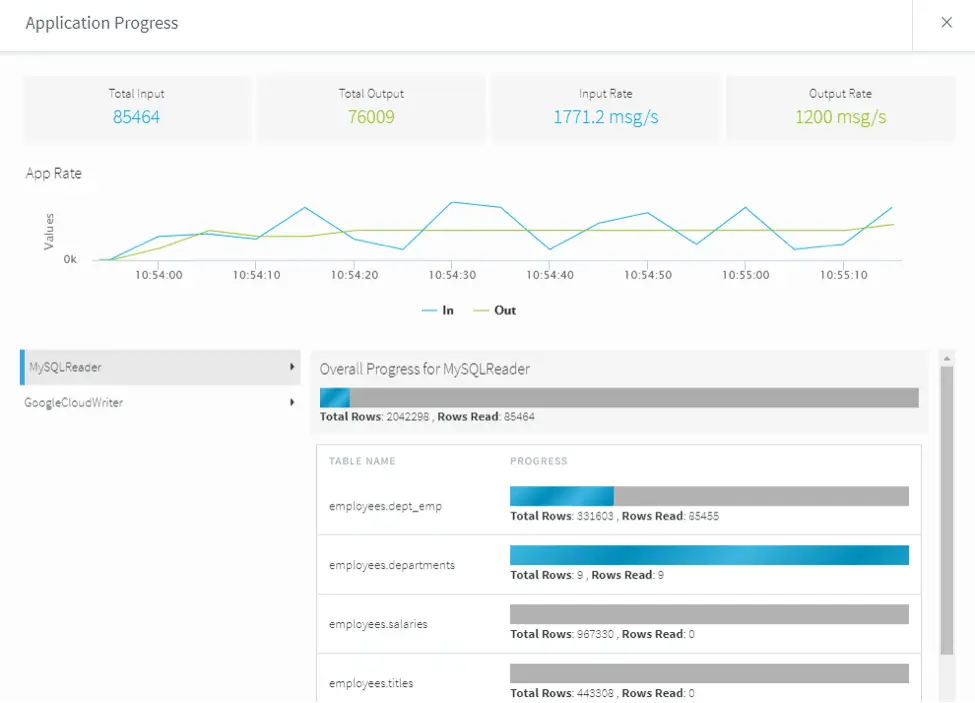
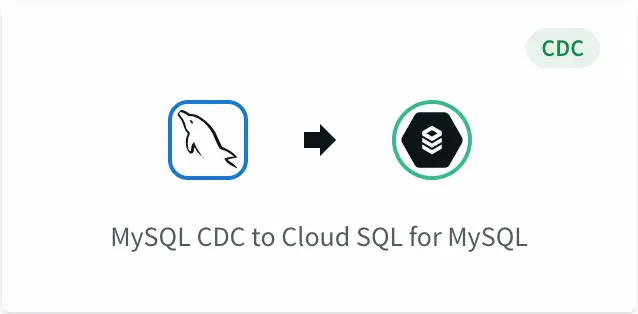
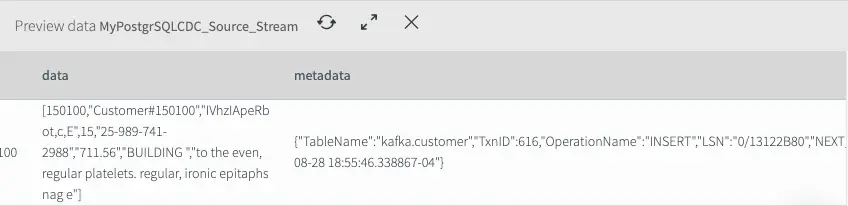
Change data capture (CDC) is a managed software process that determines the rows in source tables that have been modified after the last replication. This makes it more efficient and faster than other methods, especially the ones that copy entire tables at every replication cycle and replicate even the rows that weren’t changed.

CDC replicates create-update-delete (CUD) operations, written in SQL via the following commands: INSERT, UPDATE, and DELETE.

Here’s why Oracle CDC is a better approach for replicating your Oracle database:

  • Since CDC only works with the rows that have changed, it sends less data from the source to the replication, putting a minimal load on the network.
  • Proper CDC implementation ensures that replication operations don’t affect your production database. In this way, you can free up resources for transactions.
  • With CDC, you can achieve real-time data integration, helping you build streaming analytics.

For example, consider HomeServe, a leading home assistance provider. HomeServe wanted to send detailed reports to its insurer partners that could give an in-depth overview of water leaks. To do this, they needed a technology that could help them move the operational data to Google BigQuery without impacting their database.

Ultimately, they went with Striim’s enterprise-grade CDC to go through binary logs, JSON columns, and other sources. This allowed them to move all the changes from the transactional database. More importantly, CDC ensured no overhead was caused on the source system and performance remained unaffected. Learn more about it here.

Oracle GoldenGate is another tool that can replicate data from one Oracle database to another by using CDC. GoldenGate can be useful for a broad array of use cases. These include multi-cloud ingestion, data lake ingestion, high availability (peer-to-peer, unidirectional, bi-directional, etc.), and online transactional processing (OLTP) data replication.

Although Oracle GoldenGate is more convenient than the above methods, configuring it requires assistance from an Oracle administrator.

Simplify Oracle Database Replication with Striim

Striim for Oracle CDC

CDC is the best approach for replicating Oracle databases in many scenarios, but which tool should you choose to implement it? Consider taking a look at Striim.

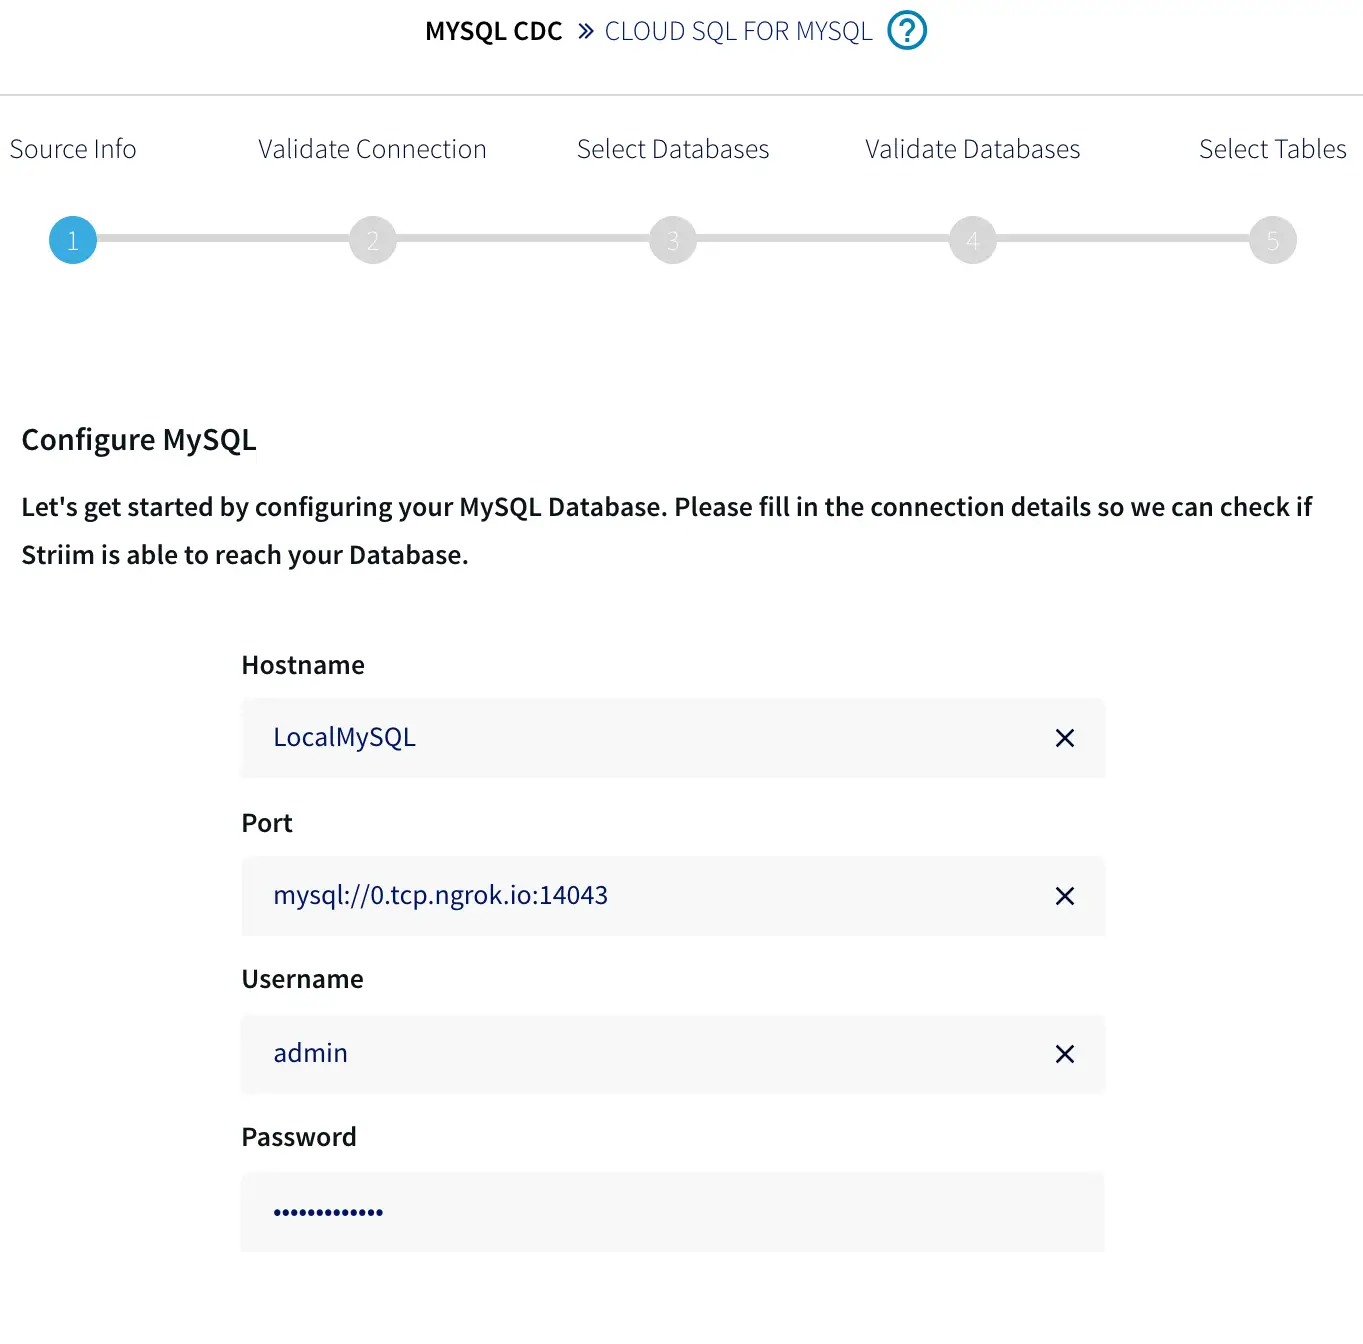
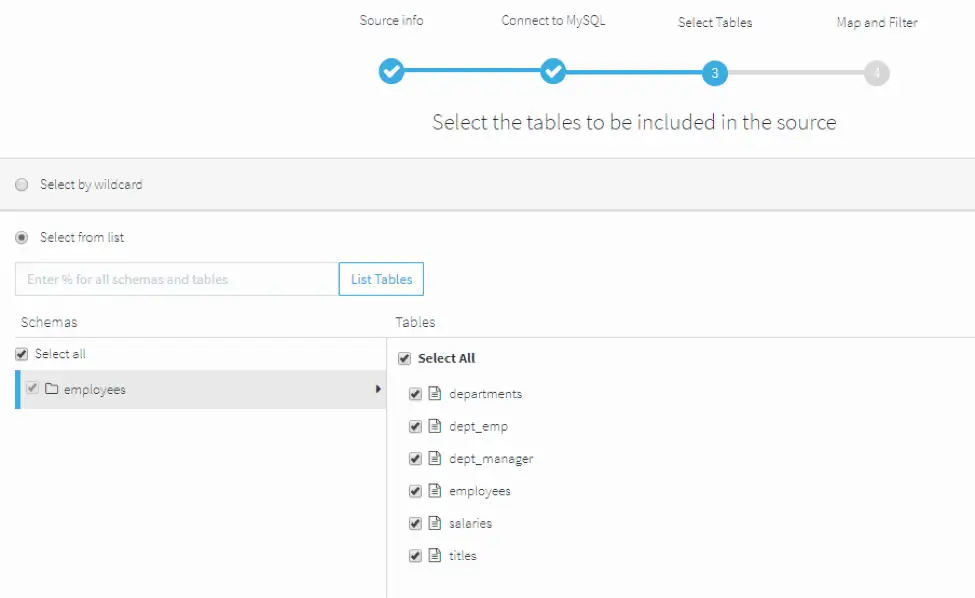
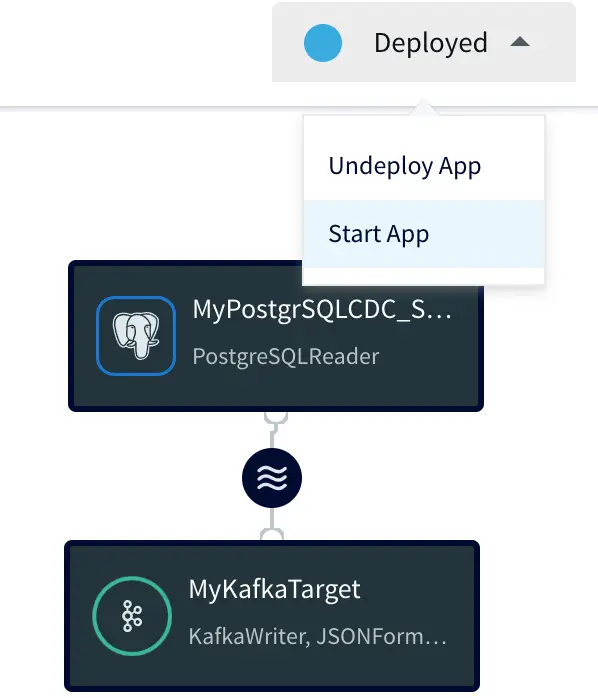
Using Striim’s Oracle CDC reader, you can turn your Oracle database into a streaming source and migrate your critical transactional data to cloud environments or real-time applications.

The log-based CDC method in Striim fetches the insert, update, and delete operations in the Oracle redo logs. Even better, Striim’s CDC reader can buffer large transactions to disk with minimal performance overhead. Throughout this process, the source systems remain unaffected.

Another thing that makes Striim stand out is, unlike other tools, it can work without the LogMiner continuous mining feature, which was deprecated in 19c. Additionally, Striim can read from GoldenGate trail files. 

Schedule a demo and we’ll give you a personalized walkthrough or try Striim at production-scale for free! Small data volumes or hoping to get hands on quickly? At Striim we also offer a free developer version.


Migrating from MySQL to Google Cloud SQL with Change Data Capture​

Tutorial

Migrating from MySQL to Google Cloud SQL with Change Data Capture

How to Change Data Capture (CDC) to synchronize data from MySQL into a Google Cloud SQL instance

Benefits

Simplify Cloud MigrationsSay goodbye to downtime and complex migrations. Striim seamlessly loads and syncs your changing data.Add New Cloud ApplicationsAdd new, client-facing applications by synchronizing an existing on-premises application’s data set.Sync Current and New DatabasesKeep  data in your current MySQL instance in sync with your new CloudSQL deployment until your migration goes live
On this page

Overview

Migrating from MySQL to Google Cloud SQL opens up cloud services that offer a wealth of capabilities with low management overhead and cost. But, moving your existing on-premises applications to the cloud can be a challenge. Existing applications built on top of on-premises deployments of databases like MySQL. In this blog post we are going to use a database technology called Change Data Capture to synchronize data from MySQL into a Google Cloud SQL instance.

Introduction

One of the major hurdles when migrating applications, whether you’re changing the technology or moving to the cloud, is migrating your data. The older and bigger the application, the more difficult that migration becomes. Traditional Extract, Translate, and Load (ETL) tools require multiple passes and, potentially, significant downtime to handle data migration activities. This is where real-time ETL tools like Striim shine.
There are a number of benefits in migrating applications this way, such as being able to:
Add a new, client-facing cloud application by synchronizing an existing, traditionally on-premises application’s data set.
Migrate one or more on-premises application (with data) to the cloud for production testing with almost zero impact on the existing application.
Let’s walk through an example of connecting an on-premises instance of MySQL to Google Cloud SQL for MySQL.

Step 1: Set Up the MySQL Database

Before we dive into Striim, we are assuming you have an on-premises MySQL instance already configured and containing relevant data. For the purpose of this post, the dataset we have loaded data from a GitHub source (https://github.com/datacharmer/test_db) in a local MySQL instance. The data set is pretty large, which is perfect for our purposes, and contains a dummy set of employee information, including salaries.

MySQL to CloudSQL

Rather than importing all the data this data set contains, I’ve excluded the load_salaries2.dump and load_salaries3.dump files. This will allow us to insert a lot of data after Striim has been configured to show how powerful Change Data Capture is.

Step 2: Set Up the Striim Application

Now that we have an on-premises data set in MySQL, let’s set up a new Striim application on Google Cloud Platform to act as the migration service.
Open your Google Cloud console and open or start a new project. Go to the marketplace and search for Striim.

MySQL to CloudSQL

A number of options should return, but the one we’re after is the first item, which allows integration of real-time data to GCP.

MySQL to CloudSQL

Select this option and start the deployment process by pressing the deploy button at the bottom of this screen. For this tutorial, we’ll use the basic defaults for a Striim server. In production, however, you’d need to size appropriately depending on your load.

Step 3: Create a Target Database

While we wait for the Striim server to deploy, let’s create a Google SQL database to which we’ll migrate our database. Select the SQL option from the side menu in Google Cloud and create a new MySQL instance.

MySQL to CloudSQL

Once again, we’ll use the defaults for a basic Google MySQL instance. Open the instance and copy the instance connection name for use later. Then open the database instance and take note of the IP address.
We also need to create the database structure for the data we imported into the local MySQL instance. To do this, open the Google Cloud shell, log into the MySQL server, and run the SQL to create the table structure. Striim also needs a checkpoint table to keep the state in the event of failures, so create that table structure using the following:

                      CREATE TABLE CHKPOINT (
                      id VARCHAR(100) PRIMARY KEY,
                          sourceposition BLOB,
                          pendingddl BIT(1),
                      ddl LONGTEXT
                  );

Step 4: Initial Load Application

Open the Google Console and go back to the Deployment Manager, and click “Visit site”. It’s important to note that the Striim VM currently has a dynamic external IP address. In a production environment, you’ll want to set this to static so it won’t change.
When you first visit the site, you’ll see a congratulations screen. Click accept and fill in the basic details. Leave the license field blank for the trial version of Striim, or add your license key if you have one.
MySQL to CloudSQL
The first thing we need to do is create an application that performs the initial load of our current data set. There is no wizard for setting up an initial load application that we require, so go to Apps and create an app from scratch.


First, let’s add a MySQL reader from the sources tab on the left. This will access our local database to load the initial set of data. To read from a local server we need to use a JDBC style URL using the template:
jdbc:mysql://:/
We are also mapping the tables we want to sync by specifying them in the tables folder using

.

This allows us to restrict what is synchronized. Finally, under output to, specify a new WAEvent type for this connector.


Once we have our source wired up, we need to add a target to the flow so our data starts to transfer. Using a process similar to the one we used previously, add the GoogleCloudWriter target with the Google cloud instance in the connection URL. For the tables, this time we need to match the source and targets together using the form:
.,.


Once both the source and target connectors have been configured, deploy and start the application to begin the initial load process.


After the application goes through the starting process we can click on the monitor button to show the performance of the application. This will take a little while to complete, depending on your database size

Step 5: Change Data Capture

While the initial load takes place, let’s create the Change Data Capture (CDC) application to get ready for the synchronization process.

This time we are going to use a wizard to create the application. Click on Add Apps, then select the option to start with a Template. Striim comes with a lot of templates for different use cases out of the box. Scroll down to Streaming Integration for MySQL, click “show more,” then look for MySQL CDC to Cloud SQL MySQL. This option sets up a CDC application for MySQL to Google Cloud SQL.

Fill out the connection information for your on-premises application and click next. This should connect to the agent and ensure everything is correct.


Once everything is connected, check the tables you selected in the first application. These will synchronize any changes that occur.


Now we need to link our source to our target. Specify the connection details for your Google SQL instance using the IP address from the previous step. Fill in the username, password, and list of tables from the source database and click next. When you’ve finished the wizard, the application should be ready to go.


If the previous data load application has finished, stop the data load application and start the Change Data Capture application. Once the application has started, start loading transactions into your on-premises database. This should start synchronizing the data that changes up to your Google Cloud instance.

Open the Change Data Capture application and select monitor. You should see both the input and output figures as the application keeps track of your on-premises database. The activity chart should be showing the throughput of the records synchronizing from one location to another.
If you open the database console in Google Cloud and run a “SELECT COUNT(salary) FROM salaries” statement a couple of times, you should see the count figure rising.

Step 6: Adding More Load

While the servers are synchronizing, let’s go back to our local MySQL and add some other transactions. Import the remaining two salaries files, load_salaries2.dump and load_salaries3.dump. This will provide additional transactions to be synchronized and you’ll see Striim continue to add transactions as they happen without needing to do anything else.

Next Steps

We looked at a really quick and easy way to synchronize an on-premises instance of MySQL to Google Cloud SQL using Striim. At this point, you could start using the cloud database to run additional applications or do data analysis — without affecting the performance and use of your existing system.
If you open the menu on the Striim admin page, then open the apps section, and finally open this application, you’ll also see other steps you could add to this flow that support even more complex use cases, such as adding in transforms, combining multiple sources, or even splitting across targets.
To learn more about migrating from MySQL to Google Cloud SQL, check out the product page. To see how Striim can help with your move to cloud-based services, schedule a demo with a Striim technologist, or download a free trial of the platform.

Tools you need

Striim

Striim’s unified data integration and streaming platform connects clouds, data and applications.

MySQL

MySQL is an open-source relational database management system.

Google Cloud SQL

Google Cloud SQL is a fully managed relational database service for MySQL, PostgreSQL and SQL Server.

Migrate and Replicate Data from SQL Server to Snowflake with Striim

Tutorial

Migrate and Replicate Data from SQL Server to Snowflake with Striim

How to use Striim to migrate schemas and data from an existing SQL Server database into Snowflake

Benefits

Operational AnalyticsAnalyze your data in real-time without impacting the performance of your operational database.Control Your CostsMove data to Snowflake incrementally while controlling upload and merge intervals to optimize compute costsGet a Live ViewUse Striim CDC to stream data to Snowflake for a continuous view of your SQLServer transactions.
On this page

What is Striim?

Striim is a next generation Cloud Data Integration product that offers change data capture (CDC) enabling continuous replication from popular databases such as Oracle, SQLServer, PostgreSQL and many others.

In addition to CDC connectors, Striim has hundreds of automated adapters for file-based data (logs, xml, csv), IoT data (OPCUA, MQTT), and applications such as Salesforce and SAP. Our SQL-based stream processing engine makes it easy to enrich and normalize data before it’s written to Snowflake.

In this tutorial, we’ll show you how to use Striim to migrate schemas and data from an existing SQL Server database into Snowflake.

Step 1: Prepare a Snowflake Database and Launch Striim

Before migrating your data from SQL Server, you must first create a database within Snowflake to store the migrated data. After that database has been created you can launch Striim as a Snowflake partner service directly from within Snowflake.

Follow the steps below to prepare a database and launch Striim in Snowflake:

Launch Snowflake in a web browser.

Click on Databases > Create:


create snowflake database

Enter a unique name for the database and click Finish:


create database mmodal

Click on Partner Connect in the top right corner of the navigation bar.

Locate and click on Striim in the list of Snowflake partners. Note: you may need to first switch your user role to ACCOUNTADMIN in order to launch Striim from Snowflake:


Activate the partner account if the account has not been previously activated:


Confirm that the database you created in steps 2 and 3 above is listed in Database(s) with USAGE privilege granted and click Connect:


Note: On subsequent launches after activation has been completed for the first time, Snowflake will just prompt you to launch:


Step 2: Create a Striim Service to Host a Data Migration App

In Striim an app will be used to migrate the data. Before you can create that app, you need to first create and configure a service to host the app.

Follow the steps below to create a new Striim service:

Click on Marketplace in the top menu.

Locate the Snowflake app and click on Create:


Enter a unique name in the Name field noting the naming requirements listed:


(Optional) Click Show advanced options and specify the Service Version and Cluster Type.

Click Create. The browser will redirect to the Services screen.

Wait for the new service to enter the Running state.

Click on Launch:


The service will open in a new browser tab.

Step 3: Create a Data Migration App on the Striim Service

With the service now created and launched, you must create an app that runs on that service to perform the data migration.

Follow the steps below to create a new data migration app:

Click on Apps to display the app management screen:


Click Create app:


Click on SQL Server Database to Snowflake:


Enter a name for the new application and the namespace and click Save:


The data migration wizard is displayed:


Step 4: Prepare for Data Migration to Snowflake

In this section you will configure your app to access your source SQL Server database. As you proceed through Striim’s migration wizard, Striim will validate that it can access and fetch the metadata and data of your source SQL Server database.

Follow the steps below to migrate data using Striim’s step-by-step wizard:

Enter the details of your existing SQL Server database from which data is to be migrated and click Next:


Striim will verify that it can connect to your database and obtain metadata:

Click Next to advance to the Select Schemas screen.

Select the schemas to migrate from your SQL Server database to Snowflake and click Next:


Striim will fetch and validate metadata for each table in your database:


Click Next to advance to the Select Tables screen. Navigate through each schema on the left-hand side, and select the tables from each to migrate:


Click Next to complete the wizard. The target creation screen is displayed:


Step 5: Prepare Your Target and Migrate Your Data to Snowflake

Now that Striim can read from your source SQL Server database, you must configure Striim to write to your target Snowflake database.

Follow the steps below to prepare a Snowflake target and start the migration process:

Enter a unique name for the target in the Target Name field on the Create Snowflake Target(s) screen.

Ensure Input From is set to the stream you created using the steps in the previous sections. Note that the name will be in the form of+ _OutputStream.

Prepare the URL of the target Snowflake database: copy the following URL into the Connection URL field and replace YOUR_HOST with the base host domain assigned by Snowflake to your account, and YOUR_DATABASE with the name of your database:


jdbc:snowflake://YOUR_HOST.snowflakecomputing.com/?db=YOUR_DATABASE_NAME&schema=public

For example, the following URL has a base URL of xr86987.ca-central-1.aws and the database name set to RNA:


jdbc:snowflake://xr86987.ca-central-1.aws.snowflakecomputing.com/?db=RNA&schema=public

Enter your credentials corresponding to your Snowflake account into the Username and Password fields.

(Optional) Modify which tables to migrate by configuring the table name(s) listed in the Tables field. By default, the tables listed will be based on those specified in the steps from the previous section and include the % as a wildcard character:


Click Next. Striim will recreate the schema(s) in your Snowflake database:


Click Next after target creation is complete. Striim will begin migrating your data to Snowflake and will provide a detailed Application Progress popup showing how the migration is progressing:


Wrapping Up: Start Your Free Trial

Our tutorial showed you how easy it is to migrate data from SQLServer to Snowflake, a leading cloud data warehouse. Once your data has been migrated, Striim enables continuous, real-time updates via Change Data Capture.

For instances where changes continue to be made to the data in your source database, Striim enables zero-downtime, zero-data loss migrations to Snowflake.

As always, feel free to reach out to our integration experts to schedule a demo, or try Striim for free here.

Tools you need

Striim

Striim’s unified data integration and streaming platform connects clouds, data and applications.

PostgreSQL

PostgreSQL is an open-source relational database management system.

Snowflake

Snowflake is a cloud-native relational data warehouse that offers flexible and scalable architecture for storage, compute and cloud services.

MySQL Replication: Your Guide to Getting Started

Here’s the thing: Getting a 500: Server error is never good news to a business, regardless of its source. Granted, the error could stem from a number of issues, but what happens when a problem with your database is the cause of the error? Are you going to start panicking because you don’t have a backup, or would you be calm, assured that your replica is up and running?

This is just one of the uses of MySQL replication. Replication is the process of copying data from one database (source) to another (replica). The data copied can be part or all of the information stored in the source database. MySQL database replication is carried out according to the business needs — and if you’re considering having a replica, here’s what you need to know.

Why Replication?

Replication may seem expensive from afar — and it usually is if you consider time and effort expended. On a closer look and in the long run, you’ll see it delivers great value to your business. It saves you time, and more money, in the future.

Most of the benefits of replication revolve around the availability of the database. However, it also ensures the durability and integrity of the data stored.

Replication Improves the Server’s Performance

HTTP requests to the server are either read (SELECT) or write(CREATE, UPDATE, DELETE) queries. An application may require a large chunk of these queries per minute, and these may, in turn, slow down the server. With replicas, you can distribute the load in the database.

For example, if the bulk of your requests are read queries, you can have the source server handle all write operations on the server, and then the replicas can be read-only. As a result, your server becomes more efficient as this load is spread across the databases. Doing this also helps avoid server overload.

Replication Allows for Easier Scalability

As a business grows, there is often a heavier load on the server. You can tackle this extra load by either scaling vertically by getting a bigger database or scaling horizontally by distributing your database’s workload among its replicas. However, scaling vertically is often a lengthy process because it takes a while — from several hours to a few months — to fully migrate your data from one database to another.

When scaling horizontally, you spread the load without worrying about reaching the load limit of any one database — at least for a while. You also do not need to pause or restart your server to accommodate more load as you would have done when moving your data to another database.

Replication Improves Application Availability (Backup)

Without replicas, you might have to do backups on tape, and in the event of a failover, it could take hours before the system is restored. And when it’s fully restored, it’ll only contain data from the last backup; the latest data snapshot is often lost. Having replicas means you can easily switch between databases when one fails without shutting down the server.

You can automate the switch so that once a source stops responding, queries are redirected to a replica in the shortest time possible. Then, when the source is back online, it can quickly receive updates to the replica.

Replication Provides an Easy Way to Pull Analytics

Pulling analytics on data stored in the database is a common procedure, and replication provides a hassle-free way to do this. You can draw insights for analytics from replicas, so you avoid overloading the source. Doing this also helps preserve the data integrity of the source — the information remains untouched, preventing any tampering with the data (whether by accident or otherwise).

Otherwise, the source can always sync up with the replica to get the latest data snapshot as needed.

Whatever the size of your database, MySQL replication is beneficial — especially if you intend to grow your business. First, figure out if and how replication affects your business and go from there to decide how many replicas to have and which replication method to use.

Use Cases For MySQL Replication

MySQL replication allows you to make exact copies of your database and update them in near real-time, as soon as updates to your source database are made. There are several cases where MySQL replication is helpful, and a few of them include:

Backups

Data backups are usually performed on a replica so as not to affect the up-time and performance of the source. These backups can be done in three forms: using mysqldump, raw data files, and backing up a source while it’s read-only. For small- to medium-sized databases, mysqldump is more suitable.

Using mysqldump involves three steps:

  1. Stop the replica from processing queries using mysqladmin stop-replica
  2. Dump selected or all databases by running mysqldump
  3. Restart the replication process once the dump is completed. mysqladmin start-replica does that for you.

Since information backed up using mysqldump is in the form of SQL statements, it would be illogical to use this method for larger databases. Instead, raw data files are backed up for databases with large data sets.

Scaling Out

Using replication to scale out is best for servers with more reads and fewer writes. An example is a server for e-commerce where more users look through your product catalog than users adding to your catalog. You’re then able to distribute the read load from the source to the replicas.

Have an integrated platform for read and write connections to the server and the action of those requests on the server. That platform could be a library that helps carry out these functions. Here’s an example layout of replication for scale-out solutions.

Switching Sources

MySQL allows you to switch your source database when need be (e.g., failover) using the CHANGE REPLICATION SOURCE TO statement. For example, say you have a source and three replicas, and that source fails for some reason. You can direct all read/write requests to one of the replicas and have the other two replicate from your new source. Remember to STOP REPLICA and RESET MASTER on the new source.

Once the initial source is back, it can replicate from the active source using the same CHANGE REPLICATION SOURCE TO statement. To revert the initial source to source, follow the same procedure used to switch sources above.

Whatever your reason for adopting MySQL replication, there’s extensive documentation on MySQL statements that can help you achieve your replication goal.

The Common Types of MySQL Replication

You can set up MySQL replication in a number of ways, depending on many factors. These factors include the type of data, the quantity of the data, the location, and the type of machines involved in the replication.

To help you determine the right type of MySQL replication for your needs, let’s review the most common MySQL replication types:

Snapshot Replication

As the name implies, snapshot replication involves taking a picture-like replica of a database. It makes an exact replication of the database at the time of the data snapshot. Because it’s a snapshot, the replica database does not track updates to the source. Instead, you take snapshots of the source at intervals with the updates included.

Snapshot replication is simple to set up and easy to maintain and is most useful for data backup and recovery. And the good news is that it’s included by default in a lot of database services.

Merge Replication

merge replication

The word “merge” means to combine or unite to form a single entity. That’s the basis for merge replication — it unites data from the source database with the replica. Merge replication is bidirectional: changes to the source are synchronized with the replicas and vice versa.

You can use merge replication when there are multiple replicas working autonomously, and the data on each database needs to be synchronized at certain operational levels of the server. It is mostly used in server-client environments. 

An example of a merge replication use case would be a retail company that maintains a warehouse and tracks the stock levels in a central (source) database. Stores in different locations have access to replica databases, where they can make changes based on products sold (or returned). These changes can be synchronized with the source database. In turn, changes to the source database are synchronized with the replicas, so that everyone has up-to-date inventory information.

Transactional Replication

transactional replication

Transactional replication begins with a snapshot of the source database. Subsequent changes to the source are replicated in the replica as they occur in near real-time and in the same order as the source. Thus, updates to the replica usually happen as a response to a change in the source.

Replicas in transactional replication are typically read-only, although they can also be updated. Therefore, transactional replication is mainly found in server-server environments, for instance, multi-region/zone databases.

There are a few other MySQL replication types, but one feature is common to all, including those discussed above. Each replication typically starts with an initial sync with the source database. After that, they branch out to their respective processes and use cases.

The Power of Leveraging Your MySQL Replicas

We’ve established the importance and advantages of replicating your databases, but keeping up with changes or corruption to the database can be a struggle for a lot of production teams. To top that, you need to know how your data is ingested and delivered and, more importantly, ensure this process of ingestion and delivery is continuous.

With Striim, you can easily see and understand the state of your data workflow at any given time. Whether your server is on-premise, cloud-based or hybrid, you can still create data flows and have control over how your data is gathered, processed, and delivered. We’re ready when you are.


Streaming Data Integration Tutorial: Adding a Kafka Stream to a Real-Time Data Pipeline

Tutorial

Streaming Data Integration Tutorial: Adding a Kafka Stream to a Real-Time Data Pipeline

Connect your streaming pipelines to Apache Kafka seamlessly for maximum organizational adoption of real-time data

Benefits

Turn Your Database into a StreamUse non-intrusive CDC to Kafka to create persistent streams that can be accessed by multiple consumers.Empower Your TeamsGive teams across your organization a real-time view of your Oracle database transactionsGet Analytics-Ready DataGet your data ready for analytics before it lands in the cloud. Streaming SQL scales in memory to keep your data moving.
On this page

Overview

This is the second post in a two-part blog series discussing how to stream database changes into Kafka. You can read part one here. We will discuss adding a Kafka target to the CDC
source from the previous post. The application will ingest database changes (inserts, updates, and deletes) from the PostgreSQL source tables and deliver to Kafka to continuously to update a Kafka topic.

What is Kafka?

Apache Kafka is a popular distributed, fault-tolerant, high-performance messaging system.

Why use Striim with Kafka?

The Striim platform enables you to ingest data into Kafka, process it for different consumers, analyze, visualize, and distribute to a broad range of systems on-premises and in the cloud with an intuitive UI and SQL-based language for easy and fast development.

Step 1: How to add a Kafka Target to a Striim Dataflow

From the Striim Apps page, click on the app that we created in the previous blog post and select Manage Flow.


MyPostgreSQL-CDC App

This will open your application in the Flow Designer.

source flow

MyPostgrSQLCDC app data flow.

To do the writing to Kafka, we need to add a Target component into the dataflow. Click on the data stream, then on the plus (+) button, and select “Connect next Target component” from the menu.

connect component data flow

Connecting a target component to the data flow.

Step 2: Enter the Target Info

The next step is to specify how to write data to the target. With the New Target ADAPTER drop-down, select Kafka Writer Version 0.11.0, and enter a few connection properties including the target name, topic and broker URL.

configuring the kafka target

Configuring the Kafka target.

Step 3: Data Formatting

Different Kafka consumers may have different requirements for the data format. When writing to Kafka in Striim, you can choose the data format with the FORMATTER drop down and optional configuration properties. Striim supports JSON, Delimited, XML, Avro and free text formats, in this case we are selecting the JSONFormatter.

Configuring the Kafka target FORMATTER.

Configuring the Kafka target FORMATTER

Step 4: Deploying and Starting the Data Flow

The resulting data flow can now be modified, deployed, and started through the UI. In order to run the application, it first needs to be deployed, click on the ‘Created’ dropdown and select ‘Deploy App’ to show the Deploy UI.

Deploying the app

Deploying the app

The application can be deployed to all nodes, any one node, or predefined groups in a Striim cluster, the default is the least used node.

Deployment node selection

Deployment node selection

After deployment the application is ready to start, by selecting Start App.

Starting the app

Starting the app

Step 5: Testing the Data Flow

You can use the PostgreSQL to Kafka sample integration application, to insert, delete, and update the PosgtreSQL CDC source table, then you should see data flowing in the UI, indicated by a number of msgs/s. (Note the message sending happens fast and quickly returns to 0).

Testing the streaming data flow

Testing the streaming data flow

If you now click on the data stream in the middle and click on the eye icon, you can preview the data flowing between PostgreSQL and Kafka. Here you can see the data, metadata (these are all updates) and before values (what the data was before the update).

Previewing the data flowing from PostgreSQL to Kafka

Previewing the data flowing from PostgreSQL to Kafka

There are many other sources and targets that Striim supports for streaming data integration. Please request a demo with one of our lead technologists, tailored to your environment.

Tools you need

Striim

Striim’s unified data integration and streaming platform connects clouds, data and applications.

PostgreSQL

PostgreSQL is an open-source relational database management system.

Snowflake

Snowflake is a cloud-native relational data warehouse that offers flexible and scalable architecture for storage, compute and cloud services.

Tutorial: Migrate and Replicate Data from MySQL to Snowflake Using Striim

In this article, we’ll go over how to use Striim to migrate and replicate data from an existing MySQL database to Snowflake.

What is Striim?

Striim is a next generation Cloud Data Integration product that offers change data capture (CDC) enabling continuous replication from popular databases (such as MySQL, Oracle, SQL Server, PostgreSQL ) to data warehouses, databases, messaging systems, and more.

In addition to CDC connectors, Striim has hundreds of automated adapters for file-based data (logs, xml, csv), IoT data (OPCUA, MQTT), and applications such as Salesforce and SAP. Our SQL-based stream processing engine makes it easy to enrich and normalize data before it’s written to Snowflake.

In this tutorial, we’ll show you how to use Striim to migrate schemas and data from an existing MySQL database into Snowflake.

This tutorial uses the Sakila sample database to illustrate the steps.

Tutorial: Migrate and Replicate Data from MySQL to Snowflake

Prerequisites

The following are required to complete this tutorial:

  • Striim Account. You can sign up for a free trial account.
  • Snowflake Account. You can sign up for a free 30-day trial account to get started.
  • MySQL database that meets the following requirements:
    • Accessible over the Internet.
    • SHA256 password authentication enabled.
    • A user with full privileges to the database that Striim will authenticate with. Construct the name by concatenating the user’s name, the @ symbol, and Striim’s IP address (34.66.168.224). For example: john@34.66.168.224.

Note: Ensure you have the database’s name, hostname, port, username, and password as they will be required in the steps below to connect to your database.

  • At least one table in the MySQL database
  • (Optional) Sakila sample database.

Prepare a Snowflake Database and Launch Striim

Before migrating your data from MySQL, you must first create a database within Snowflake to store the migrated data. After that database has been created you can launch Striim as a Snowflake partner service directly from within Snowflake.

Follow the steps below to prepare a database and launch Striim in Snowflake:

  • Launch Snowflake in a web browser.
  • Click on Databases > Create:

Create Snowflake database

  • Enter a unique name for the database and click Finish:

Name database

  • Click on Partner Connect in the top right corner of the navigation bar.
  • Locate and click on Striim in the list of Snowflake partners. Note: you may need to first switch your user role to ACCOUNTADMIN in order to launch Striim from Snowflake:

Locate Striim Partner Connect

  • Activate the partner account if the account has not been previously activated:

Ready to activate partner account

  • Confirm that the database you created above is listed in Database(s) with USAGE privilege granted and click Connect.
  • Note: On subsequent launches after activation has been completed for the first time, Snowflake will just prompt you to launch:

Account previously created

Create a Striim App

In Striim, an app will be used to perform migration from MySQL to a Snowflake database.

Follow the steps below to create a new Striim App:

  • Ensure you’re on the App screen in Striim and click Create App:

Create Striim app

  • Locate the Build using Wizards section on the Create a New App screen and select MySQL Database to Snowflake:

MySQL to snowflake wizard

  • Enter a unique name for your app and click Save:

Name Striim app

  • The data migration wizard is displayed:

Migration wizard displayed

Prepare for Data Migration to Snowflake

In this section you will configure your app to access your source MySQL database. As you proceed through Striim’s data migration wizard, Striim will validate that it can access and fetch the metadata and data of your source MySQL database.

  • Enter the host/port for your MySQL database and the login credentials for the Striim user who has been granted full privileges to your MySQL database:

Enter host port

  • Striim will verify that it can connect to your database and obtain metadata:

Verify connection

  • Click Next to advance to the Select Databases to move screen.
  • Select the databases to migrate from your MySQL database to Snowflake and click Next:

Select database to move

  • Striim will fetch and validate metadata for each table in your database:

Validate and fetch

  • Click Next to advance to the Select Tables screen. Navigate through each schema on the left-hand side, and select the table(s) to migrate:

Select tables to migrate

  • Click Next to complete the wizard. The target creation screen is displayed:

Target creation screen 1

Prepare Your Target and Migrate Your Data to Snowflake

Now that Striim can read from your source MySQL database, you must configure Striim to write to your target Snowflake database.

Follow the steps below to prepare a Snowflake target and start the migration process:

  • Enter a unique name for the target in the Target Name field on the Create Snowflake Target(s) screen.
  • Ensure Input From is set to the stream you created using the steps in the previous sections. Note that the name will be in the form of <your application name> + _OutputStream.
  • Prepare the URL of the target Snowflake database: copy the following URL into the Connection URL field and replace YOUR_HOST with the base host domain assigned by Snowflake to your account, and YOUR_DATABASE with the name of your database:

jdbc:snowflake://YOUR_HOST.snowflakecomputing.com/?db=YOUR_DATABASE_NAME&schema=public

For example, the following URL has a base URL of xr86987.ca-central-1.aws and the database name set to SAKILA

jdbc:snowflake://xr86987.ca-central-1.aws.snowflakecomputing.com/?db=SAKILA&schema=public

  • Enter your credentials corresponding to your Snowflake account into the Username and Password fields.
  • (Optional) Modify which tables to migrate by configuring the table name(s) listed in the Tables field. By default, the tables listed will be based on those specified in the steps from the previous section and include the % as a wildcard character:

Create target 2

Click Next. Striim will recreate the schema(s) in your Snowflake database:

Create Schema

Click Next after target creation is complete. Striim will begin migrating your data to Snowflake and will provide a detailed Application Progress popup showing how the migration is progressing:

monitor data flow

The amount of time required for migration will vary depending on how much data is being migrated from your source MySQL database and on your internet connection speed.

Conclusion: Start Your Free Trial

Our tutorial showed you how easy it is to migrate data from MySQL to Snowflake, a leading cloud data warehouse. Once your data has been migrated, Striim enables continuous, real-time updates via Change Data Capture. For instances where changes continue to be made to the data in your source database, Striim enables zero-downtime, zero-data loss migrations to Snowflake.

As always, feel free to reach out to our integration experts to schedule a demo, or try Striim for free here.

Data Transformation 101: The What, Why, and How

Ninety percent of the data generated daily is unstructured and almost meaningless to organizations. The continuous increase in the volume of data is a potential gold mine for businesses. Like gold, data has to be carefully mined and refined, or in this case, extracted and transformed to get the most value.

Businesses receive tremendous volumes of data from various sources to make better decisions. But raw data can be complex, challenging, and almost meaningless to the decision-makers in an organization. By transforming data, businesses can fully maximize the value of their data and use it to make more in-depth strategic decisions.

In this post, we’ll share an overview of data transformation, how it works, its benefits and challenges, and different data transformation approaches

  1. What is Data Transformation?
  2. Why Transform Data?
  3. How Data Transformation Works
  4. Data Transformation Methods
  5. Data Transformation Use Cases
  6. Data Transformation Challenges
  7. Data Transformation Best Practices
  8. Use Data Transformation Tools Over Custom Coding

What is Data Transformation?

Data transformation is the process of converting data from a complex form to a more straightforward, usable format. It can involve actions ranging from cleaning out data, changing data types, deleting duplicate data, data integration, and data replication, depending on the desired result.

Data transformation is an integral part of any data pipeline including ETL (Extract, Transform, and Load) and ELT (Extract, Load, Transform) pipelines. ETL involves extracting data from multiple sources, transforming it into a more intelligent structure, and loading or storing it in a data warehouse. In contrast, ELT shifts the bulk of the transformations to the destination data warehouse.

ETL vs ELT Infographic

Data transformation is essential to standardize data quality across an organization and create consistency in the type of data shared between systems in the organization.

Why Transform Data? (Benefits)

With data transformation, businesses can increase efficiencies, make better decisions, generate more revenue, and gain many other benefits, including:

  • Higher data quality: Businesses are very concerned with data quality because it is crucial for making accurate decisions. Data transformation activities like removing duplicate data and deleting null values can reduce inconsistencies and improve data quality.
  • Improved data management: Organizations rely on data transformation to handle the tremendous amounts of data generated from emerging technologies and new applications. By transforming data, organizations can simplify their data management and reduce the dreaded feeling of information overload.
  • Seamless data integration: It is normal for a business to run on more than one technology or software system. Some of these systems need to transfer data between one another. With data transformation, the data sent can be converted into a usable format for the receiving system, making data integration a seamless process.
  • Obfuscate sensitive data: In order to abide by GDPR, HIPAA, and other regulations, companies need to be able to mask or remove sensitive information such as PII or credit card numbers when transferring data from one system to another.
masking data with Striim
An example showing how Striim can be used to mask credit card numbers during data transfer from one system to another.

How Data Transformation Works

When data is extracted from the source, it is raw and nearly impossible to use. The data transformation process involves identifying the data, structuring it, and generating a workflow that can be executed to convert the data. Sometimes, it is mandatory to clean the data first for easy identification and mapping.

The steps to transform raw data into an intelligent format include:

  1. Identify the data: This is the data discovery phase, and it involves identifying and understanding the data in its source/extracted format. Data discovery is usually best accomplished with the help of a data profiling tool. Here, you have an idea of what should be done to get the data into the desired format.
  2. Structure the data: This is the data mapping stage where the actual transformation process is planned. Here, you define how the fields in the data are connected and the type of transformation they will need. This stage is also where you consider if there would be any loss of data in the transformation process. For example, if we have a simple Excel spreadsheet with a date column in an incorrect format, we would want to make a ‘mapping’ to determine the type of transformation needed to change the date to a correct format.
  3. Generate a workflow: For transformation to occur, a workflow or code needs to be generated. You can write your custom code or use a data transformation tool. Python and R are the most common languages for a custom code, but it can be done in any language, including an Excel Macro, depending on the transformation needs. When developing a transformation workflow, consider certain factors like scalability (will the transformation needs change over time?) and usability (will other people need this workflow?).
  4. Execute the workflow: Here, data is restructured and converted to the desired format.
  5. Verify the data: After transformation, it is best to check if the output is in the expected format. If it isn’t, review the generated workflow, make necessary changes, and try again.

Data Transformation Methods

Organizations can transform data in different ways to better understand their operations. For example, data aggregation, data filtering, data integration, etc., are all forms of data transformation, and they can happen with any of these types of data transformation:

Transformation with scripting

This type of transformation involves manually coding the data transformation process from start to finish in Python, R, SQL, or any other language. It is an excellent approach for customization but often results in unintentional errors and misunderstandings as developers sometimes fail to interpret the exact requirements in their custom-coded solutions.

Transformation with on-site ETL tools

These tools work through on-site servers to extract, transform, and load information into an on-site data warehouse. However, an on-site transformation solution can be expensive to set up and manage as data volume increases, so big data companies have moved to more advanced cloud-based ETL tools.

Transformation with cloud-based ETL tools

Cloud-based ETL tools have simplified the process of data transformation. Instead of working on an on-site server, they work through the cloud. In addition, these tools make it easier to link cloud-based platforms with any cloud-based data warehouse.

Transformations within a data warehouse

Instead of ETL (where data is transformed before it’s loaded into a destination) ELT shifts the transformations to the data warehouse. dbt (data build tool) is a popular development framework that empowers data analysts to transform data using familiar SQL statements in their data warehouse of choice.

Data Transformation Use Cases

Data Preparation and Cleaning for ELT Pipelines

In ELT, users load data into the data warehouse in its raw form and apply transformations in the DW layer using stored procedures and tools like dbt. However the raw data can have many issues preventing it from being actionable. 

Data Transformation can address the following issues:

  • The raw data may have lookup IDs instead of human readable names, for example like this:
User ID Page Viewed Timestamp
12309841234 Homepage 3:00 pm UTC July 30,2021
12309841235 Request a demo 4:00 pm UTC July 30,2021
    Instead of this:
Username Page Viewed Timestamp
Jane Strome Homepage 3:00 pm UTC July 30,2021
John Smith Request a demo 4:00 pm UTC July 30,2021
  • De-duplication of redundant records
  • Removing null or invalid records that would break reporting queries
  • Transforming your data to fit machine learning training models

Business Data Transformations for Operational Analytics

Business and analytical groups may have some north star metrics that can only be tracked by correlating multiple data sets. Data transformation jobs can join data across multiple data sets and aggregate it to create a unified view of this data. Examples of this include:

  • Joining unique customer records across multiple tables – your customer Jane Smith exists in your CRM, your support ticketing system, your website analytics system (e.g. Google Analytics), and your invoicing system. You can write a transform to create a unified view of all her sales and marketing touchpoints and support tickets to get a 360 view of her customer activity.

Creating a 360 view of the customer

  • Creating aggregate values from raw data – for instance you can take all your invoices and transform them to build a table of monthly revenue categorized by location or industry
  • Creating analytical tables – it may be possible for your data analyst to write complex queries to get answers to simple questions. Alternatively your data engineering team can make life easy for data analysts by pre-creating analytical tables. That will make your analysts’ job as easy as writing a ‘select * from x limit 100’ to generate a new report and drive down compute costs in your warehouse. For example:

Sales Data Table:

Customer Invoice Amount Invoice Date
ACME $100 3:00 pm UTC July 30,2021
MyShop $200 1:00 pm UTC July 29, 2021

And Monthly Sales (analytical table):

Month Invoice Amount
July $500
August $200

Data Transformation Challenges

Data transformation has many benefits to an organization, but it is also important to note that certain hurdles make data transformation difficult.

Data transformation can be a costly process. ETL tools come at a price, and training staff on data management processes is not exactly a walk in the park either. The cost of data transformation depends on infrastructure size. Extensive infrastructure will require hiring a team of data experts to oversee the transformation process.

To transform data effectively, an organization would have to set up tools, train its current employees, and/or hire a new set of experts to oversee the process. Either way, it is going to cost time and resources to make that happen.

Data Transformation Best Practices

The data transformation process seems like an easy step-by-step workflow, but there are certain things to keep in mind to avoid running into blockers or carrying out the wrong type of data transformation. The following are data transformation best practices:

  • Start by designing the target format. Jumping right into the nitty-gritty of data transformation without understanding the end goal is not a good idea. Communicate with business users to understand the process you are trying to analyze and design the target format before transforming data into insights.
  • Profile the data. In other words, get to know the data in its native form before converting it. It helps to understand the state of the raw data and the type of transformation required. Data profiling enables you to know the amount of work required and the workflow to generate for transformation.
  • Cleanse before transforming. Data cleaning is an essential pre-transformation step. It reduces the risk of having errors in the transformed data. Data can have missing values or information that is irrelevant to the desired format. By cleansing your data first, it increases the accuracy of the transformed data.
  • Audit the data transformation process. At every stage of the transformation process, track the data and changes that occur. Auditing the data transformation process makes it easier to identify the problem source if complications arise.

Use Data Transformation Tools Over Custom Coding

Data transformation tools are more cost-effective and more efficient than custom coding. Writing codes for data transformation functions have a higher risk of inefficiencies, human error, and excessive use of time and resources.

Striim data integration platform
Striim is a data integration solution that offers real-time, high-speed SQL-based transformations.

Data transformation tools are usually designed to execute the entire ETL process. If you are not using tools for the transformation process, you’ll also need to worry about the “extraction” and “loading” steps. Custom coding allows for a fully customized data transformation solution, but as data sources, volumes, and other complexities increase, scaling and managing this becomes increasingly difficult.

Striim is an end-to-end data integration solution that offers scalable in-memory transformations, enrichment and analysis, using high-speed SQL queries. To get a personalized walkthrough of Striim’s real-time data transformation capabilities, please request a demo. Alternatively, you can try Striim for free.

Back to top