Recover your CDC pipeline on Striim after planned downtime or cluster failure with no loss of data

Tutorial

Recover your CDC pipeline on Striim after planned downtime or cluster failure with no loss of data

Use Striim to recover or autoresume your data stream after server failure

Benefits

Restart your data pipeline after planned or unplanned failure from where it left off.

Resume data streaming automatically by assigning retry interval for planned outages

Avoid duplicate data from source to target table after recovery from CDC pipeline failure

On this page

Overview

Striim is a next generation unified data streaming product that offers change data capture (CDC) from popular databases such as Oracle, SQLServer, PostgreSQL and many others. Server downtime is defined as the amount of time organizations are offline. This is an unavoidable event for most companies and can be either planned due to maintenance or IT-related tasks or unplanned due to system crashes or connectivity issues.

Data Pipelines are majorly affected by server failovers. In 2009, PayPal’s network infrastructure faced a technical issue, causing it to go offline for one hour. This downtime led to a loss of transactions worth $7.2 million. In these circumstances real-time streaming with a strong recovery feature is one of the most efficient solutions.

With few limitations, Striim applications can be recovered after planned downtime or most cluster failures with no loss of data. In the following recipe, we have shown how to enable ‘RECOVERY’ and ‘AUTO RESUME’ features in Striim  that can be utilized to handle failovers along with real-time streaming. Striim allows data pipelines to pick up from where it left during the failover, thus avoiding loss of data or duplicates in the target table. Please find the github link for this application here.

Core Striim Components

PostgreSQL CDC: PostgreSQL Reader uses the wal2json plugin to read PostgreSQL change data. 1.x releases of wal2jon can not read transactions larger than 1 GB.

Stream: A stream passes one component’s output to one or more other components. For example, a simple flow that only writes to a file might have this sequence

Snowflake Writer: Striim’s Snowflake Writer writes to one or more existing tables in Snowflake. Events are staged to local storage, Azure Storage, or AWS S3, then written to Snowflake as per the Upload Policy setting.

Enabling Recovery from System Failures

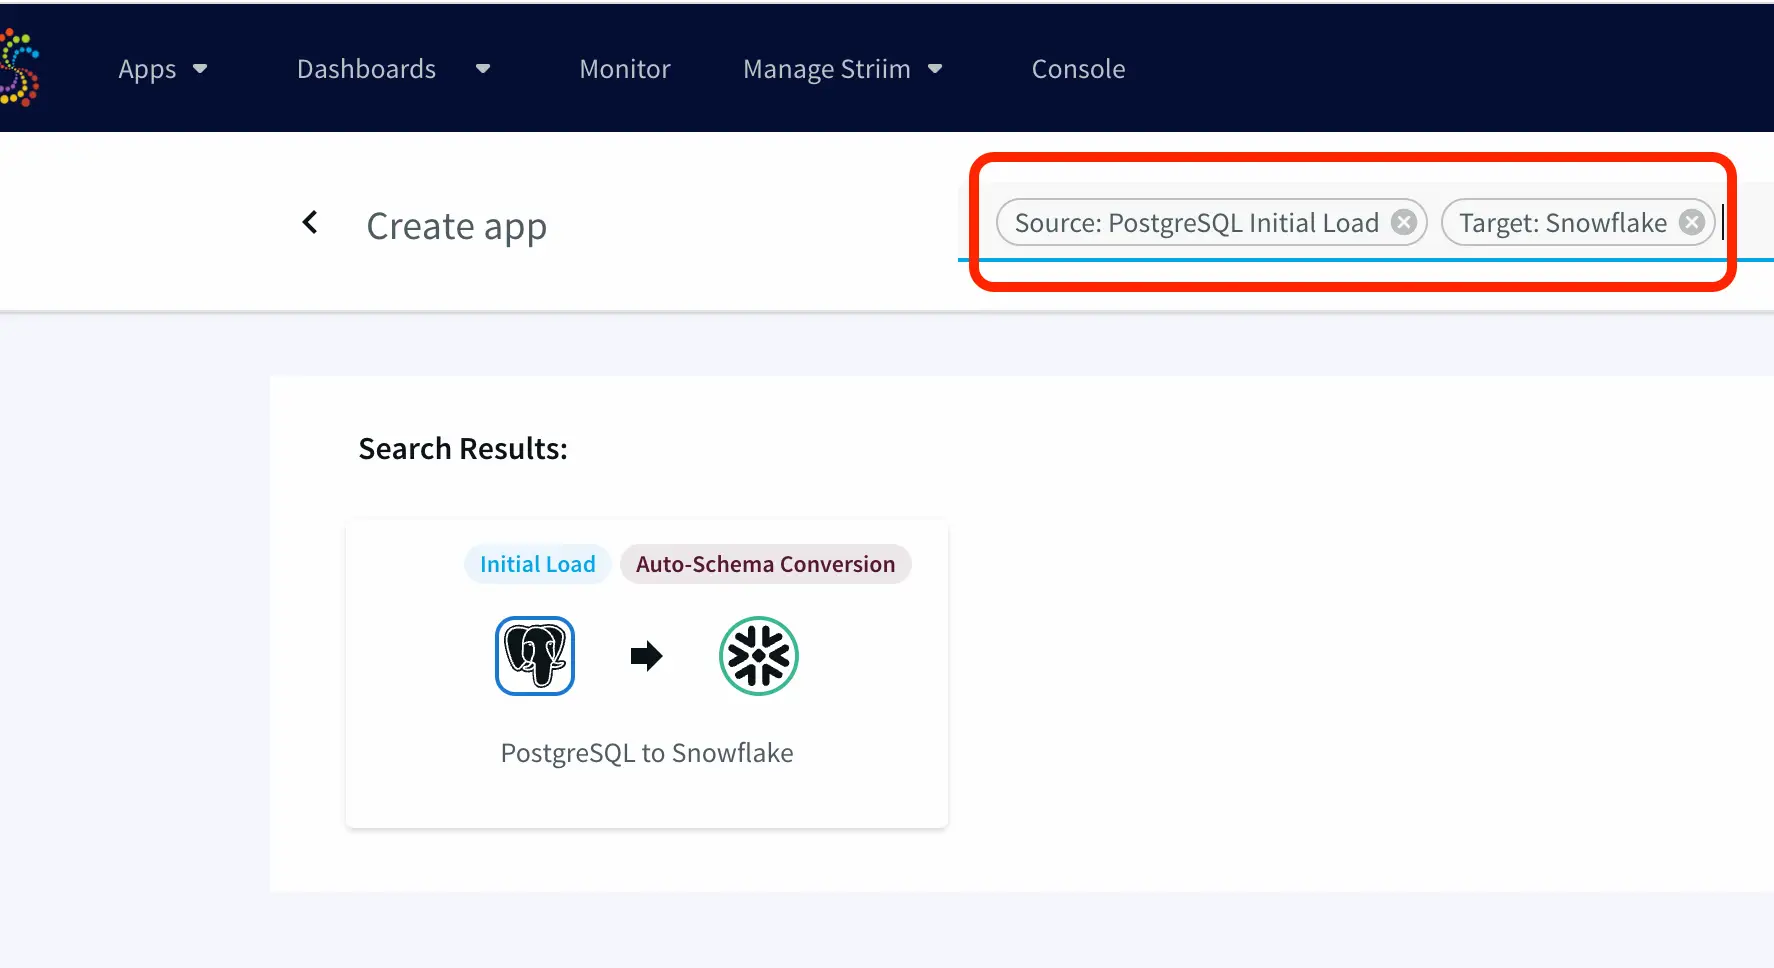
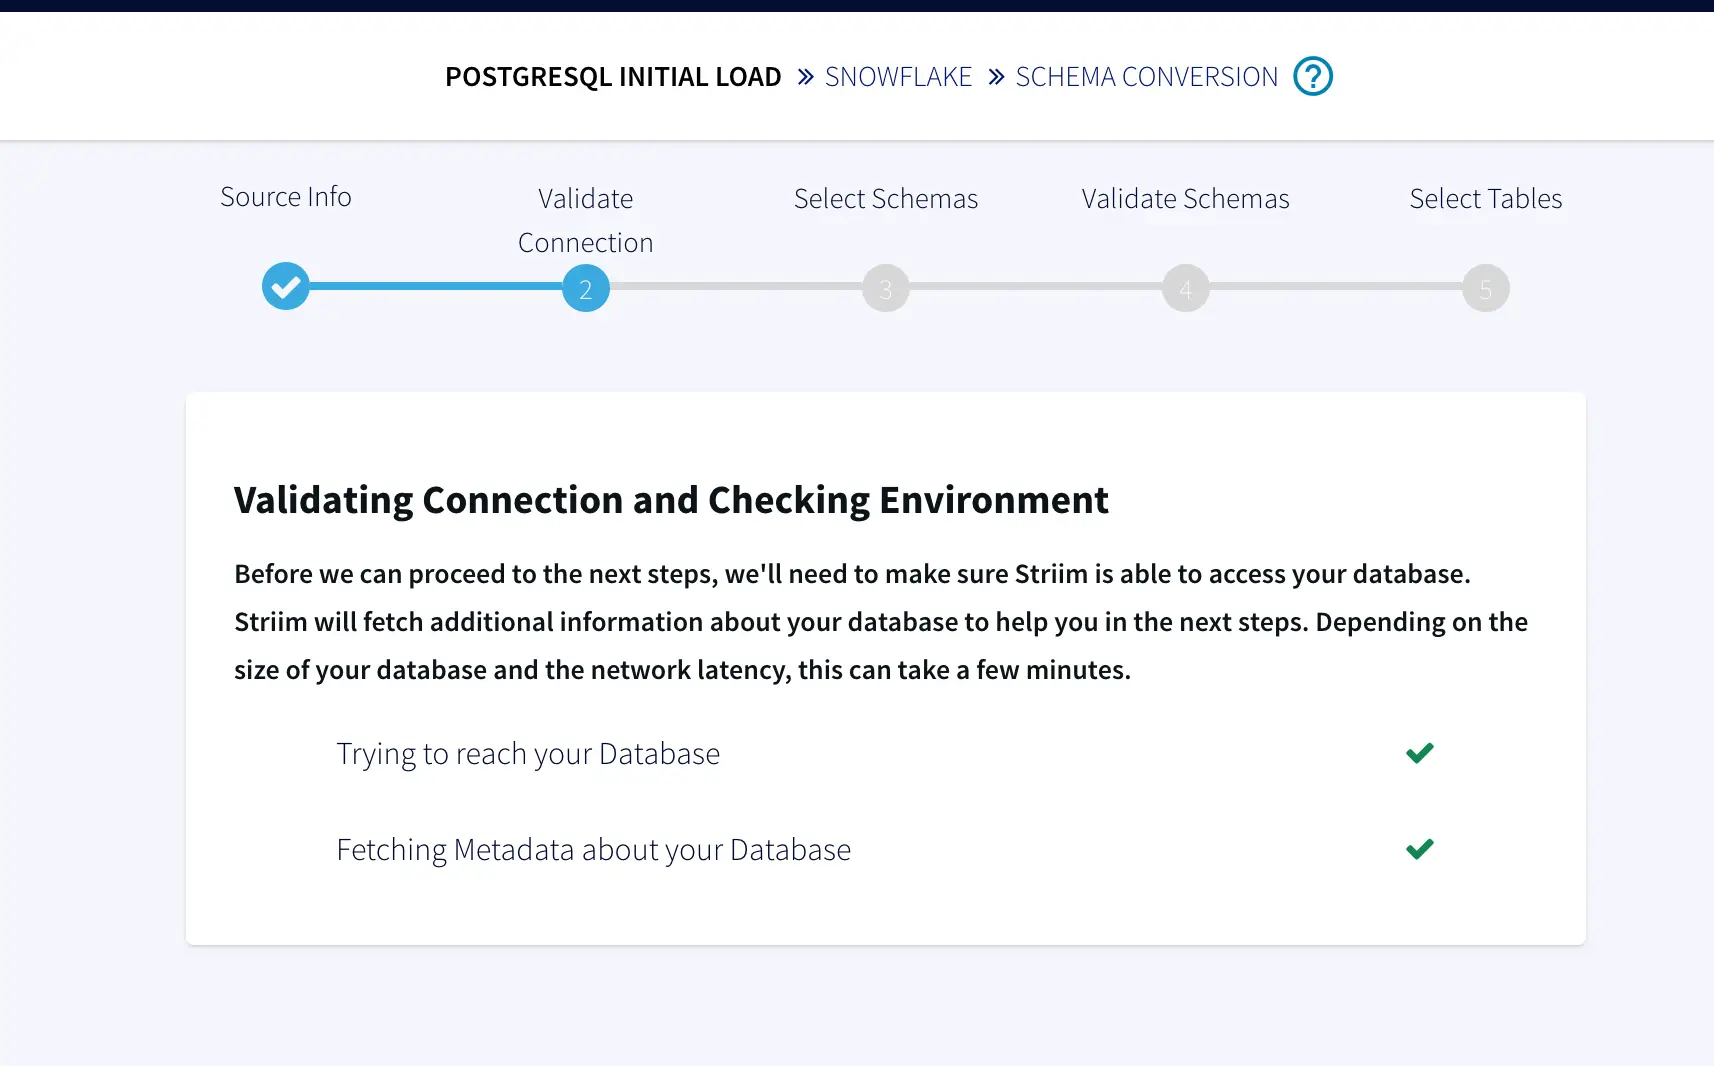
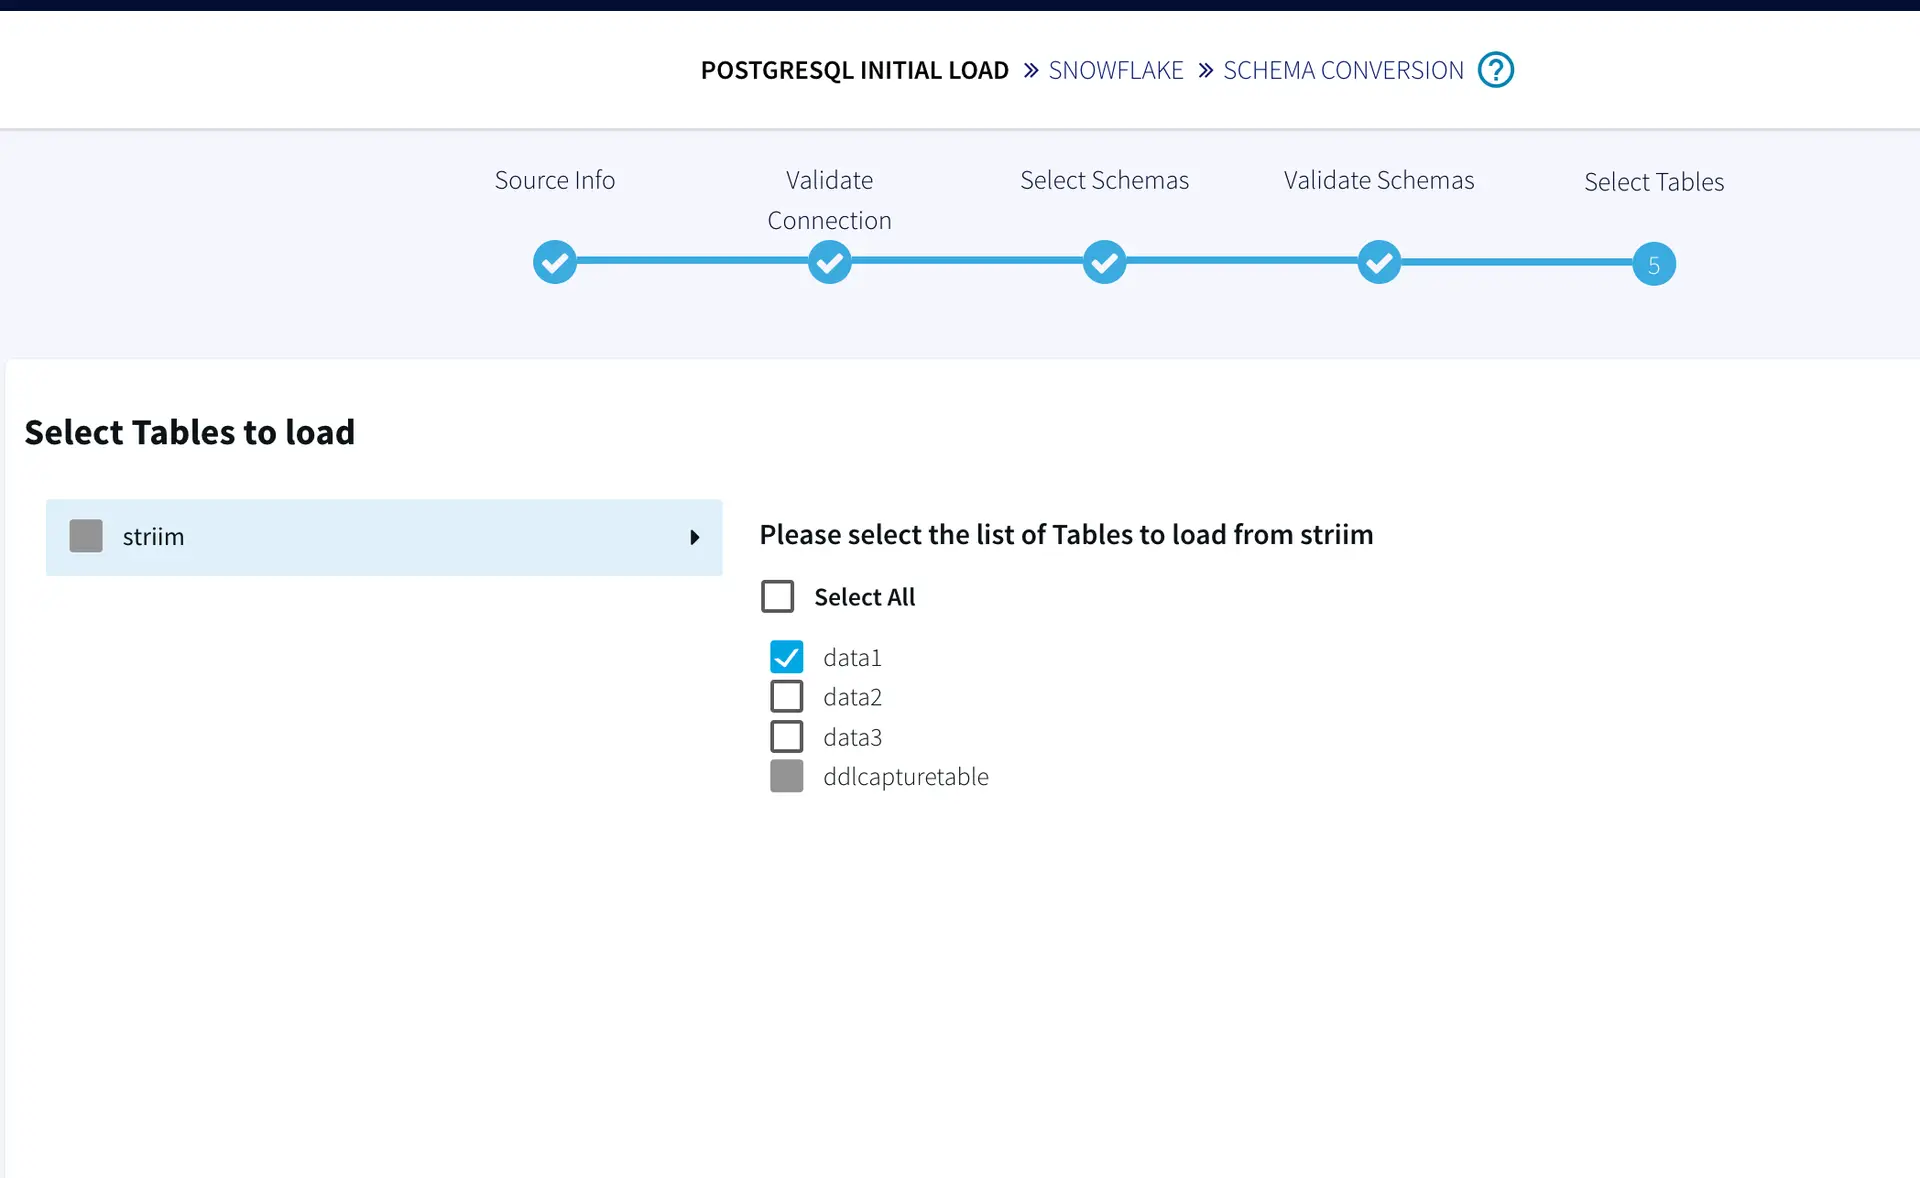
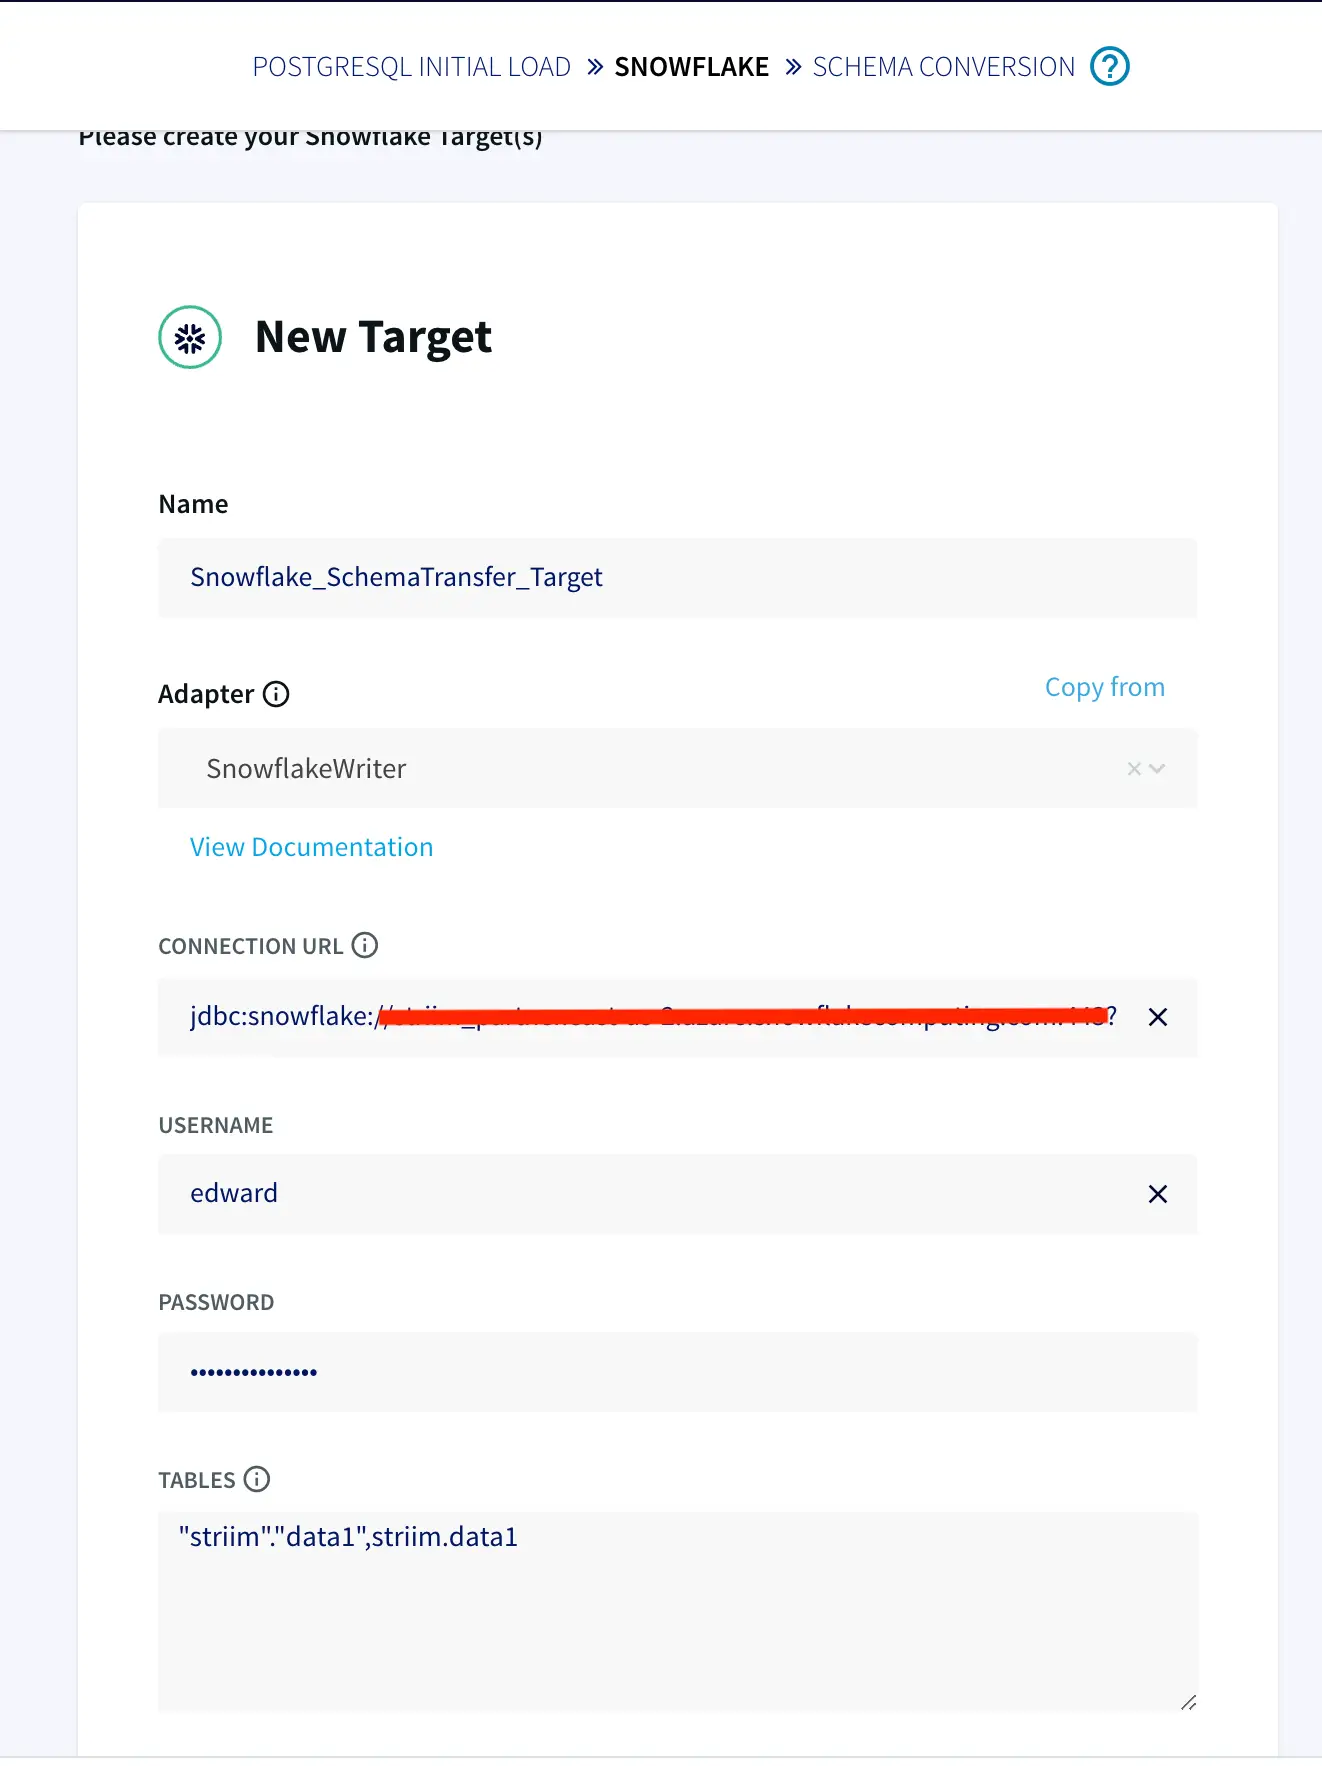
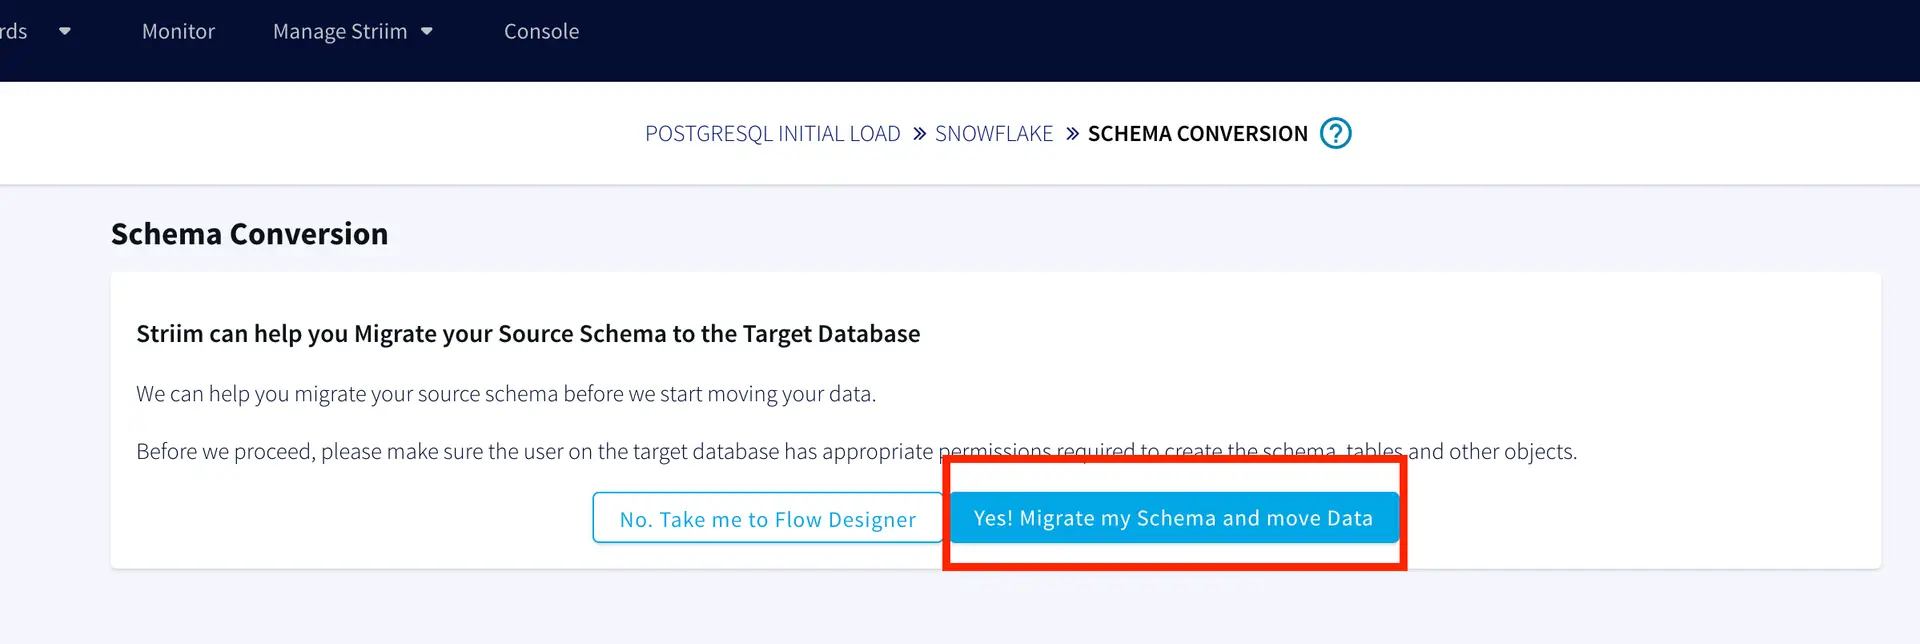
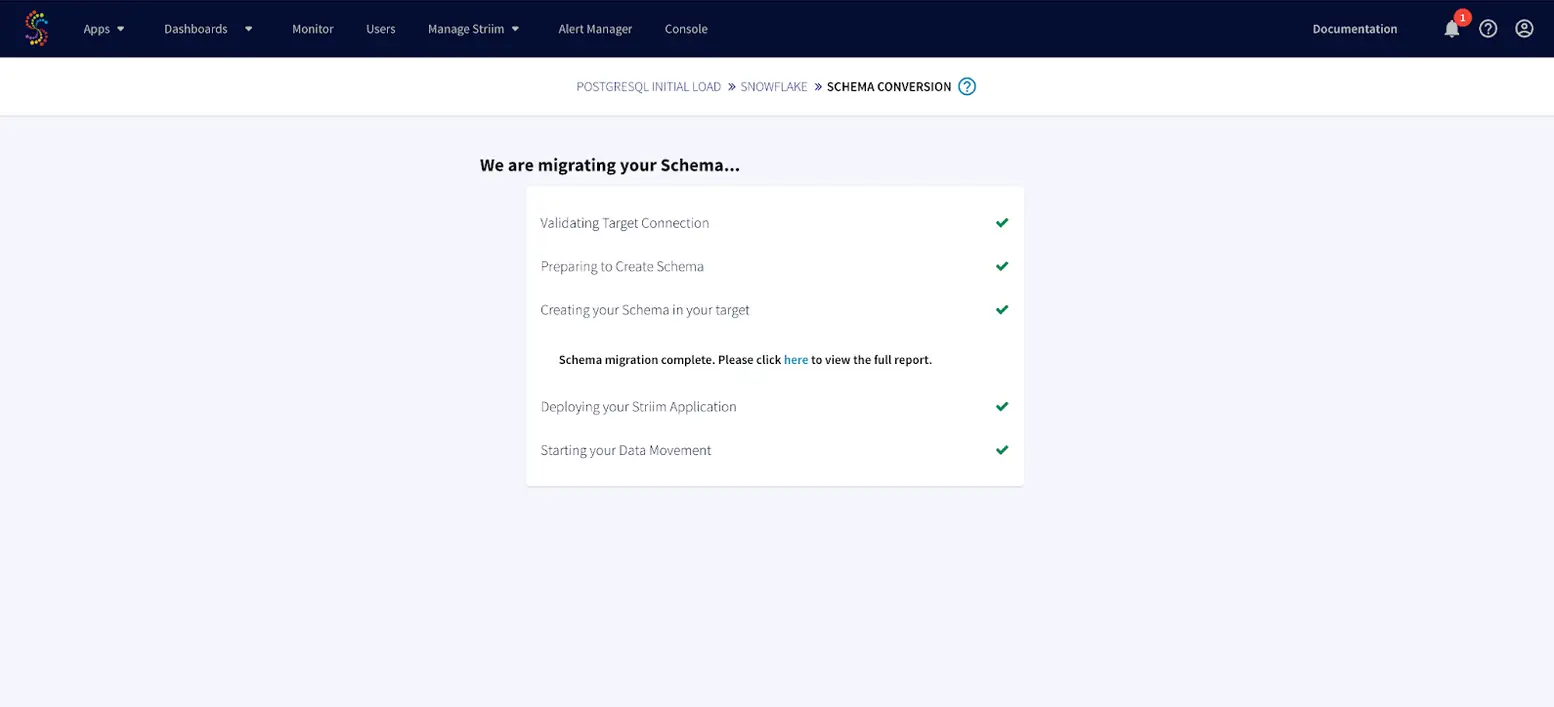
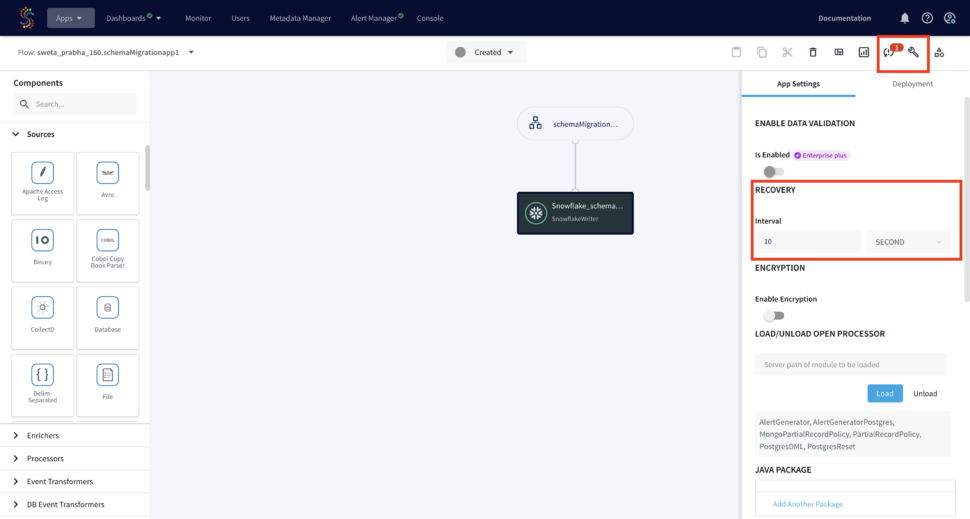
Striim supports recovery from system failures through Recovery and Autoresume features. For recovery of WAction stores, persistence streams must be enabled on every WAction store within the Striim application. Before enabling Recovery, create your app using flow designer. In the following use-case, our source is postgres CDC and target is Snowflake. You can refer to our recipes and tutorials for detailed steps on creating striim app from flow designer, both using wizard or from scratch.You can configure the Recovery and Autoresume setting from flow designer as follows:

On the upper right corner under app configuration -> App settings, specify the time interval for ‘RECOVERY’.With this setting, Striim will record a recovery checkpoint every ten seconds (or time specified by the user), provided it has completed recording the previous checkpoint. When recording a checkpoint takes more than ten seconds, Striim will start recording the next checkpoint immediately. When the Striim application is restarted after a system failure, it will resume exactly where it left off.

Running the Streaming App before Failover

The postgres CDC to Snowflake streaming application is deployed and run. When one row is inserted to the source table, it is replicated into the target table.

Running the Streaming App after Failover

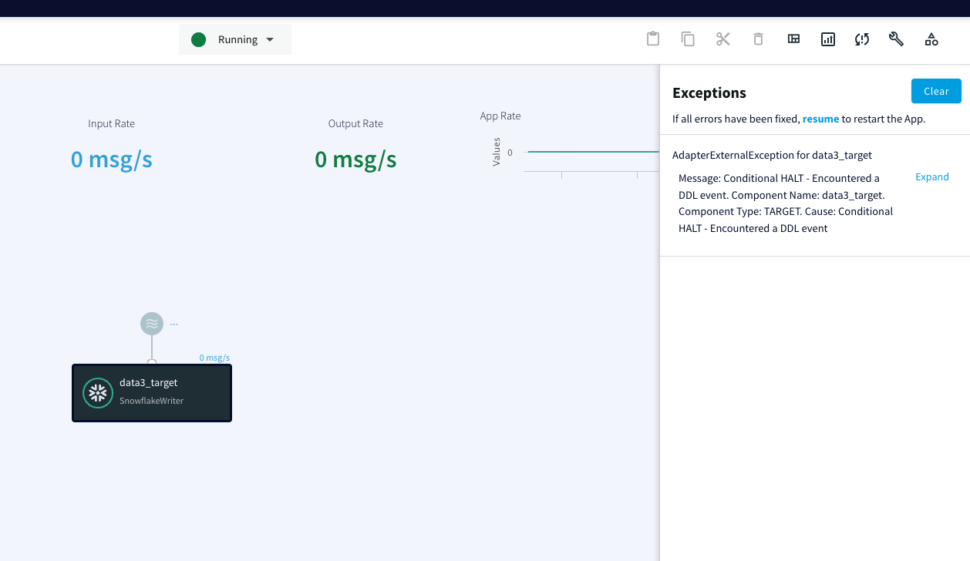
When a failover occurs, the app stops and the last checkpoint is recorded. When recovery is enabled, DatabaseWriter uses the table specified by the Checkpoint Table property to store information used to ensure that there are no missing or duplicate events after recovery.

The failover occurred after the first row was replicated to target table:

When the app is restarted, it takes some time to start from where the application left off:

During failover, two more rows were added to the source table which was picked up by the striim app and once the server was up, two more rows were replicated to the target table.

The following snapshots show the source (Postgres) and target (Snowflake) tables and we can see there is no repetition on the target table even though the app started after a failover.

You can also monitor the checkpoint with console commands. To see detailed recovery status, enter MON . in the console (see Using the MON command). If the status includes “late” checkpoints, we recommend you Contact Striim support, as this may indicate a bug or other problem (though it will not interfere with recovery).

To see the checkpoint history, enter SHOW . CHECKPOINT HISTORY in the console.

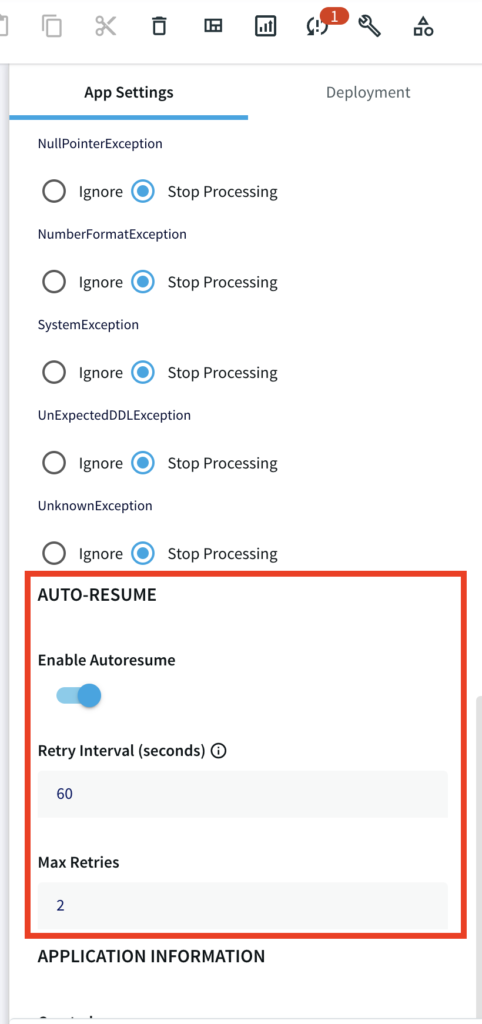
Automatically Restarting an Application after a Crash

If known transient conditions such as network outages cause an application to crash, you may configure it to restart automatically after a set period of time. You can enable auto resume feature with desired retry interval and maximum retries under App Setting in the flow design as follows:

Setting Up Striim app for CDC pipeline recovery

Step 1: Download the data and Sample TQL file from our github repo

You can download the TQL files for streaming app our github repository. Deploy the Striim app on your Striim server. It should have failure recovery enabled. If you are creating your app from wizard please follow the steps shown in the recipe

Step 2: Configure your source and target

Configure your source and Target in the striim components.

Step 3:Run app before failover

Deploy your streaming app and run it for real-time data replication

Step 4: Run app after failover

Run the Striim app after Failover. Check the source and target for the recovered data

Wrapping Up: Start your Free Trial Today

The above tutorial showed you how to enable recovery for any planned or unplanned server outages or failovers. With Striim’s powerful CDC technology and recovery feature, you can rely on your real-time data pipeline for any analytical purposes even when there is a failover. Striim supports a multitude of sources and targets . This can be utilized to build reliable streaming applications with desired databases and data warehouses.

As always, feel free to reach out to our integration experts to schedule a demo, or try Striim for free here.

Tools you need

Striim

Striim’s unified data integration and streaming platform connects clouds, data and applications.

PostgreSQL

PostgreSQL is an open-source relational database management system.

Snowflake

Snowflake is a cloud-native relational data warehouse that offers flexible and scalable architecture for storage, compute and cloud services.

Is “The Modern Data Stack” Dead?

In this episode recorded live from New York City, we hosted Ethan Aaron: CEO of Portable and thought leader in the data industry. Ethan covers a range of topics such as out-of-the-box analytics, the ‘Post-Modern Data Stack,’ and running a dashboard-driven organization.

Ethan explains why having too many tools too early could weigh down small data teams and reduce the business value they could provide. Make sure to follow Ethan on Linkedin for more.


Technical Considerations for Selecting a Data Integration Tool

Modern organizations collect vast amounts of data from different systems, such as application servers, CRM and ERP systems, and databases. Getting access to this data and analyzing it can be a challenge. You can use data integration to resolve this challenge and generate a unified view of your company’s data. That’s why around 80% of business operations executives say that data integration is crucial to their current operations. For this purpose, you can use a data integration tool — a type of software that can move data from your source systems to destination systems.

With so many options in the market, choosing a data integration tool isn’t a straightforward process. If you select the wrong tool, it can affect how your data infrastructure works, which can have a direct impact on your business operations. That’s why you need to have a checklist of key technical considerations that can help you to pick the right data integration tool.

  1. Data Connectors to Move Data From Sources to Destinations
  2. Automation for Ease of Use
  3. Flexible Replication Support to Copy Data in Multiple Ways
  4. User Documentation to Get the Most Out of the Tool
  5. Security Features for Data Protection
  6. Compliance With Data Regulations

1- Data Connectors to Move Data From Sources to Destinations

The first step is to consider what data sources and destinations you have so you can look for data connectors that can move data between them.

Generally, data sources in an organization can include data sets in spreadsheets, accounting software, marketing tools, web tracking, customer relationship management systems (CRMs), enterprise resource planning systems (ERPs), databases, and so on. If you’re planning to aggregate data from different sources and load them into data repositories for storage or analysis, you need to look for destination coverage. This includes coverage for relational databases (e.g., Oracle), data warehouses (e.g., Snowflake), and data lakes (e.g., AWS S3).

List all your current and future potential sources and destination systems, and make sure your prospective tool offers coverage for all of them. These tools have different willingness to add new connectors.

Do keep in mind that data connectors vary from tool to tool. Just because a tool comes with a data connector of your preference doesn’t necessarily mean it’ll be user-friendly. Some data connectors are difficult to set up, which can make it hard for end users to move data. Therefore, compare the user-friendliness of connectors before deciding on a data integration tool.

2- Automation for Ease of Use

A data integration tool should minimize manual efforts that are required during data integration. Some things your tool should automate include:

  • Management of data types: Changes in schema can alter the type of a specific value, i.e., from float to integer. A data integration tool shouldn’t need manual intervention to reconcile data between the source and target system.
  • Automatic schema evolution: As applications change, they can alter the underlying schemas (e.g. adding/dropping columns, changing names). Your tool’s connectors should accommodate these changes automatically without deleting fields or tables. This ensures that your data engineers don’t have to perform fixes after the data integration process. Look for a tool that supports automatic schema evolution.
  • Continuous sync scheduling: Based on how often your organization needs data to be updated, choose a tool that offers continuous sync scheduling. This feature allows you to set fixed intervals to sync data at regular and short intervals. For instance, you can set your CRM system to sync data with your data warehouse every hour. If you want more convenience, you can look for a data integration tool that supports real-time integration, allowing you to move data within a few seconds.

3- Flexible Replication Support to Copy Data in Multiple Ways

Based on your needs, you might need to replicate data in more ways than one. That’s why your data integration should have flexible support on how you can replicate your data.

For example, full data replication copies all data — whether it’s new, updated, or existing — from source to destination. It’s a good option for small tables or tables that don’t have a primary key. However, it’s not efficient, as it can take more time and resources.

Alternatively, log-based incremental replication copies data by reading the data logs, tracking changes, and updating the target system accordingly. It’s more efficient as it minimizes load from the source since it only streams changes unlike full data replication, which streams all data.

Even if you feel you only need a specific type of replication right now, consider getting a tool that offers more flexibility, so you can adapt as your organization scales up.

4- User Documentation to Get the Most Out of the Tool

One thing that is often overlooked while choosing a data integration tool is the depth and quality of user documentation. Once you start using a data integration tool, you’ll need a guide that can explain how to install and use the tool as well as provide resources, such as tutorials, knowledge bases, user guides, and release notes.

Poor or incomplete documentation can lead to your team wasting time if they get stuck on a particular task. Therefore, make sure your prospective tool offers comprehensive documentation, enabling your users to get maximum value from their tool.

5- Security Features for Data Protection

On average, a cyber incident costs more than $9.05 million to U.S. companies. That’s why you need to prioritize data security and look for features in your tool that can help you protect sensitive data. Over the last few years, cyber-attacks have wreaked havoc across industries and compromised data security for many organizations. These attacks include ransomware, phishing, spyware, etc.

Not all users in your organization should have the authorization to create, edit, or remove data connectors, data transformations, or data warehouses or perform any other sensitive action. Get a tool that allows you to grant different access levels to your team members. For example, you can use read-only mode to ensure that an intern can only read information. Or you can grant administrative mode to a senior data architect, so they can use the features to transform data.

Your tool also needs to support encryption so you can mask data as it travels from one system to another. Some of the supported encryption algorithms that you need to be looking at for these tools include AES and RSA.

6- Compliance With Data Regulations

Regulatory compliance for data is getting stricter all the time, which means you need a tool that’s certified with the relevant regulatory bodies (e.g., SOC 2). You might have to meet a lot of requirements for compliance based on your company’s or user’s location. For example, if your customers live in the EU, then you need to adhere to GDPR requirements. Failure to do so can result in hefty penalties or damage to brand image.

There will be a greater need to prioritize compliance if you belong to an industry with strict regulatory requirements, such as healthcare (e.g., HIPAA). That’s why a data integration tool should also support column blocking and hashing — a feature that helps to omit or obscure private information from the synced tables.

Trial Your Preferred Data Integration Tool Before Making the Final Decision

Once you’ve narrowed down your search to the data integration tools that have the right features for your needs, you should test them for yourself. Most vendors provide a free trial that can last a week or more — enough time for you to connect it with your systems and assess it. Link data connectors with your operational sources and data repositories like a data lake or data warehouse and see for yourself how much time it takes to synchronize your data or how convenient your in-house users find your tool to be.

For starters, you can sign up for Striim’s demo, where our experts will engage you for 30 minutes and explain how Striim can improve real-time data integration in your organization.

See it in action: Streaming SQL

Striim is built on a distributed, streaming SQL platform. Run continuous queries on streaming data, join streaming data with historical caches, and scale up to billions of events per minute.

How to Stream Data to Snowflake Using Change Data Capture

On DemandSnowflake CDC Dark Blue 1

Data is the new oil, but it’s only useful if you can move, analyze, and act on it quickly. A Nucleus Research study shows that tactical data loses half its value 30 minutes after it’s generated, while operational data loses half its value after eight hours.

Change data capture (CDC) plays a vital role in the efforts to ensure that data in IT systems is quickly ingested, transformed, and used by analytics and other types of platforms. Striim is a unified data streaming and integration platform that offers non-intrusive, high-performance CDC from production databases to a wide range of targets.

In this live technical demo, we walk you through a use case where data is replicated from PostgreSQL to Snowflake in real time, using CDC. We also show examples of more complex use cases, including a data mesh with multiple data consumers.

PostgreSQL CDC to Snowflake data pipeline with Schema Evolution and Data Contracts

Tutorial

PostgreSQL CDC to Snowflake data pipeline with Schema Evolution and Data Contracts

Use Striim to capture and propagate schema changes while performing real-time CDC from PostgreSQL to Snowflake

Benefits

Reduce data downtime by building pipelines resilient to schema changes

Create smart rules to keep schemas in sync without propagating problematic DDL

Automatically keep schemas and models in sync with your operational database.

On this page

Overview

Striim is a next generation unified data streaming product that offers change data capture (CDC) from popular databases such as Oracle, SQLServer, PostgreSQL and many others. To maximize uptime and operational success, Striim can enforce Data Contracts with Schema Evolution. Data Contracts are a way to align on the function of critical data pipelines with technical and business stakeholders. For instance, you may have an analytics team that wants to automatically add all new tables to their pipelines. On the other hand, you may have a software development team that will need to block and immediately be alerted on all new schema changes. 

Data Contracts can also be applied on Data Freshness SLAs. These can be managed by Striim’s Smart Alerts. However we will go over that in a separate recipe. Here we are simply focussed on enforcing Data Contracts on schemas. 

Striim can capture common DDL statements in the source table and replicate those changes to the target tables, or take other actions such as quiescing or halting the application. To know more about the supported CDC sources and adapters, please follow this link.

In one of our previous recipes, we have shown how to create a replica slot and cdc user to stream CDC changes from the PostgreSQL source table in real-time. In this tutorial we have configured a Striim app that captures schema evolution like CREATE TABLE, ALTER TABLE (eg. add column) and DROP TABLE and delegate the changes to the target through striim. In case of a new column, the target table updates with the new column. For CREATE and DROP TABLE, Striim’s message logs notify the new DDL change for any further action by the user. Please follow the steps below to configure your source database and Striim app for capturing schema evolution. Please refer to our github repository for all codes, datasets and tql file of this app.

Core Striim Components

PostgreSQL CDC: PostgreSQL Reader uses the wal2json plugin to read PostgreSQL change data. 1.x releases of wal2jon can not read transactions larger than 1 GB.

Stream: A stream passes one component’s output to one or more other components. For example, a simple flow that only writes to a file might have this sequence

Snowflake Writer: Striim’s Snowflake Writer writes to one or more existing tables in Snowflake. Events are staged to local storage, Azure Storage, or AWS S3, then written to Snowflake as per the Upload Policy setting.

Step 1: Create a Replication Slot and Replication User

For a CDC application on a postgres database, make sure the following flags are enabled for the postgres instance:

Create a user with replication attribute by running the following command on google cloud console:

CREATE USER replication_user WITH REPLICATION IN ROLE cloudsqlsuperuser LOGIN PASSWORD ‘yourpassword’;

Follow the steps below to set up your replication slot for change data capture:

Create a logical slot with wal2json plugin.

Step 2: Configure PostgreSQL CDDL Capture Procedure and CDDL Tracking Table

CDDL stands for “Common Data Definition Language”. Striim supports Create Table, Alter Table (Add, Modify, Drop, Add primary key and adding unique constraints) and Drop Table for handling schema evolution or CDDL.The source adapter must be able to capture the CDDLs executed on the interested tables and schema and the target adapter must be able to process DDL WAEvents sent by the source adapter.

For PostgreSQL CDDL Capture procedure and Tracking, a set of SQL scripts has to be executed on the source database by the customer with the superuser role. Firstly, the schema is created if it does not already exist and an empty table with DDL Capture fields is created that will record the DDL changes. 

CREATE SCHEMA IF NOT EXISTS striim;
CREATE TABLE IF NOT EXISTS striim.ddlcapturetable
  (
    event           TEXT,
    tag             TEXT,
    classid         OID,
    objid           OID,
    objsubid        INT,
    object_type     TEXT,
    schema_name     TEXT,
    object_identity TEXT,
    is_extension    BOOL,
    query           TEXT,
    username        TEXT DEFAULT CURRENT_USER,
    db_name TEXT DEFAULT Current_database(),
    client_addr     INET DEFAULT Inet_client_addr(),
    creation_time   TIMESTAMP DEFAULT now()
  ); 

The next step is to write a PostgreSQL function that collects DDL change logs from pg_stat_activity and inserts into ddlcapturetable. The function shown below is called ‘ddl_capture_command()’ which is executed inside two event triggers in the next section.

GRANT USAGE ON SCHEMA striim TO PUBLIC;
GRANT SELECT, INSERT ON TABLE striim.ddlcapturetable TO PUBLIC;

create or replace function striim.ddl_capture_command() returns event_trigger as $$
declare v1 text;
r record;
begin

    select query into v1 from pg_stat_activity where pid=pg_backend_pid();
    if TG_EVENT='ddl_command_end' then
        SELECT * into r FROM pg_event_trigger_ddl_commands();
        if r.classid > 0 then
            insert into striim.ddlcapturetable(event, tag, classid, objid, objsubid, object_type, schema_name, object_identity, is_extension, query)
            values(TG_EVENT, TG_TAG, r.classid, r.objid, r.objsubid, r.object_type, r.schema_name, r.object_identity, r.in_extension, v1);
        end if;
    end if;
    if TG_EVENT='sql_drop' then
            SELECT * into r FROM pg_event_trigger_dropped_objects();
            insert into striim.ddlcapturetable(event, tag, classid, objid, objsubid, object_type, schema_name, object_identity, is_extension, query)
            values(TG_EVENT, TG_TAG, r.classid, r.objid, r.objsubid, r.object_type, r.schema_name, r.object_identity, 'f', v1);
    end if;
end;
$$ language plpgsql strict;
 

Once the ddlcapture table is created and ddl_capture_command() function is defined, two event triggers are executed as follows.

CREATE EVENT TRIGGER pg_get_ddl_command on ddl_command_end                    EXECUTE PROCEDURE striim.ddl_capture_command();
CREATE EVENT TRIGGER pg_get_ddl_drop on sql_drop                              EXECUTE PROCEDURE striim.ddl_capture_command();

Step 3: Create the CDC app that handles Schema Evolution on Striim SaaS

There is an additional CDDL configuration in source and target which was not required in traditional CDC DML streaming app. For the CDDL configuration in the source database, click on ‘Show Advanced Setting’ as shown below.

Enable ‘SCHEMA EVOLUTION-CDDL CAPTURE’ and enter the name of the CDDL TRACKING TABLE that we created in Step 2. The CDDL ACTION property is ‘Process’.

For the Snowflake target under ‘Show Advanced Setting’, ‘Process’ is selected under CDDL ACTION. This ensures the ALTER TABLE changes in the source table are replicated into the target table in Snowflake.

Note: you must create tables in Snowflake yourself manually or use Striim’s schema creation wizard.

To transfer your schema and tables from postgres to snowflake using schema creation wizard, follow the steps shown below:

Step 1: Create a new app with Postgres Initial Load as source and Snowflake as target


Step 2: Follow the app wizard and select your schema and tables in your Postgres source

Step 3: Configure your Snowflake wizard as shown below

Step 4: Select Schema Migration to migrate your schema from Postgres to Snowflake


Step 4: Run the App and check the message logs and target table for any DDL changes.

For this tutorial, I have used a sample table ‘data1’ containing two columns ‘Name’ and ‘Salary’. When a new column ‘Sex’ is added, it is streamed and the target table in snowflake is updated.

Enable ‘SCHEMA EVOLUTION-CDDL CAPTURE’ and enter the name of the CDDL TRACKING TABLE that we created in Step 2. The CDDL ACTION property is ‘Process’.


For the Snowflake target under ‘Show Advanced Setting’, ‘Process’ is selected under CDDL ACTION. This ensures the ALTER TABLE changes in the source table are replicated into the target table in Snowflake.

When we add a new table ‘data3’  into the schema, DDL Operation is ignored but the message log notifies the user about the new change. The metadata from the message log can be used to set alert for different types of DDL operations

Static Tables

There are four types of action labels for CDDL supported source and target adapters. Striim can also handle data replication sources that contain tables with static schema. The four actions that can be executed on capturing CDDLs are:

Process:  This is the default action behavior that parses the DDL query and streams into the target table

Ignore: The DDL events will be captured and stored into internal metadata repository but will not be sent to the downstream consumers

Quiesce: When a DDL event is captured on the interested tables, source adapters will issue the Quiesce command and DDL operation will not be sent to downstream consumers. This action label is specific to Source Adapters only.

Halt: On receiving DDL action from upstream, the adapters will halt the app. This action is important when we want to halt the application when DDL is executed on static tables.

Here is an example showing a striim app with one static table. Since there are multiple tables in the source, we specify the action label ‘HALT’ on the target adapter.

You can also create a separate app for static tables that reads from the same source stream. This would not halt the data streams for other tables while a DDL is executed on static tables. Configure a separate app with the same source stream as follows. The source app is still running while the app containing the target app with a static table is halted.

Setting Up Striim app to capture Schema Evolution

Step 1: Create Replication Slot and Replication User on Postgres

Follow this recipe to create a Replication Slot and user for Change Data Capture. The replication user reads change data from your source database and replicates it to the target in real-time.

Step 2: Setup CDDL Capture Procedure and CDDL Tracking Table

Follow the recipe to configure PostgreSQL CDDL Capture Procedure and CDDL Tracking Table. You can find the sql queries in our github repository

Step 3: Create CDC app on Striim server

Create the CDC app that handles Schema Evolution on Striim SaaS as shown in the recipe

Step 4: Deploy and Run the Striim app

Run the App and check the message logs and target table for any DDL changes.

Wrapping Up: Start your Free Trial Today

Our tutorial showed you how to handle schema evolution in PostgreSQL database and stream the CDC to Snowflake target, a leading cloud data warehouse through Striim SaaS. By constantly moving your data into Snowflake, you could track the schema changes as well as build analytics or machine learning models, all with minimal impact to your current systems. You could also start ingesting and normalizing more datasets with Striim to fully take advantage of your data.

As always, feel free to reach out to our integration experts to schedule a demo, or try Striim for free here.

Tools you need

Striim

Striim’s unified data integration and streaming platform connects clouds, data and applications.

PostgreSQL

PostgreSQL is an open-source relational database management system.

Snowflake

Snowflake is a cloud-native relational data warehouse that offers flexible and scalable architecture for storage, compute and cloud services.

Back to top