Edward Bell

7 Posts

Data Replication for SQL Server: Native Tools vs. Real-Time CDC

SQL Server has long been the reliable workhorse of enterprise IT. It stores the mission-critical data that keeps your business running. But in an era where data must be instantly available across cloud platforms, analytics engines, and AI models, it’s no longer strategically optimal to keep that data locked in a single database.

That’s where data replication comes in.

When you need to migrate workloads to the cloud, offload heavy reporting queries, or ensure high availability during an outage, replication is the engine that makes it happen. As data volumes scale and the architecture grows more complex, how you replicate matters just as much as why.

If you’re navigating the complexities of data replication for SQL Server, you’re likely facing a practical set of challenges: which native replication method should you use? How do you avoid crippling performance bottlenecks? And how do you reliably move SQL Server data to modern cloud platforms without taking your systems offline? In this guide, we’ll break down exactly how SQL Server replication works, explore the limitations of its native tools, and show you why modern, log-based Change Data Capture (CDC) is the fastest, safest path to modern database replication.

Key Takeaways

  • Replication is an enterprise enabler: SQL Server data replication underpins business continuity, advanced analytics, and cloud modernization strategies.
  • Native tools have trade-offs: SQL Server offers four built-in replication types (Snapshot, Transactional, Merge, and Peer-to-Peer), each with unique strengths and inherent limitations.
  • Scale breaks native approaches: Native replication introduces challenges—like latency, schema changes, limited cloud support, and complex monitoring—that compound at enterprise scale.
  • CDC is the modern standard for data replication: Log-based Change Data Capture (CDC) enables real-time, cloud-ready replication with far less overhead than traditional native methods.
  • Best practices mitigate risk: Success requires aligning your replication strategy with business outcomes, proactively monitoring pipeline health, securing endpoints, and planning migrations to minimize downtime.
  • Striim bridges the gap: Modern platforms like Striim extend replication beyond SQL Server’s native limits. With real-time CDC, diverse cloud-native targets, built-in monitoring, and enterprise-grade security, Striim reduces total cost of ownership (TCO) and accelerates modernization.

What Is Data Replication in SQL Server?

Data replication in SQL Server is the process of copying and distributing data and database objects from one database to another, and then synchronizing them to maintain consistency.

But when data leaders talk about “data replication for SQL Server,” they aren’t just talking about Microsoft’s built-in features. Today, the term encompasses both native SQL Server Replication and modern, third-party approaches like log-based Change Data Capture (CDC) streaming.

Whether you’re relying on the native tools out of the box or upgrading to a modern streaming platform, the underlying goal is the same. To move data securely and accurately where it needs to go to support high availability, operational performance, and advanced analytics.

How Data Replication Works for SQL Server

To appreciate why many enterprises are eventually forced to move toward modern CDC platforms, you first need a baseline understanding of how native SQL Server replication operates under the hood.

Native replication is built around a publishing industry metaphor: Publishers, Distributors, and Subscribers.

Here’s how the native workflow looks, broken down step-by-step:

Step 1: Define the Publisher and Articles to Replicate

The Publisher is your source database. You don’t have to replicate the entire database; instead, you start by defining “Articles”, i.e. the specific tables, views, or stored procedures you want to share. Grouping these articles together creates a “Publication.”

Step 2: Configure the Distributor to Manage Replication

The Distributor is the middleman. It stores the distribution database, which holds metadata, history data, and (in transactional replication) the actual transactions waiting to be moved. It acts as the routing engine, taking the load off the Publisher.

Step 3: Set up Subscribers to Receive Data

Subscribers are your destination databases. A Subscriber requests or receives the Publication from the Distributor. You can have multiple Subscribers receiving the same data, and they can be located on the same server or across the globe.

Step 4: Run Replication Agents to Move and Apply Changes

SQL Server relies on dedicated background programs called Replication Agents to do the heavy lifting. The Snapshot Agent creates the initial baseline of your data, the Log Reader Agent scans the transaction log for new changes, and the Distribution Agent moves those changes to the Subscribers.

Step 5: Monitor Replication Status and Performance

Once running, Database Administrators (DBAs) must continuously monitor the health of these agents. This involves tracking latency, checking for failed transactions, and ensuring the Distributor doesn’t become a bottleneck as transaction volumes spike.

Types of SQL Server Replication

SQL Server offers four primary native replication models, and choosing the right one is critical to the health of your infrastructure. Pick the wrong method, and you’ll quickly introduce crippling latency, data conflicts, or massive operational overhead.

Here is a breakdown of the four native types:

Type

How it works

Pros

Cons

Ideal scenarios

Notes/limits

Snapshot Copies the entire dataset at a specific moment in time. Simple to configure; no continuous overhead. Resource-intensive; data is instantly stale; high network cost. Small databases; read-only reporting; baseline syncing. Rarely used for continuous enterprise replication.
Transactional Reads the transaction log and streams inserts, updates, and deletes. Lower latency; highly consistent; supports high volumes. Schema changes can break pipelines; large transactions cause bottlenecks. Offloading read-heavy queries; populating data warehouses. The workhorse of native SQL Server replication.
 Merge Allows changes at both Publisher and Subscriber, merging them later. Supports offline work; allows multi-directional updates. High CPU usage; complex conflict resolution rules. Point-of-sale (POS) systems; mobile applications. Relies heavily on database triggers, increasing overhead.
Peer-to-Peer Multi-node transactional replication where all nodes read and write. Excellent high availability; scales read/write workloads globally. Extremely complex to manage; strict identical schema requirements. Distributed web applications requiring global read/write access. Requires SQL Server Enterprise Edition.

Snapshot Replication You can think of snapshot replication like taking a photograph of your database. It copies the entire dataset—schema and data—and drops it onto the Subscriber. It is straightforward, but it is heavy. Because it moves the whole dataset every time, it’s typically only used for very small databases, or as the initial step to seed a database before turning on another, more dynamic replication method.

Transactional Replication

This is the most common native approach. Instead of copying everything over and over, the Log Reader Agent scans the SQL Server transaction log and continuously moves individual inserts, updates, and deletes to the Subscriber. It’s designed for low-latency environments. However, it requires a pristine network connection, and any structural changes to your tables (DDL changes) can easily break the pipeline and force a painful restart.

Merge Replication

Merge replication allows both the Publisher and the Subscriber to make changes to the data independently. When the systems finally connect, they merge their updates. If two users change the same row, SQL Server uses predefined rules to resolve the conflict. It is highly flexible for offline scenarios—like remote retail stores or mobile apps—but it demands significant CPU resources and constant operational oversight to untangle inevitable data conflicts.

Peer-to-Peer Replication

Built on the foundation of transactional replication, peer-to-peer allows multiple SQL Server nodes to act as both Publishers and Subscribers simultaneously. It is designed to scale out read and write operations globally, offering excellent high availability. But it comes with a steep cost in complexity. Managing conflicts across a multi-node, active-active architecture requires intense DBA attention.

Common Use Cases for Data Replication in SQL Server

Why go through the effort of replicating data in the first place? In an enterprise environment, replication is the engine behind several mission-critical initiatives.

While native SQL Server tools can handle basic SQL-to-SQL setups, many of these use cases eventually push organizations toward modern, log-based CDC streaming platforms—especially when the destination is a cloud environment or a modern analytics engine.

Disaster Recovery and High Availability

When your primary system goes down, your business stops. Every minute of downtime costs revenue and erodes customer trust. Replication ensures that a standby database is always ready to take over. By keeping a secondary replica continuously synchronized, you can failover instantly during an outage, minimizing data loss and keeping mission-critical applications online.

Offload Reporting and Analytics Workloads

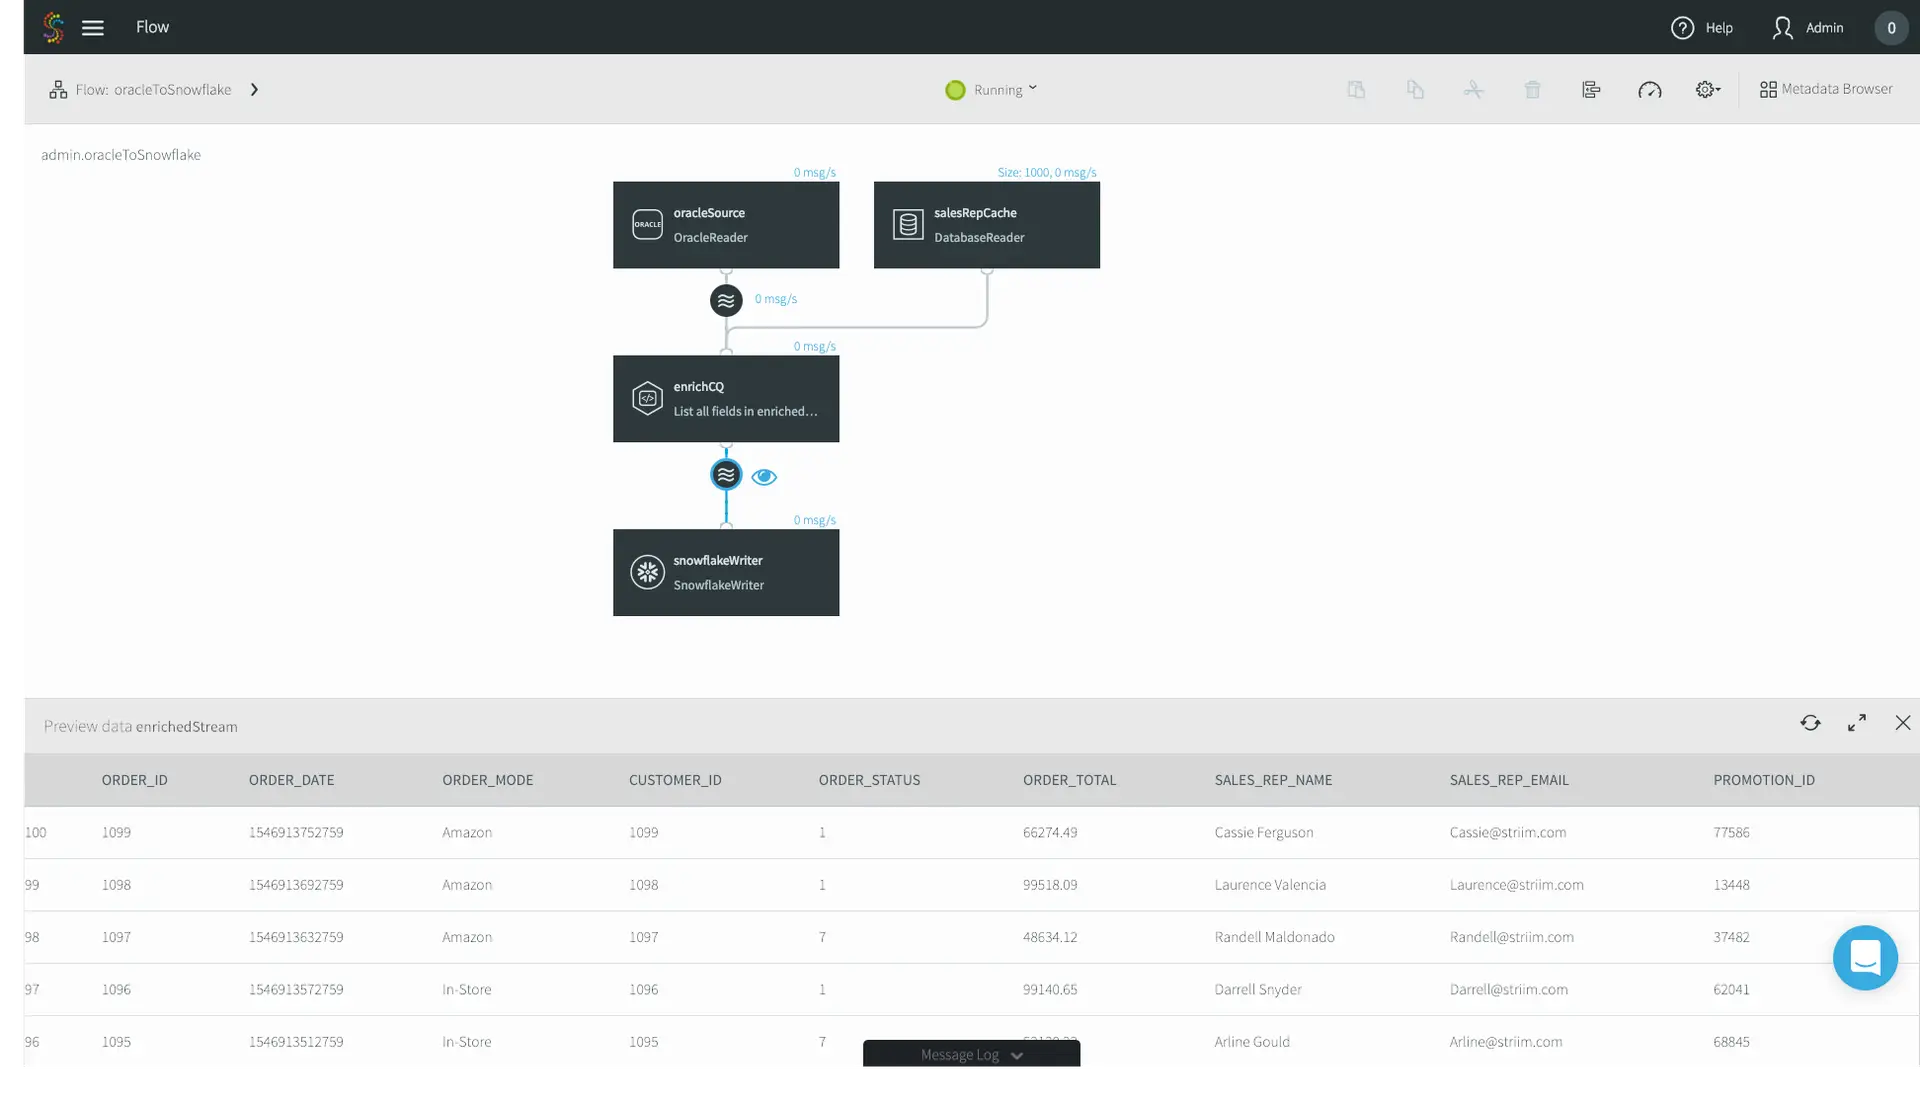
Running heavy analytical queries on your production SQL Server is a recipe for disaster. It drains compute resources, slows down operational performance, and frustrates your end-users. Replication solves this by moving operational data to a secondary system or a dedicated data warehouse. While native transactional replication can do this for SQL-to-SQL environments, modern CDC platforms excel here by streaming that data directly into platforms like Snowflake or BigQuery for real-time analytics.

Support Cloud Migration and Hybrid Architectures

Enterprises are rapidly migrating workloads to Azure, AWS, and Google Cloud. However, taking a massive production database offline for an extended migration window is rarely feasible. Replication bridges the gap. By continuously syncing your on-premises SQL Server to your new cloud environment, you can migrate seamlessly and perform a zero-downtime cutover. When you’re dealing with heterogeneous cloud targets, modern streaming platforms are the only viable path forward.

Enable Geo-Replication and Distributed Applications

If your users are in London, but your database is in New York, latency is somewhat inevitable. Replication allows you to distribute data geographically, placing read-replicas closer to the end-users. This drastically improves application response times and ensures a smooth, localized experience for a global user base.

Challenges with Native SQL Server Replication

Native SQL Server replication can work well for basic, homogenous environments. But as enterprise data architectures scale, these built-in tools often lead to significant risks. Here’s where native approaches typically fall short.

Latency and Performance Trade-Offs

In high-transaction environments, the Log Reader and Distribution Agents can quickly become bottlenecks. Wide Area Network (WAN) constraints or high-churn tables often lead to severe lag. DBAs are left constantly measuring “undistributed commands” and troubleshooting end-to-end latency. Furthermore, the cost of over-replication—replicating too many tables or unnecessary columns—severely taxes the source system’s CPU and memory.

Schema Changes and Conflict Resolution

Data structures are rarely static. With native transactional replication, executing Data Definition Language (DDL) changes—like adding a column or modifying a data type—can easily break the replication pipeline. Handling identity columns and strict Primary Key (PK) requirements also introduces friction. In the worst-case scenarios, a schema mismatch forces a complete reinitialization of the database, leading to hours of downtime. For Merge or Peer-to-Peer replication, designing and managing conflict resolution policies demands immense operational overhead.

Limited Hybrid and Cloud Support

Native replication was designed for SQL-to-SQL ecosystems. When you need to move data to heterogeneous targets—like Snowflake, BigQuery, Kafka, or a distinct cloud provider—native tools fall flat. Creating workarounds involves overcoming significant network hurdles, security complexities, and tooling gaps. Modern cloud architectures require platforms built specifically for cross-platform, multi-cloud topologies.

Complexity of Monitoring and Maintenance

Managing native replication requires a heavy administrative lift. Daily and weekly tasks include monitoring agent jobs, triaging cryptic error logs, and making tough calls on whether to reinitialize failing subscriptions. Because there is no unified observability layer, it is difficult to establish and adhere to clear Service Level Objectives (SLOs) around maximum lag or Mean Time to Recovery (MTTR).

Best Practices for SQL Server Data Replication

Whether you are trying to optimize your current native setup or transitioning to a modern streaming architecture, adhering to best practices is essential. These field-tested lessons reduce risk, improve reliability, and support broader modernization strategies.

Define Replication Strategy Based on Business Needs

Technology should always follow business drivers. Start by defining your required outcomes—whether that is high availability, offloading analytics, or executing a cloud migration—before selecting a data replication strategy. To reduce overhead and limit the blast radius of failures, strictly scope your replication down to the necessary tables, columns, and filters.

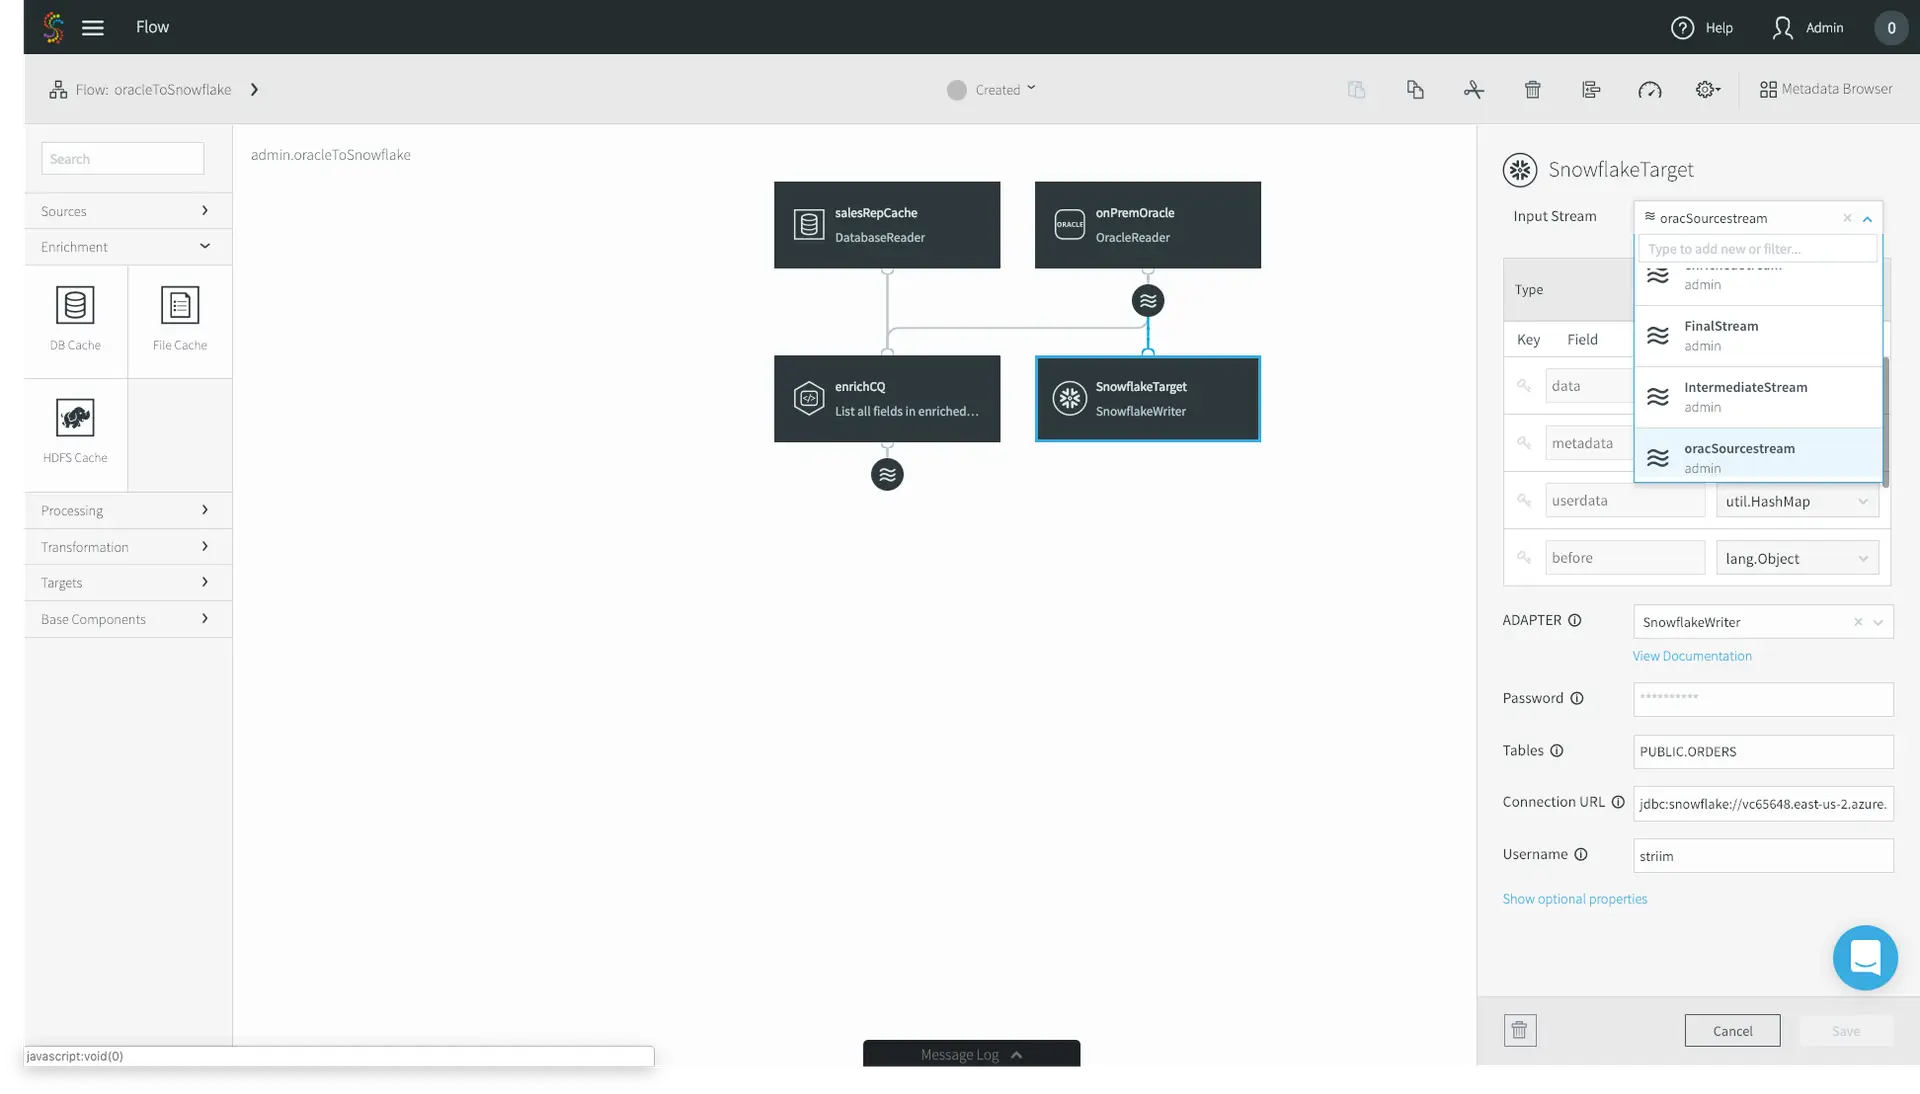
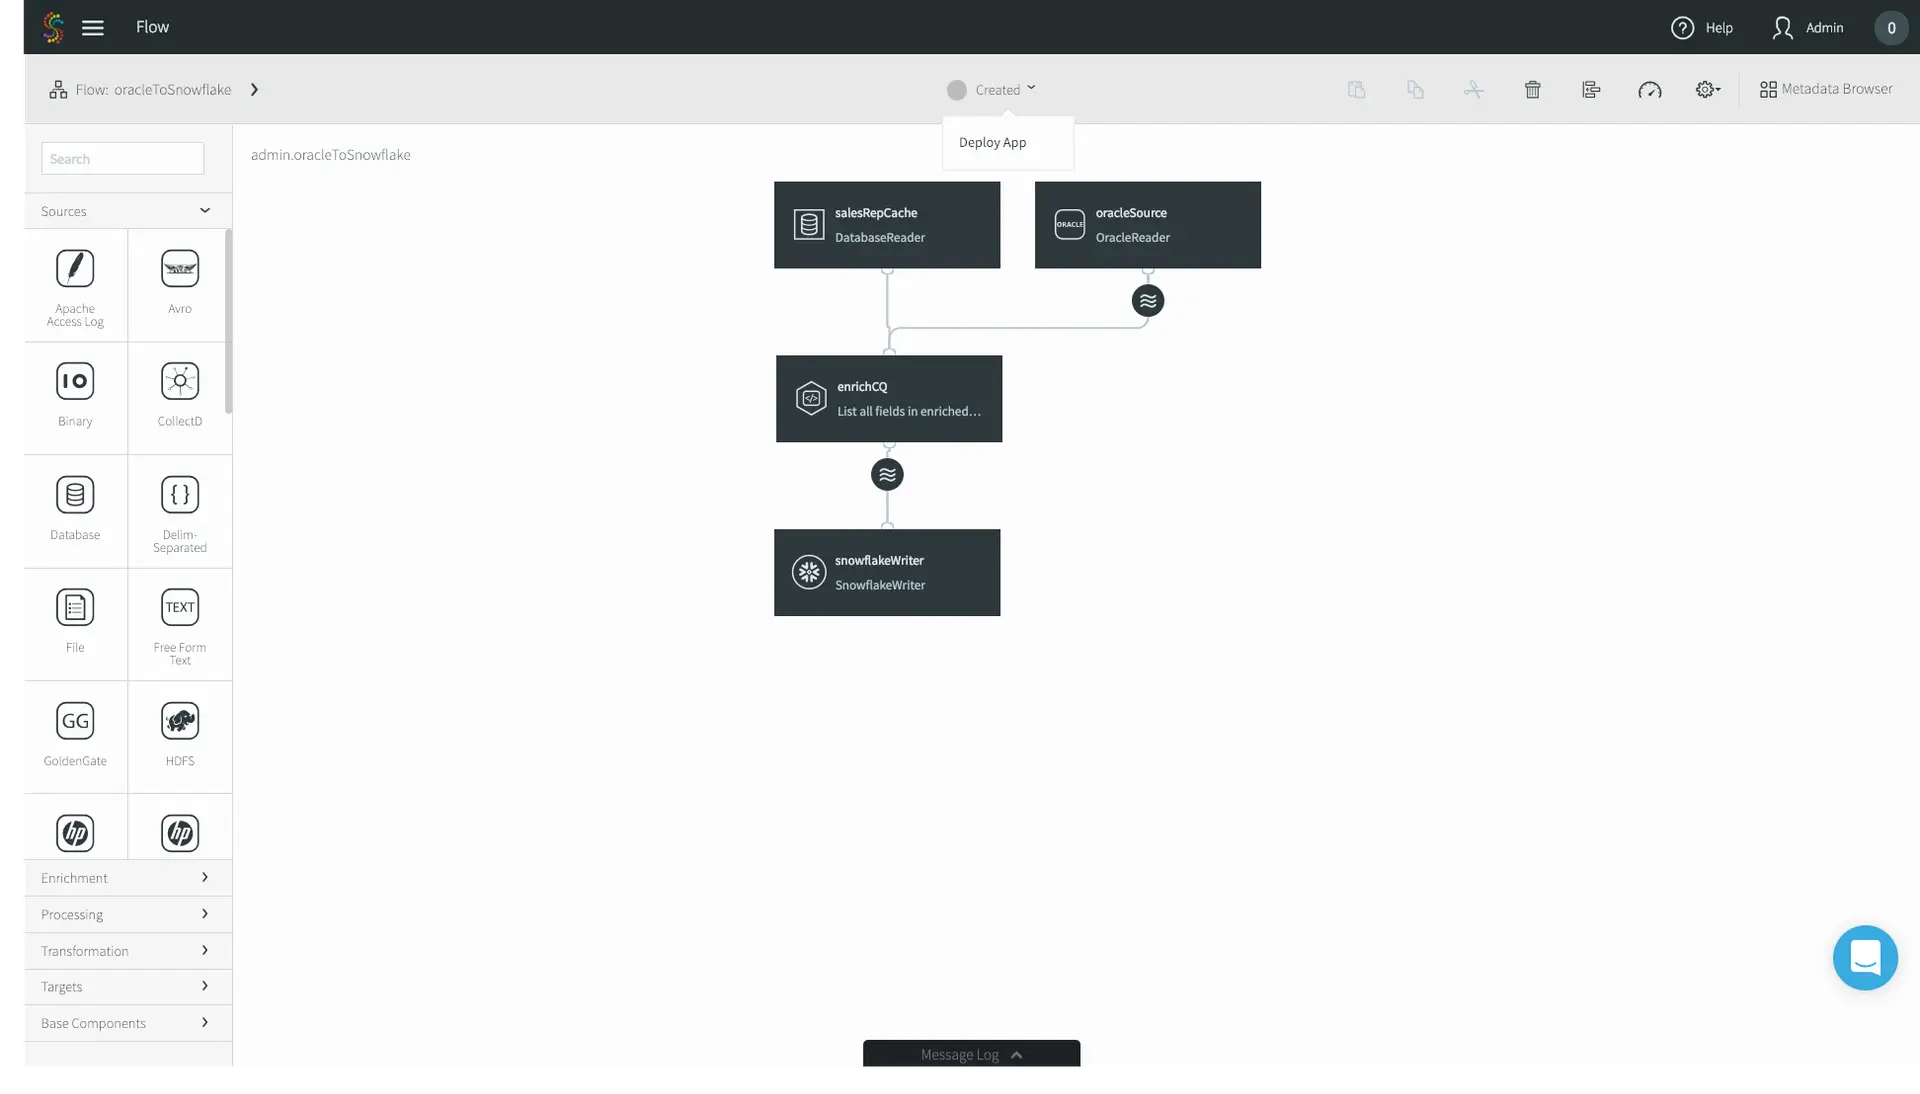
How Striim helps: Striim simplifies strategic planning by supporting log-based CDC for heterogeneous targets right out of the box. This makes it significantly easier to align your replication setup directly with your modernization and analytics goals, without being constrained by native SQL Server limits.

Monitor and Validate Replication Health

Replication blind spots are dangerous. It’s best to be proactive from the offset: tracking latency, backlog sizes, agent status, and errors. Set up proactive alerting thresholds and regularly validate data parity using row counts or checksums. Crucially, establish a clear incident response plan to reduce MTTR when replication inevitably hits a snag.

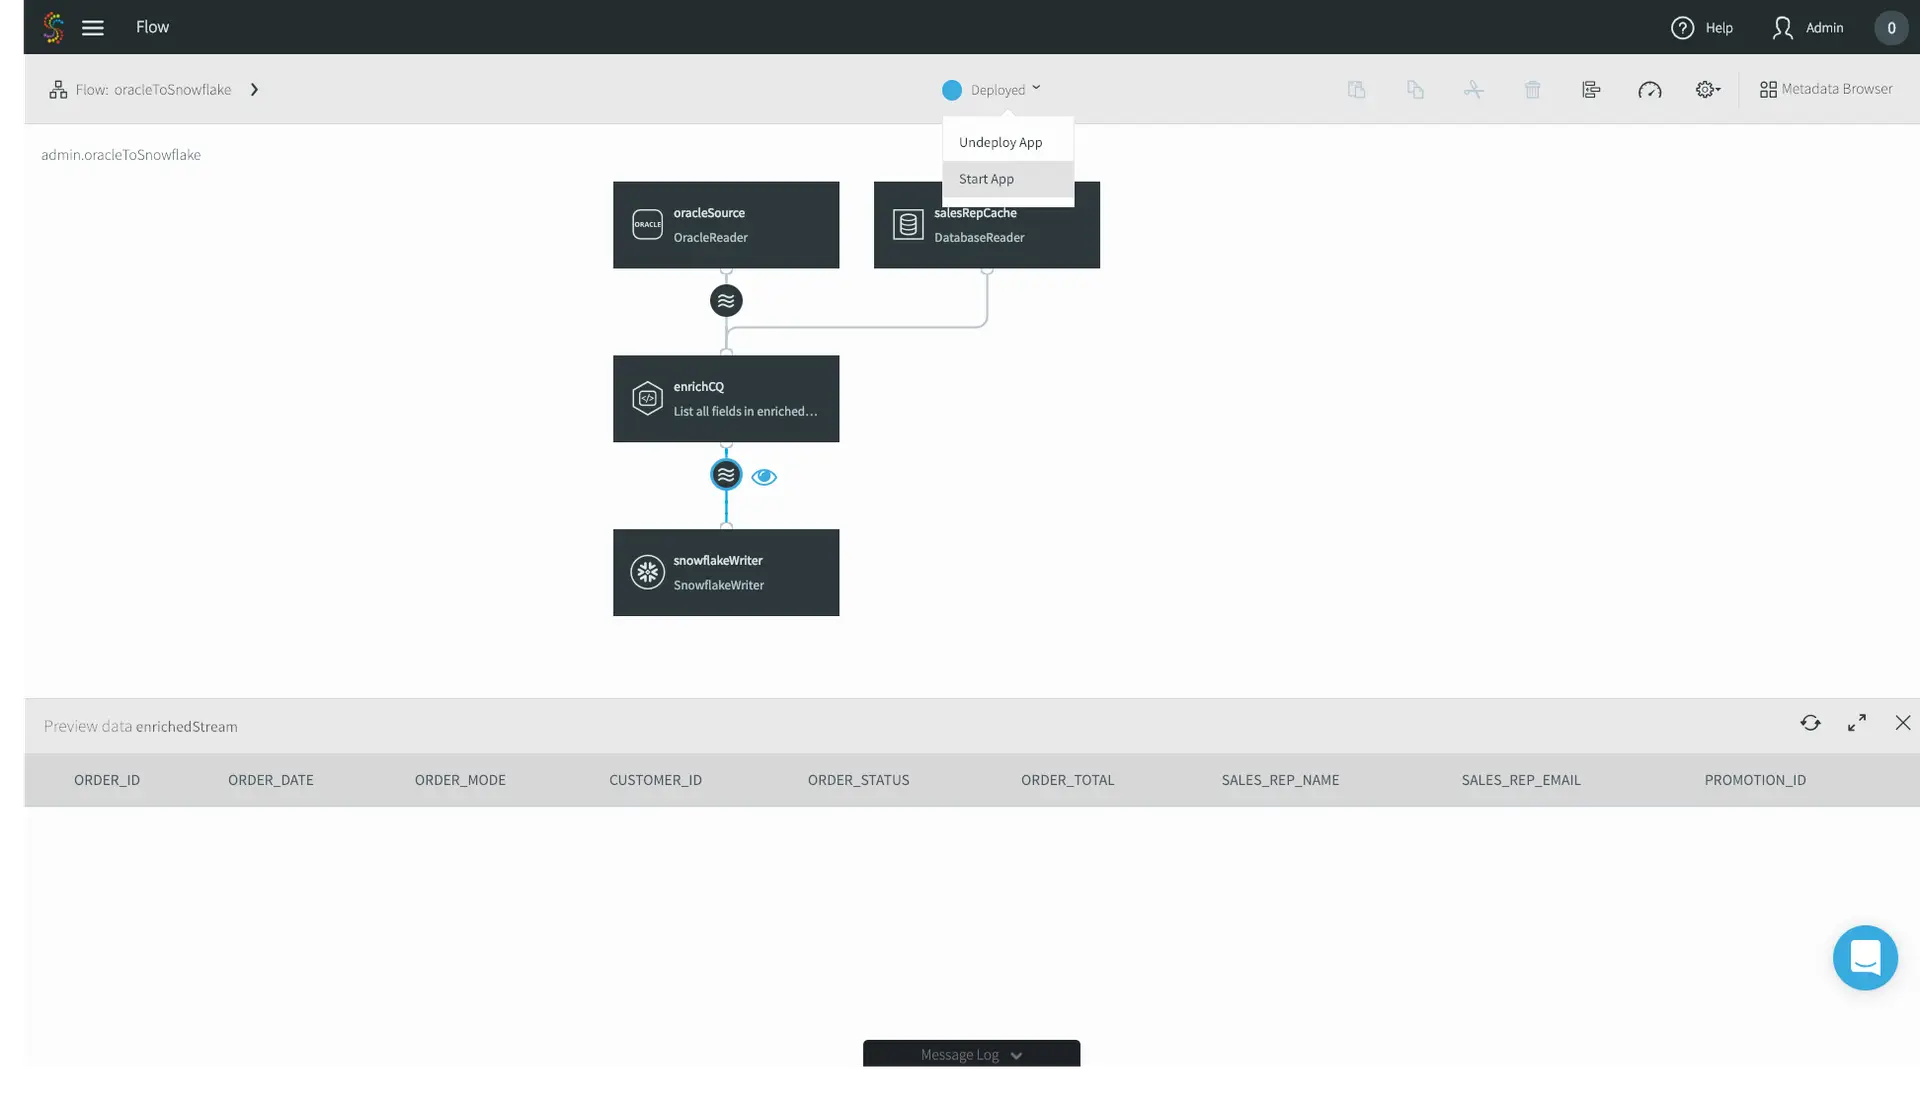
How Striim helps: Striim provides built-in dashboards and real-time monitoring capabilities. It gives you a unified view of pipeline health, making it far easier to detect issues early, troubleshoot efficiently, and ensure continuous data flow across SQL Server and your cloud systems.

Secure Replication Endpoints and Credentials

Data in motion is highly vulnerable. Secure your pipelines by enforcing least-privilege access, encrypting data in transit, and securing snapshot folders. Avoid common security pitfalls, like embedding plaintext credentials in agent jobs or deployment scripts. Always rotate secrets regularly and audit access to maintain compliance with mandates like SOX, HIPAA, and GDPR.

How Striim helps: Striim natively integrates with enterprise-grade security controls. With support for TLS encryption, Role-Based Access Control (RBAC), and comprehensive audit logs, Striim drastically reduces your manual security burden and compliance risk compared to piecing together native replication security.

Minimize Downtime During Migrations

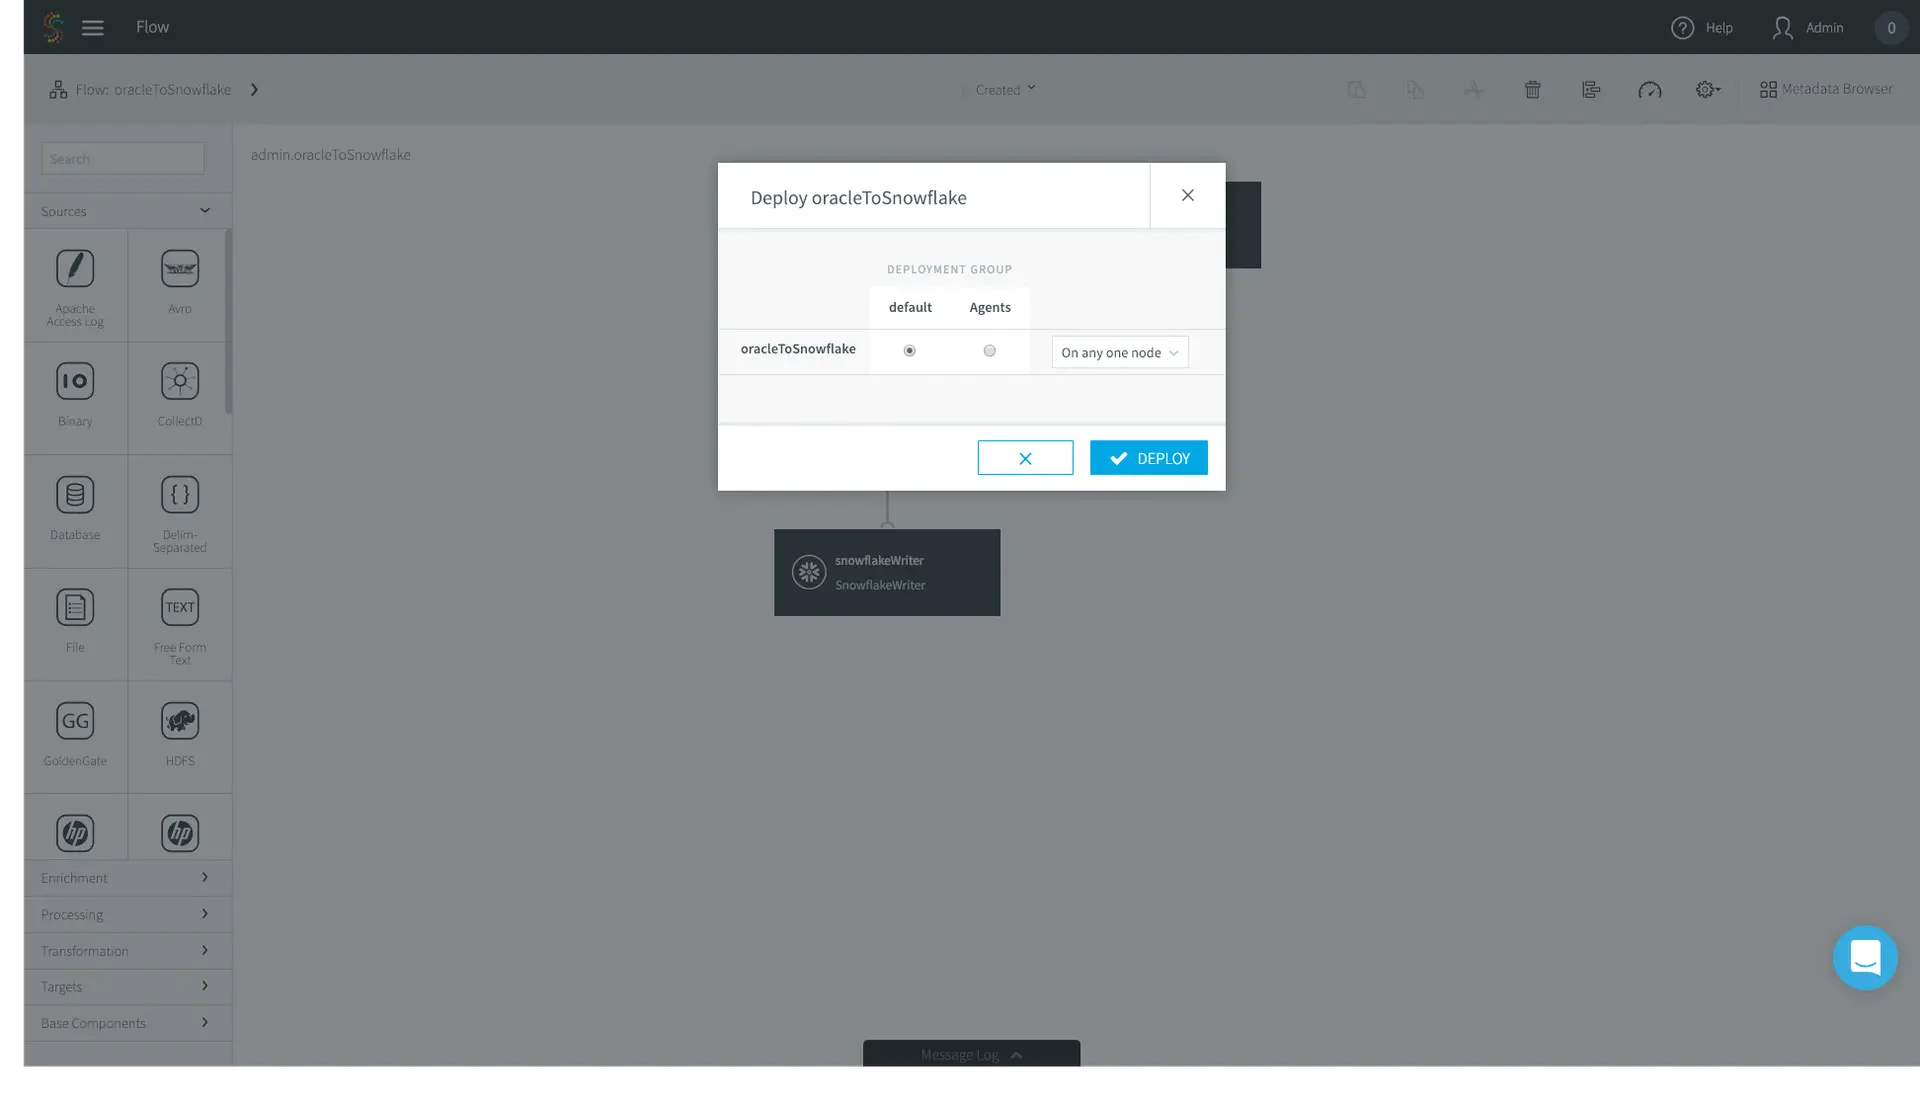
When migrating databases, downtime is the enemy. A safe migration strategy involves seeding the target database via a backup and restore process, and then using replication to synchronize the ongoing deltas. Always run dry-run cutovers to test your process, and define strict rollback criteria before touching production. For large, high-churn tables, carefully plan for phased or parallel migrations to minimize impact. How Striim helps: Striim is built for zero-downtime migrations. By leveraging log-based CDC to capture and stream changes in real-time, Striim allows you to move SQL Server workloads to modern cloud targets continuously, ensuring you can modernize your infrastructure without ever disrupting live applications.

What Makes Striim the Data Replication Solution of Choice for SQL Server

Native SQL Server replication often creates pain around latency, schema changes, and cross-platform targets. To truly modernize, you need a platform built for the speed and scale of the cloud.

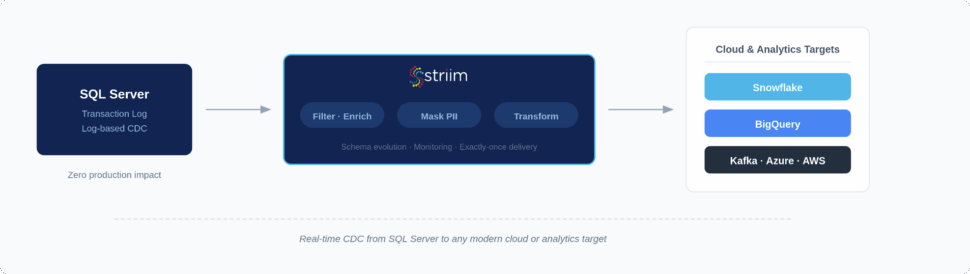
Striim is the enterprise-ready, log-based CDC platform designed to overcome the limitations of native replication. By unifying real-time data movement, in-flight transformation, and governance, Striim ensures your data gets where it needs to be—accurately, securely, and in sub-second latency.

Here is how Striim specifically solves SQL Server replication challenges (for deeper technical details, refer to our SQL Server documentation):

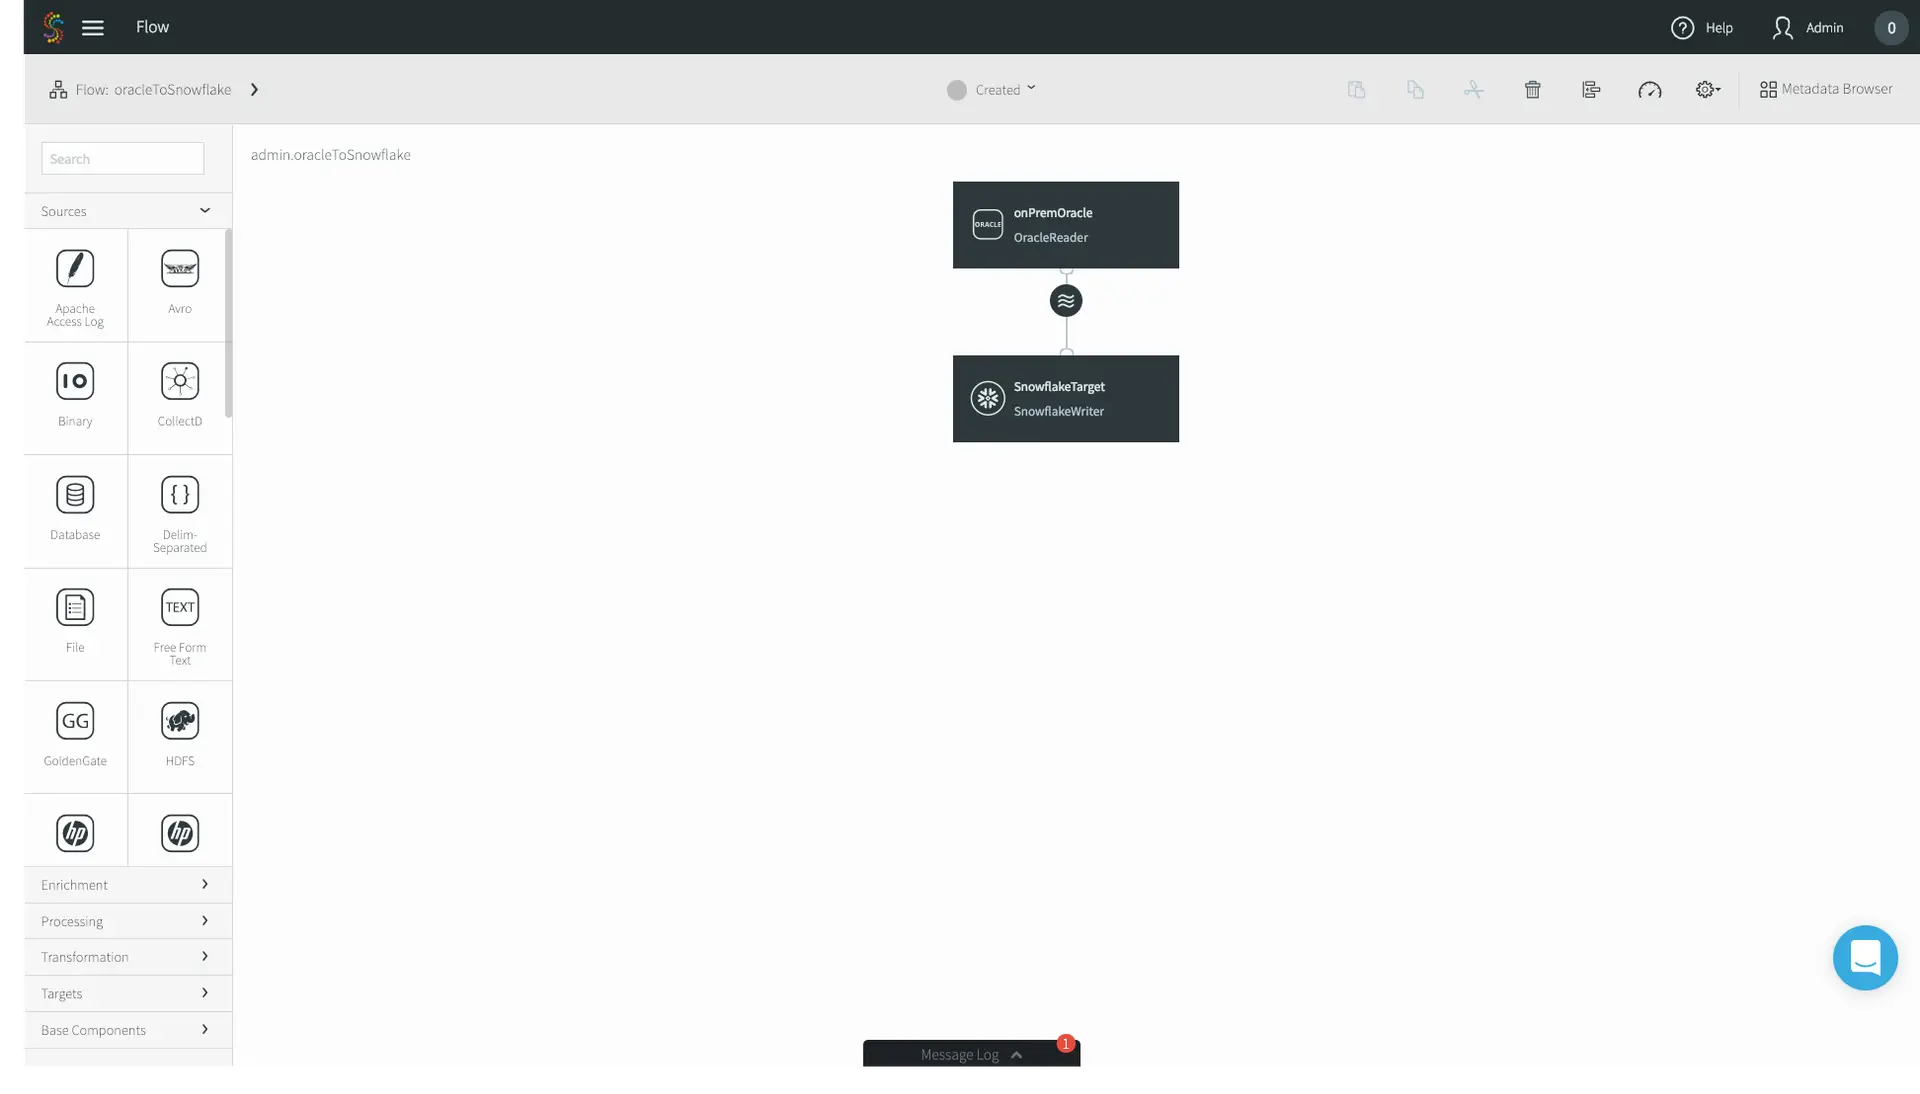
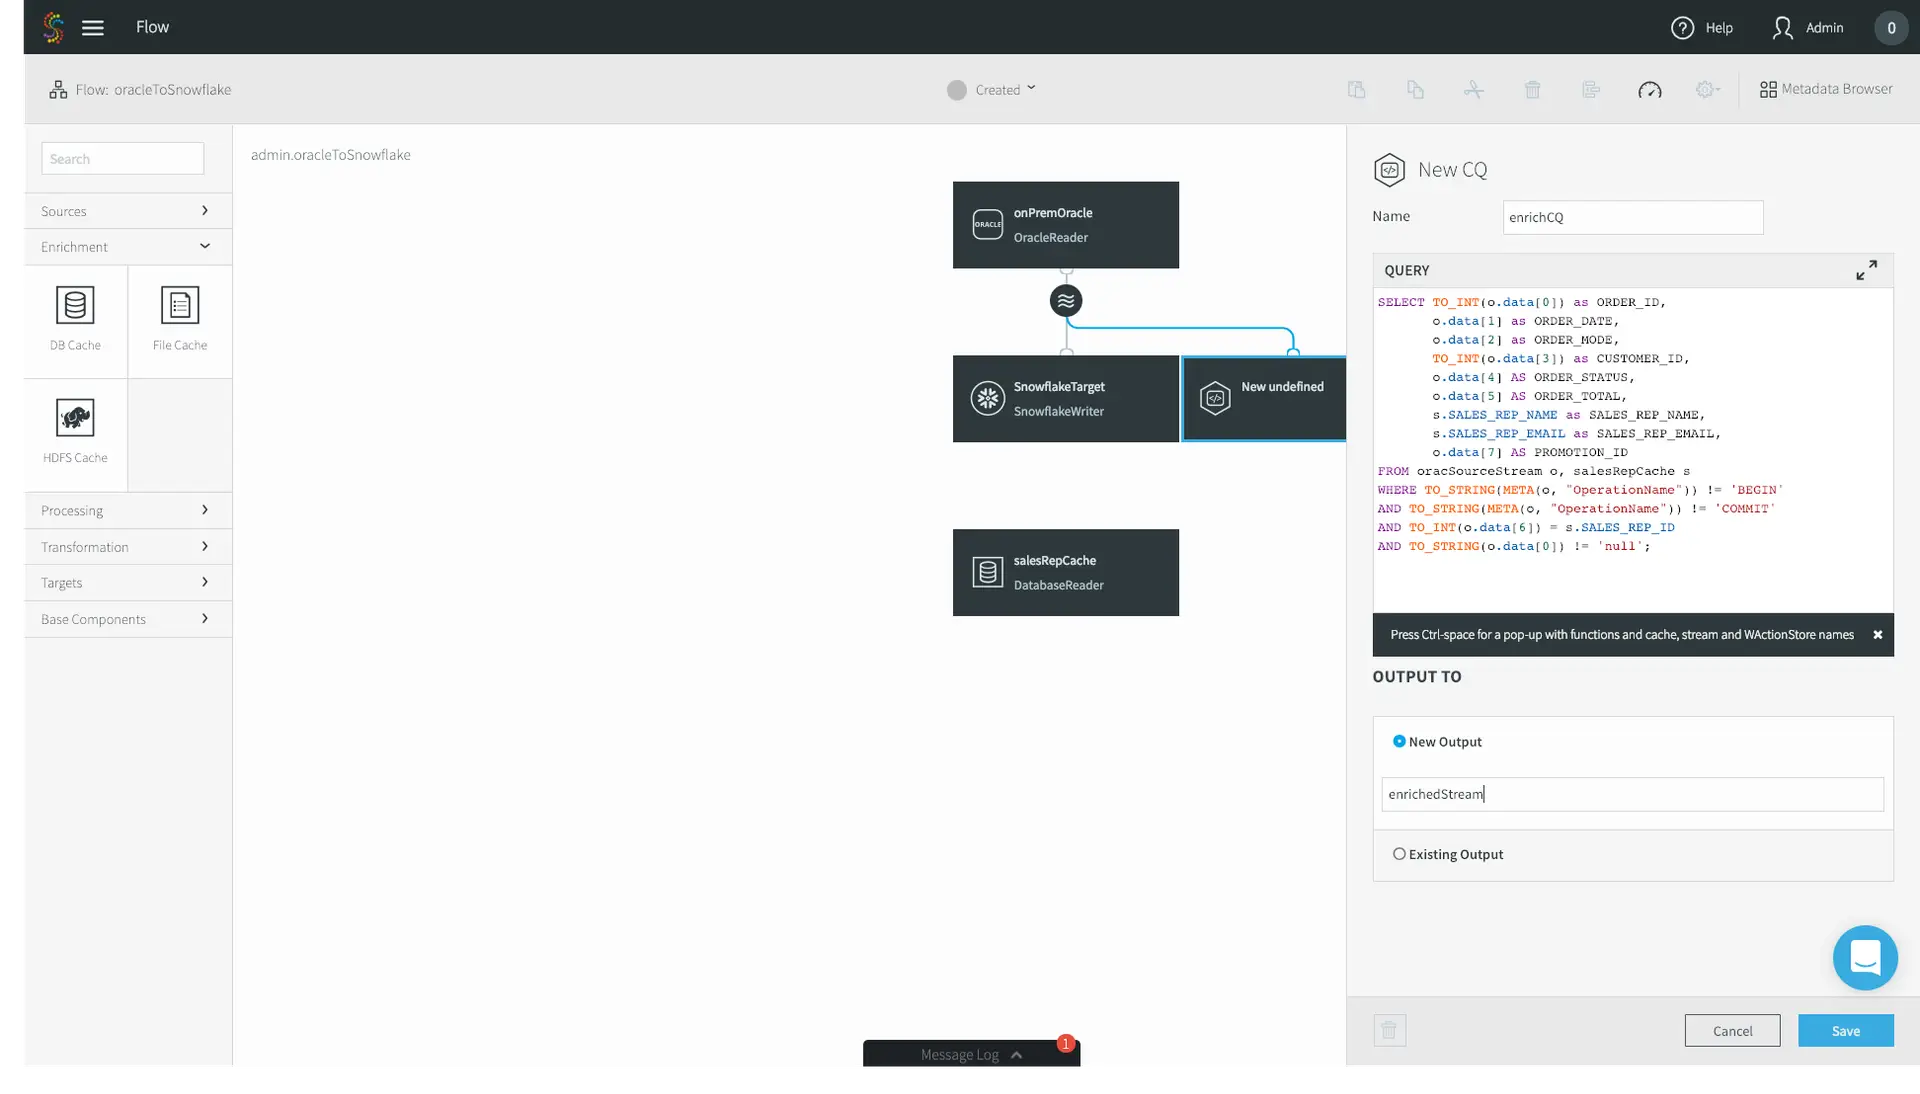
  • Log-based Change Data Capture (CDC) with minimal latency: Using our Microsoft SQL Server connector, Striim reads directly from the SQL Server transaction log, keeping your production databases unburdened while ensuring real-time data freshness for analytics, reporting, and operational decision-making.
  • Continuous replication to modern cloud platforms: Moving to Azure, AWS, GCP, Snowflake, Kafka, or BigQuery? Striim supports continuous replication to heterogeneous targets, accelerating cloud adoption and enabling multi-cloud strategies without friction.
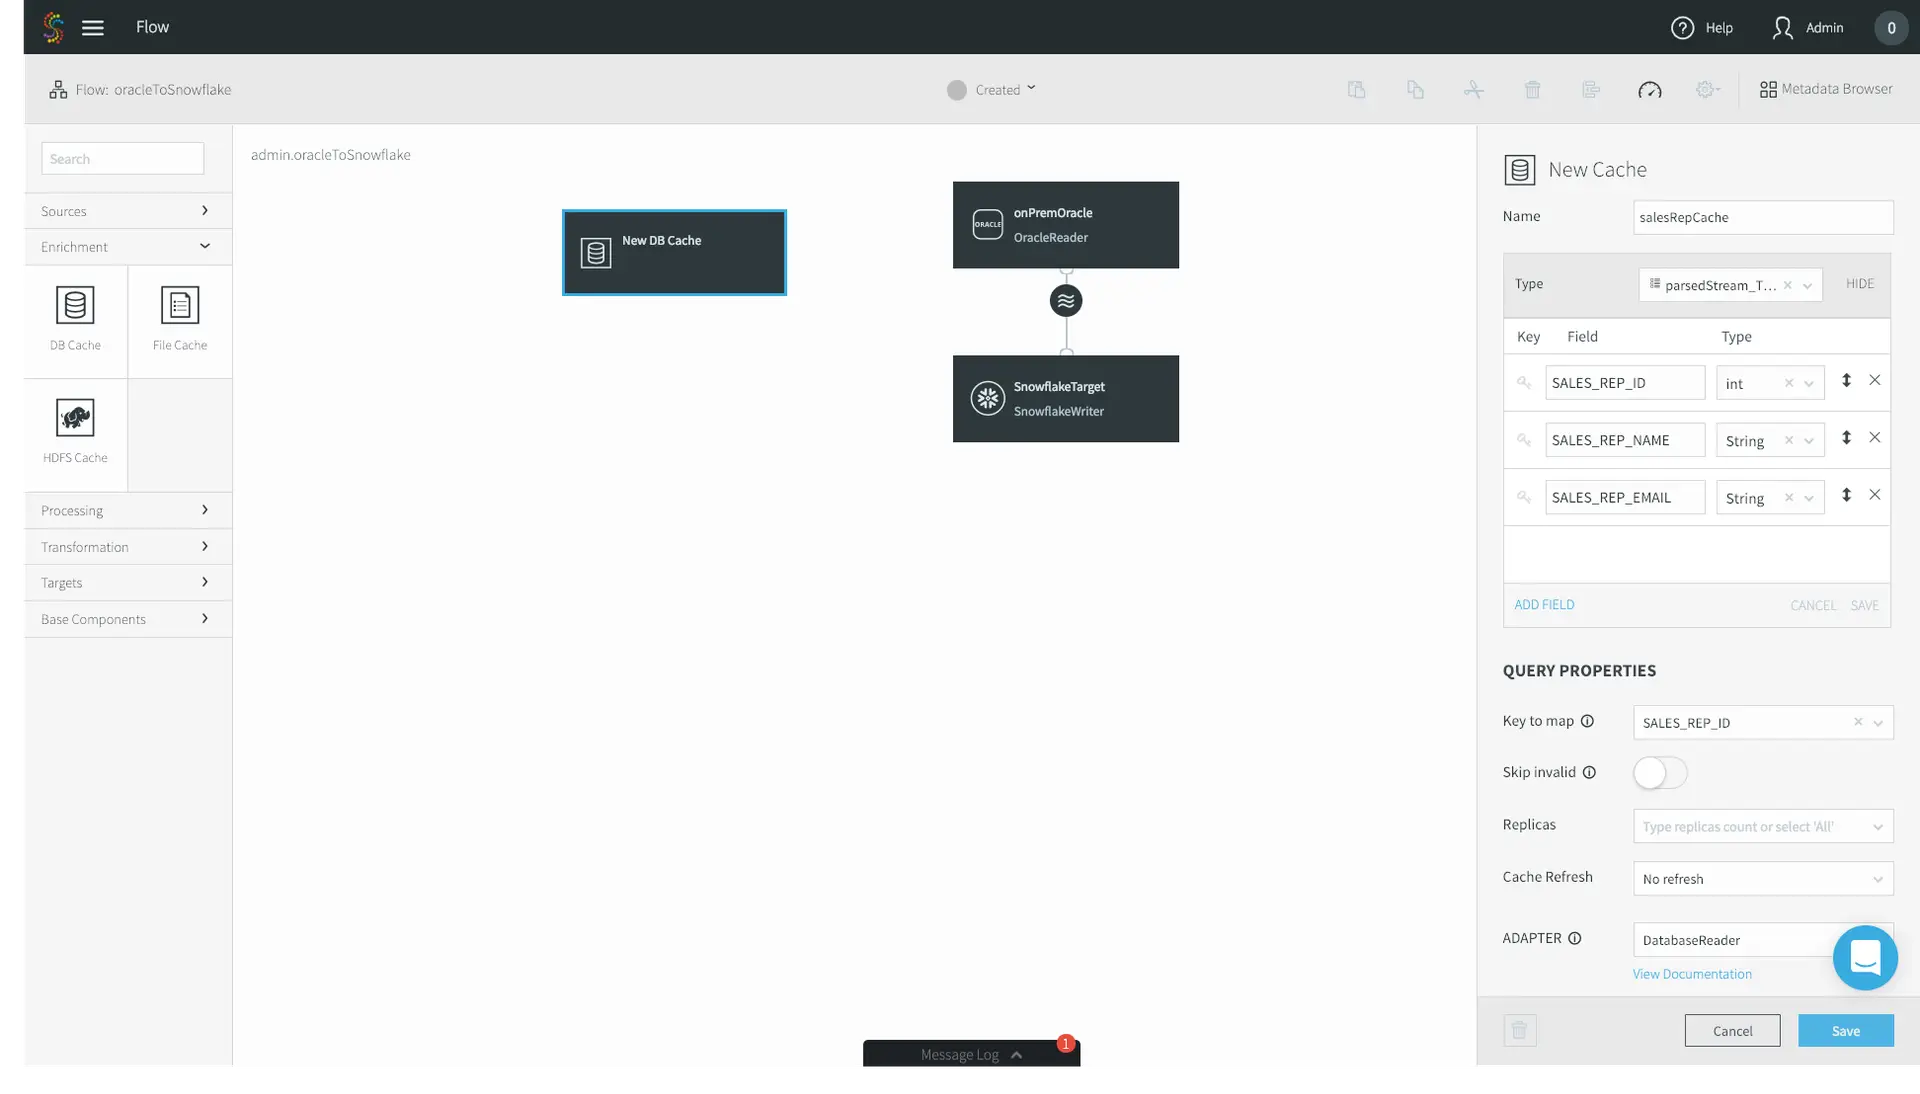
  • Low-code interface with drag-and-drop pipeline design: Avoid complex scripting. Striim’s intuitive interface shortens project timelines and reduces engineering effort, helping your data teams deliver results in weeks instead of months.
  • Built-in monitoring dashboards and alerts: Stop flying blind. Striim lowers DBA overhead and improves reliability by actively monitoring pipeline health, surfacing errors, and catching latency issues before they impact the business.
  • Enterprise-grade security: Striim reduces compliance risk and ensures your replication meets regulatory standards (like HIPAA, SOX, and GDPR) with native TLS encryption, role-based access control, and comprehensive audit trails.
  • Schema evolution handling: Don’t let a simple DDL change break your pipeline. Striim seamlessly handles schema evolution, simplifying ongoing operations by avoiding painful database re-initializations and minimizing disruption.
  • Zero-downtime cloud migration workflows: Moving massive SQL Server databases to the cloud doesn’t have to require planned outages. Striim supports phased modernization without ever interrupting your live applications or customer experiences.
  • Horizontal scalability: Built to process over 100 billion events daily, Striim ensures your replication infrastructure easily keeps pace as data volumes and business demands grow.

FAQs

What are the biggest challenges with data replication for SQL Server in large enterprises?

The biggest challenges revolve around scale, system performance, and architectural rigidity. Native tools can heavily tax source databases, creating crippling latency during high-transaction periods. Furthermore, native methods struggle with Data Definition Language (DDL) changes, which frequently break pipelines, and lack native support for streaming data to modern, non-Microsoft cloud environments.

How does log-based CDC improve SQL Server replication compared to native methods?

Log-based CDC is drastically more efficient because it reads the database transaction log asynchronously, rather than running resource-heavy queries against the active tables. This prevents performance degradation on your primary SQL Server instance. It also provides sub-second latency and handles structural schema changes far more gracefully than native transactional replication.

Can SQL Server data replication support cloud migration without downtime?

Yes, but doing it safely requires modern CDC tools. You begin by executing an initial data load (seeding) to the new cloud target while the primary SQL Server remains online. Simultaneously, log-based CDC captures any changes happening in real time and streams those deltas to the cloud, allowing you to synchronize the systems and cut over with zero downtime.

What’s the difference between SQL Server replication and third-party replication tools like Striim?

SQL Server’s built-in replication is primarily designed for homogenous, SQL-to-SQL environments and relies heavily on complex agent management. Striim, conversely, is an enterprise-grade platform built for heterogeneous architectures. It captures data from SQL Server and streams it in real-time to almost any target—including Snowflake, Kafka, and BigQuery—while offering in-flight transformations and unified observability.

How do I monitor and troubleshoot SQL Server replication at scale?

At an enterprise scale, you must move away from manually checking agent logs. Best practices dictate establishing Service Level Objectives (SLOs) around acceptable lag and implementing centralized monitoring dashboards. Platforms like Striim automate this by providing real-time visibility into pipeline health, proactive alerting for bottlenecks, and automated error handling to reduce mean time to recovery (MTTR).

Is data replication for SQL Server secure enough for compliance-driven industries (HIPAA, SOX, GDPR)?

Native SQL Server replication can be secured, but it requires meticulous manual configuration to ensure snapshot folders and credentials aren’t exposed. For compliance-driven industries, utilizing a platform like Striim is far safer. It embeds security directly into the pipeline with end-to-end TLS encryption, role-based access control (RBAC), and rigorous audit trails that easily satisfy regulatory audits.

How do I choose the best data replication strategy for SQL Server in a hybrid cloud environment?

Always start by mapping your business requirements: acceptable latency, source system impact, and target destinations. If you are moving data across a hybrid cloud topology (e.g., from an on-premises SQL Server to a cloud data warehouse), native tools will likely introduce too much friction. In these scenarios, a modern log-based CDC and streaming strategy is the undisputed best practice.

What’s the ROI of using Striim for SQL Server data replication versus managing native replication in-house?

The ROI of Striim is driven by massive reductions in engineering and administrative overhead, as DBAs no longer spend hours troubleshooting broken native pipelines. It accelerates time-to-market for AI and analytics initiatives by delivering real-time, context-rich data continuously. Most importantly, it protects revenue by enabling zero-downtime migrations and guaranteeing high availability for mission-critical applications.

Ready to modernize your SQL Server data architecture? Don’t let legacy replication tools hold back your digital transformation. Integration isn’t just about moving data. It’s about breaking down silos and building a unified, intelligent architecture.

Curious to learn more? Book a demo today to explore how Striim helps enterprises break free from native limitations, operationalize AI, and power real-time intelligence—already in production at the world’s most advanced companies.

Oracle to BigQuery Made Simple: Challenges and Solutions

When it comes to enterprise data speed isn’t just a nice-to-have, it’s the price of admission. For years, organizations relied on Oracle as the bedrock of your operations, and for good reason. It’s a proven solution for handling order processing and financial records. But legacy Oracle apps weren’t built for the era of real-time streaming or real-time analytics. They were built to be the “system of record,” not the “system of insight.”

As your data volumes explode, that gap between “what’s happening now” and “what’s in my report” is getting wider. If you’re looking to leverage real-time use cases, you can’t afford to wait for overnight batch windows, and you definitely can’t settle for stale analytics. 

By moving your operational data from Oracle into Google BigQuery, you can run robust analytics without putting strain on the production systems that keep your business running. Think of BigQuery as a scalable, cloud-native engine that lets you unlock the value of your data the second it’s created.

In this guide, we’re going to look at why this move is so critical right now, the common roadblocks, and how you can build a pipeline that actually keeps pace with your business while modernizing your data integration.

Key Takeaways:

  • The Why: You’re bridging the gap between Oracle’s transactional reliability and BigQuery’s robust analytical power. It’s about keeping your system of record safe while you innovate in the cloud.
  • The How: It boils down to three main choices: batch ETL, incremental loads, or real-time streaming via Change Data Capture (CDC). If you want zero downtime and data that’s actually fresh, CDC is the way to go.
  • The Solution: Modernization isn’t just about moving data; it’s about doing so reliably. You need native connectors, automatic schema handling, and clear observability so you aren’t constantly chasing infrastructure fixes.

Why Replicate Your Oracle Data into BigQuery?

The objective isn’t to replace Oracle altogether; rather, it’s to complement your transactional core with a high-performance analytical partner. Most enterprises we work with are moving toward a hybrid architecture where Oracle handles the heavy lifting of transactions, while BigQuery becomes the “intelligence hub.”

This setup lets you innovate—like running complex ML models or massive queries—without risking the performance of operational systems. It lets you take rigid, schema-heavy operational data and make it fluid, searchable, and ready for AI.

Here’s why most teams are making the jump:

  • Stop Slowing Down Your OLTP: Running heavy analytics on your production Oracle database is a great way to frustrate your users. Replication moves that load to BigQuery, keeping your core systems fast.
  • Let Your Data Scientists Run Wild: By separating these environments, your data team can experiment and scale without needing to ask the DBA for permission every time they run a big query.
  • Scalability on Demand: You keep Oracle for what it does best (integrity), while leveraging Google’s elastic, serverless infrastructure to handle your biggest data spikes.

Use Cases: What Can You Actually Do With It?

When you can query your Oracle data in BigQuery seconds after a transaction happens, you can do things that were impossible with batch processing.

Use Case What You Get Why BigQuery?
Real-Time Reporting Instant visibility into sales. Handles large joins across datasets in seconds.
Fraud & Risk Catching “bad actors” as they strike. Built-in ML to spot patterns in streaming data.
Supply Chain Inventory tracking that actually keeps up. Joins your ERP data with external weather or traffic info.
Customer Experience Personalization that feels like magic. Combines transaction history with live app engagement.

Operational Dashboards and Real-Time Reporting

Streaming replication turns static reports into living dashboards. Your leadership team can track KPIs as they happen. Imagine a retailer monitoring sales across thousands of stores in real time: they can adjust pricing or staffing on the fly instead of waiting for a “next-day” post-mortem.

Fraud Detection and Risk Monitoring

In finance, every second you wait is money lost. By streaming transactions from Oracle to BigQuery, you can run anomaly detection models instantly. If anomalies hit your database, you can flag them immediately, saving your company’s bottom line and its reputation.

Supply Chain and Inventory Optimization

If your inventory data is “stale,” you’re either overstocking or running out of product. Real-time replication lets you track shipments and warehouse levels continuously. When your Oracle ERP data hits BigQuery, you can combine it with live traffic or shipping updates to predict delays before your customer even knows there’s a problem.

Customer Insights and Personalization

By unifying your Oracle transaction history with live engagement data in BigQuery, your marketing team can trigger the right offer at the exact moment a customer interacts with your brand. Striim makes this easy by streaming data from multiple sources at once to give you that full context.

Machine Learning and Predictive Analytics

The biggest killer of AI is stale data. Real-time replication feeds fresh, high-quality data into your BigQuery ML models. Without timely data, your models are just guessing about the past; with it, they’re predicting your future: anticipating churn or market shifts before they happen.

How to Replicate Oracle Data to BigQuery: 3 Options

There’s more than one way to handle database replication, but the method you choose will lead to different levels of data freshness, maintenance effort, and risk to production systems.

Here’s how the three main approaches stack up:

Method Data Freshness Maintenance Effort Downtime Risk
Batch ETL Hours or Days (Stale) Medium High (during large loads)
Incremental Loads Minutes or Hours (Lagging) High (complex logic) Low to Medium
Real-Time CDC Seconds (Instant) Low (automated) Zero

1. Batch ETL Jobs (Extract, Transform, Load)

Traditional ETL tools take a snapshot of your Oracle data, transform it, and then dump it into BigQuery in one move. It’s relatively simple to set up if you’re just starting out, but it has a major drawback: your data is already out of date the moment it lands.

2. Lift-and-Load with Scheduled Incremental Updates

To fix the “stale data” problem, many teams try to run smaller updates more often: say, every 15 or 30 minutes. While this reduces latency, it adds a whole new layer of complexity. You have to write custom logic to track “delta” changes (what’s changed since the last run?), and you’re still stuck with small downtime windows or performance dips every time the update triggers. It’s a “patch” solution that often creates more maintenance headaches than it solves.

3. Real-Time Streaming Pipelines Using Change Data Capture (CDC)

If you want to move at the speed of modern business, Oracle CDC is the gold standard. Instead of taking snapshots, CDC listens to the Oracle database’s redo logs in real time. Every time an insert, update, or delete happens, it’s immediately captured and streamed to BigQuery.

A key advantage of CDC is that it has almost zero impact on your production database’s performance and ensures that BigQuery is always in sync with Oracle. It’s the only way to achieve true zero-downtime replication while keeping your analytics fresh enough for real-world decision-making.

Major Roadblocks in Migrating Oracle Data to Google BigQuery

While the benefits of moving your Oracle data to BigQuery are significant, the process is rarely a “set it and forget” scenario. If you’ve tried to build these pipelines yourself, you’re familiar with the engineering overhead involved. Here are some of the biggest hurdles that threaten to derail modernization projects:

High Latency and Downtime Risks

Traditional batch methods or simple lift-and-load approaches often leave BigQuery data lagging hours or even days behind your Oracle source. This poses a significant risk. Outdated insights lead to failed SLAs and poor decisions, and loading vast amounts of data at once can cause significant downtime on your source systems: a potential disaster for a mission-critical Oracle app.

Schema Drift and Data Type Incompatibilities

Oracle is famous for its complex data types—think NUMBER, DATE, CLOB, or BLOB. These don’t always have a direct, clean equivalent in BigQuery. Even worse is “schema drift”: when a developer changes a table structure in Oracle, it can instantly break downstream analytics. Striim solves this by handling automatic schema evolution and mapping, ensuring your pipelines keep running even when the source changes.

Maintaining Transactional Consistency at Scale

Ensuring that data arrives in BigQuery in the exact order it was created in Oracle is not a simple exercise. If you lose the sequence of events, your financial reports or inventory counts will be wrong. You need Oracle change data capture architecture that supports “exactly-once” delivery and automatic replay to ensure data integrity.

Lack of Observability and Error Recovery

If a pipeline fails at 2 AM, how long until someone on the team finds out? Most custom or open-source tools give you very little visibility into replication lag or dropped events. Without real-time monitoring and a clear way to recover from errors, you can’t truly trust the data sitting in BigQuery.

Performance Bottlenecks and Scaling Limitations

When your transaction volume spikes—say, during a holiday sale or a market shift—your replication pipeline needs to keep up. Throughput issues often cause data to fall behind, creating a bottleneck. Striim’s architecture is built to handle these spikes with built-in buffering and backpressure management, so your performance stays steady no matter the load.

Security and Compliance Gaps

Moving sensitive data like PII (Personally Identifiable Information) between systems brings up major governance questions. You have to worry about GDPR, HIPAA, and general data privacy. Your replication pipeline can’t be a weak link in your security chain; it needs to support encryption, masking, and fine-grained access control out of the box.

How to Build Reliable Oracle to BigQuery Streaming Architecture

Understanding the “how” is just as important as the “why.” If you want to move away from batch processing and into the world of real-time insights, you need architecture that is resilient by design. Here’s what a reliable Oracle-to-BigQuery pipeline looks like under the hood:

Step 1: Capture Via Log-Based CDC

Instead of querying the tables directly (which puts a load on your production CPU), we use log-based Change Data Capture. This reads the Oracle redo logs: the chronological record of every change made to the database. By capturing inserts, updates, and deletes as they happen, you can ensure transactional accuracy without slowing down your core applications.

Step 2: Stream Data With Resilience and Ordering

Once the data is captured, it’s pushed into a streaming pipeline. Effective integration requires more than simple data transfer; it must guarantee events are delivered in the precise sequence they occurred. Striim uses built-in buffering and backpressure control to handle traffic spikes safely. If your network hiccups or BigQuery reaches a quota limit, our checkpointing capabilities ensure no data is lost and nothing is duplicated once the connection returns.

Step 3: Transform and Map for Schema Compatibility

This is where the “translation” happens. Your system must map Oracle’s specific data types (like NUMBER or DATE) into BigQuery-friendly formats. Striim handles this mapping automatically and allows you to apply in-flight transformations—like filtering out sensitive PII or enriching a record with data from another source—before it ever touches your cloud warehouse.

Step 4: Deliver to BigQuery for Instant Availability

The final stage is the actual ingestion. Whether through streaming inserts or micro-batching, the goal is to make the data available for querying as quickly as possible. Because the architecture is built for low latency, you’re looking at seconds—not hours—from the moment a row changes in Oracle to the moment it’s ready for your BigQuery dashboards.

Simplify Oracle to BigQuery Replication With Striim

Building and maintaining custom data pipelines is a full-time job your team likely doesn’t have time for. Striim eliminates that complexity by combining real-time CDC, in-flight transformations, and enterprise-grade observability into a single, unified platform.

Instead of spending weeks putting out fires, you can have a production-ready Oracle-to-BigQuery pipeline running in minutes. Striim is the simplest, most reliable way to achieve continuous, zero-downtime replication so you can focus on the insights that actually move the needle for your business.

Key capabilities include:

  • Native Oracle CDC and BigQuery Connectors: Capture every change directly from the Oracle redo logs and stream it to BigQuery with sub-second latency.
  • Automatic Schema Evolution: As your Oracle source changes, Striim keeps your BigQuery tables in sync automatically. No more broken pipelines when a developer adds a column.
  • In-Flight Transformations: Clean, filter, mask, or enrich your data while it’s in motion. Your data lands in BigQuery ready for analytics, not buried in technical debt.
  • Exactly-Once Delivery: We guarantee data integrity with built-in checkpointing and fault tolerance. You never have to worry about missing transactions or duplicate records.
  • Unified Observability: Track throughput, latency, and pipeline health in real time through a single dashboard. You’ll know exactly how your data is moving at every step.
  • Enterprise Security: With built-in encryption and fine-grained access controls, Striim ensures your sensitive Oracle data remains compliant with GDPR, HIPAA, and other global standards.

Ready to see how intuitive real-time replication can be? 

Try Striim for free or book a demo today to start unlocking the full potential of your Oracle data in Google BigQuery.

How to Migrate Data from MySQL to Azure Database for MySQL

For many data teams, migrating MySQL workloads to Azure Database for MySQL is a critical step in modernizing their data platform, but maintaining uptime, preserving data integrity, and validating performance during the process can be complex.

With Striim and Microsoft Azure, those challenges become manageable. Striim’s log-based Change Data Capture (CDC) continuously streams every MySQL transaction into Azure Database for MySQL, enabling zero-data-loss replication, real-time validation, and minimal impact on live applications.

As part of the Microsoft Unlimited Database Migration Program, this joint solution helps organizations accelerate and de-risk their path to Azure. By combining proven migration tooling, partner expertise, and architectural guidance, together, Striim and Microsoft simplify every stage of the move.

This tutorial walks through the key steps and configurations to successfully migrate from MySQL to Azure Database for MySQL using Striim.

Why Use Striim for Continuous Migration

Through the Unlimited Database Migration Program, Microsoft customers gain unlimited Striim licenses to migrate as many databases as they need at no additional cost. Highlights and benefits of the program include:

  • Zero-downtime, zero-data-loss migrations. Supported sources include SQL Server, MongoDB, Oracle, MySQL, PostgreSQL, Sybase, and Cosmos. Supported targets include Azure Database for MySQL, Azure Database for PostgreSQL, Azure Database for CosmosDB, and Azure Database for MariaDB.
  • Mission-critical, heterogeneous workloads supported. Applies for SQL, Oracle, NoSQL, OSS.
  • Drives faster AI adoption. Once migrated, data is ready for real-time analytics & AI.

In this case, Striim enables continuous, log-based Change Data Capture (CDC) from MySQL to Azure Database for MySQL. Instead of relying on periodic batch jobs, Striim reads directly from MySQL binary logs (binlogs) and streams transactions to Azure in real time.

Using the architecture and configuration steps outlined below, this approach minimizes impact on production systems and ensures data consistency even as new transactions occur during migration.

Architecture Overview

This specific setup includes three components:

  • Source: an existing MySQL database, hosted on-premises or in another cloud.
  • Processing layer: Striim, deployed in Azure for low-latency data movement.
  • Target: Azure Database for MySQL (Flexible Server recommended).

Data flows securely from MySQL → Striim → Azure Database for MySQL through ports 3306 and 5432. Private endpoints or Azure Private Link are recommended for production environments to avoid public internet exposure.

Preparing the MySQL Source

Before streaming can begin, enable binary logging and create a replication user with read access to those logs:


Set the binlog format to ROW and ensure logs are retained long enough to handle any temporary network interruption.

In Striim, use the MySQL Reader component to connect to the source. This reader consumes binlogs directly, so overhead on the production system remains in the low single-digit percentage range.

You can find detailed configuration guidance in Striim’s MySQL setup documentation.

Configuring the Azure MySQL Target

Before starting the pipeline, make sure target tables exist in Azure Database for MySQL. Striim supports two methods:

  • Schema Conversion Utility (CLI): automatically generates MySQL DDL statements.
  • Wizard-based creation: defines and creates tables directly through the Striim UI.

Create a MySQL user with appropriate privileges:


The Striim environment needs network access to the MySQL instance over port 5432. Using a private IP or Azure Private Endpoint helps maintain compliance and security best practices.

Building the Migration Pipeline

A complete Striim migration includes three coordinated stages:

  1. Schema Migration – creates tables and schemas in the target.
  2. Initial Load – bulk-loads historical data from MySQL to Azure Database for MySQL.
  3. Change Data Capture (CDC) – continuously streams live transactions to keep the systems in sync.

During the initial load, Striim copies historical data using a Database Reader and Database Writer. Once complete, you can start the CDC pipeline to apply real-time updates until MySQL and Azure Database for MySQL are fully synchronized. Note that Striim automatically maps compatible data types during initial load and continuous replication.

When ready, pause writes to MySQL, validate record counts, and cut over to Azure with zero data loss. Follow Striim’s switch-over guide for sequencing the transition safely.

Working in Striim

You can build pipelines in Striim using several methods:

  • Wizards: pre-built templates that guide you through setup for common source/target pairs such as MySQL → Azure Database for MySQL.
  • Visual Designer: drag-and-drop components for custom data flows.
  • TQL scripts: Striim’s language for defining applications programmatically, suitable for CI/CD automation.

Each Striim application is backed by a TQL file, which can be version-controlled and deployed via REST API for repeatable infrastructure-as-code workflows. Below is a step-by-step demo of what you can expect.

Adding Transformations and Smart Pipelines

Beyond 1:1 replication, you can apply transformations to enrich or reshape data before writing to Azure. Striim supports in-memory processing through continuous SQL queries or custom Java functions.

For example, you can append operational metadata:


These Smart Data Pipelines allow teams to incorporate auditing, deduplication, or lightweight analytics without creating separate ETL jobs—streamlining modernization into a single migration flow.

Performance Expectations

In joint Striim and Microsoft testing, results typically show:

  • 1 TB historical load: completed in 4–6 hours
  • Ongoing CDC latency: sub-second for inserts, updates, and deletes

Throughput depends on schema complexity, hardware configuration, and network performance. For best results, deploy Striim in the same Azure region as your Azure Database for MySQL target and allocate sufficient CPU and memory resources.

Support and Enablement

The Microsoft Unlimited Database Migration Program is designed specifically to provide customers direct access to Striim’s field expertise throughout the migration process.

From end-to-end, you can expect:

  • Onboarding and ongoing support, including installation kits and walkthroughs.
  • Higher-tier service packages are available as well.
  • Direct escalation paths to Striim for issue resolution and continuous assistance during migration and replication.
  • Professional services and funding flexibility, such as ECIF coverage for partner engagements, cutover or weekend go-live standby, and pre-approved service blocks to simplify SOW approvals.

Together, these resources ensure migrations from MySQL to Azure Database for MySQL are fully supported from initial enablement through post-cutover operations, backed by Microsoft and Striim’s combined field teams.

Accelerate Your Migration Journey with Microsoft’s Unlimited Database Migration Program

With Striim and Microsoft, moving from MySQL to Azure Database for MySQL is no longer a complex, high-risk process—it’s an engineered pathway to modernization. Through the Microsoft Unlimited Database Migration Program, you can access partner expertise, joint tooling, and migration credits to move data workloads to Azure quickly and securely at no extra cost to you.

Whether your goal is one-time migration or continuous hybrid replication, Striim’s CDC engine, combined with Azure’s managed MySQL service, ensures every transaction lands with integrity. Start your modernization journey today by connecting with your Microsoft representative or visiting https://go2.striim.com/demo.

How Striim Extends Azure Synapse Link

We recently announced that Striim is a participant in Microsoft’s Intelligent Data Platform partner ecosystem. We’re also excited to share that Striim extends Synapse Link to add support for additional source systems. 

There’s no question about the benefits of Azure Synapse. Whether it’s around on-demand usage, the ability to reduce high CapEx projects and increase cost savings, or enabling insight-driven decisions as fast as possible, Synapse can be an integral piece to your digital transformation journey. However, in order to make the most of Synapse and Power BI you need to reliably ingest data from disparate sources in real time. 

In order to do so, Azure introduced Synapse Link, a method of easily ingesting data from Cosmos DB, SQL Server 2022, SQL DB, and Dataverse. Synapse Link utilizes either the change feed or change tracking to support continuous replication from the source transactional system. Rather than relying on legacy ETL tools to ingest data into Synapse on a nightly basis, Synapse Link enables more real-time analytical workloads with a smaller performance impact on the source database. 

Outside of the sources included today with Synapse Link, Microsoft partnered with Striim to add support for real-time ingestion from Oracle and Salesforce to Synapse. Striim enables real-time Smart Data Pipelines into critical cloud services via log-based change data capture (CDC). CDC is the least intrusive method of reading from a source database, which reads from the underlying transaction logs rather than the database itself – empowering replications of high-value business-critical workloads to the cloud with minimal downtime and risk. 

Besides pure data replication use cases, one common pattern that we see is the requirement to pre-process data in flight before even landing on Synapse. This reduces the time to value, and gets the data in the right format ahead of time. Within Striim it’s incredibly easy to do so either with out-of-the-box transformations, SQL code, or even Java for the most flexibility. 

Whether you’re interested in replication or Smart Data Pipelines, to learn more please watch the free joint webinar: https://info.microsoft.com/ww-ondemand-unlock-insights-to-your-data-with-azure-synapse-link.html?lcid=en-us, or download our Oracle to Synapse or Salesforce to Synapse reference architectures.

If you have any questions please reach out to microsoft@striim.com, we’d be happy to discuss your specific use case in more detail.

Setting Up Streaming ETL to Snowflake

Snowflake, the data warehouse built for the cloud, is designed to bring power and simplicity to your cloud-based analytics solutions, especially when combined with a streaming ETL to Snowflake running in the cloud.Streaming ETL to Snowflake

Snowflake helps you make better and faster business decisions using your data on a massive scale, fueling data-driven organizations. Just take a look at Snowflake’s example use cases and you can see how companies are creating value from their data with Snowflake. There’s just one key caveat – how do you get your data into Snowflake in the first place?

Approaches – ETL/CDC/ELT

There are plenty of options when it comes to using data integration technologies, including ETL to Snowflake.

Let’s start with traditional ETL. Now a 50+ year old legacy technology, ETL was the genesis of data movement and enabled batch, disk-based transformations. While ETL is still used for advanced transformation capabilities, the high latencies and immense load on your source databases leave something to be desired.

Next, there was Change Data Capture (CDC). Pioneered by the founders of Striim at their previous company, GoldenGate Software (acquired by Oracle), CDC technology enabled use cases such as zero downtime database migration and heterogeneous data replication. However, CDC lacks transformational capabilities, forcing you into an ELT approach – first landing the data into a staging area such as storage, and then transforming to its final form. While this works, the multiple hops increase your end-to-end latency and architectural complexity.

Continuously Integrating Transactional Data into Snowflake

Enter, Striim. Striim is an evolution from GoldenGate and combines the real-time nature of CDC with many of the transformational capabilities of ETL into a next-generation streaming solution for ETL to Snowflake and other analytics platforms, on-premises or in the cloud. Enabling real-time data movement into Snowflake, Striim continuously ingests data from on-premises systems and other cloud environments to Snowflake. In this quick start guide, we will walk you through, step-by-step, how to use Striim for streaming ETL to Snowflake by loading data in real time, whether you run Snowflake on Azure or AWS.

Data Flow

We’ll get started with an on-premises Oracle to Snowflake application with in-line transformations and denormalization. This guide assumes you already have Striim installed either on-premises or in the cloud, along with your Oracle database and Snowflake account configured.

After installing Striim, there are a variety of ways to create applications, or data pipelines, from a source to a target. Here, I’ll focus on using our pre-built wizards and drag-and-drop UI, but you can also build applications with the drag-and-drop UI from scratch, or using a declarative language using the CLI.

We will show how you can set up the flow between the source and target, and then how you can enrich records using an in-memory cache that’s preloaded with reference data.

  1. In the Add App page, select Start with Template.

Striim for ETL to Snowflake

2. In the following App Wizard screen, search for Snowflake.

Striim for ETL to Snowflake

3. For this example, we’ll choose Oracle CDC to Snowflake.

Striim for ETL to Snowflake

4. Name the application whatever you’d like – we’ll choose oracleToSnowflake. Go ahead and use the default admin Namespace. Namespaces are used for both application organization and enable a microservices approach when you have multiple data pipelines. Click Save.

Striim for ETL to Snowflake

5. Follow the wizards, entering first your on-premises Oracle configuration properties, and then your Snowflake connection properties. In this case I’m migrating an Oracle orders table. Click Save, and you’ll be greeted by our drag and drop UI with the source and target pre-populated. If you want to just do a straight source-to-target migration, that’s it! However, we’ll continue this example with enrichment and denormalization, editing our application using the connectors located on the left-hand side menu bar.

Striim for ETL to Snowflake

6. In this use case, we’ll enrich the Orders table with another table of the same on-premises Oracle database. Locate the Enrichment tab on the left-hand menu bar, and drag and drop the DB Cache to your canvas.

Striim for ETL to Snowflake

7. First, name the cache whatever you’d like – I chose salesRepCache. Then, specify the Type of your cache. In this case, my enrichment table contains three fields: ID, Name, and Email. Specify a Key to map. This tells Striim’s in-memory cache how to position the data for the fastest possible joins. Finally, specify your Oracle Username, the JDBC Connection URL, your password, and the tables that you want to use as a cache. Click Save.

Striim for ETL to Snowflake

8. Now we’ll go ahead and join our streaming CDC source with the static Database Cache. Click the circular stream beneath your Oracle source, and click Connect next CQ component.

Striim for ETL to Snowflake

9. Application logic in Striim is expressed using Continuous Queries, or CQs. You do so using standard SQL syntax and optional Java functionality for custom scenarios. Unlike a query on a database where you run one query and receive one result, a CQ is constantly running, executing the query on an event-by-event basis as the data flows through Striim. Data can be easily pre-formatted or denormalized using CQs.

10. In this example, we are doing a few simple transformations of the fields of the streaming Oracle CDC source, as well as enriching the source with the database cache – adding in the SALES_REP_NAME and SALES_REP_EMAIL fields where the SALES_REP_ID of the streaming CDC source equals the SALES_REP_ID of the static database cache. Specify the name of the stream you want to output the result to, and click Save. Your logic here may vary depending on your use case.

Striim for ETL to Snowflake

11. Lastly, we have to configure our SnowflakeTarget to read from the enrichedStream, not the original CDC source. Click on your Snowflake target and change the Input Stream from the Oracle source stream to your enriched stream. Click Save.

Striim for ETL to Snowflake

12. Now you’re good to go! In the top menu bar, click on Created and press Deploy App.

Striim for ETL to Snowflake

13. The deployment page allows you to specify where you want specific parts of your data pipeline to run. In this case I have a very simple deployment topology – I’m just running Striim on my laptop, so I’ll choose the default option.

Striim for ETL to Snowflake

14. Click the eye next to your enrichedStream to preview your data as it’s flowing through, and press Start App in the top menu bar.

Striim for ETL to Snowflake

15. Now that the apps running, let’s generate some data. In this case I just have a sample data generator that is connecting to my source Oracle on-premises database.

Striim for ETL to Snowflake

16. Data is flowing through the Striim platform, and you can see the enriched Sales Rep Name and Emails. 

Striim for ETL to Snowflake

17. Lastly, let’s go to our Snowflake warehouse and just do a simple select * query. Data is now being continuously written to Snowflake.

Striim for ETL to Snowflake

That’s it! Without any coding, you now have set up streaming ETL to Snowflake to load data continuously, in real time.

Interested in learning more about streaming ETL to Snowflake? Check out our Striim for Snowflake solution page, schedule a demo with a Striim technologist, or download the Striim platform to get started!

Continuous Data Movement to Azure: Getting Started with Striim


Striim in the Microsoft Azure Cloud enables companies to simplify real-time data movement to Azure by enabling heterogeneous data ingestion, enrichment, and transformation in a single solution before it delivers the data with sub-second latency. Brought to you by the core team behind GoldenGate Software, Striim offers a non-intrusive, quick-to-deploy, and easy-to-iterate solution for streaming data movement to Azure.

It’s easy to get started with Striim in the Azure Cloud. We offer Azure Marketplace solutions for Azure SQL Data Warehouse, Azure Cosmos DB, SQL Database, Azure Database for PostgreSQL, Azure Storage, and HDInsight. However, if you want continuous data movement to Azure Database for MySQL or other Azure services, you can quickly set up your own instance of Striim on a VM.

This quick-start guide assumes you already have an Azure account set up, and should take about 20 minutes to complete.


Helpful Links
Striim Azure Documentation

Download Free Trial hbspt.cta.load(4691734, ‘e285e62c-9abc-45bb-857d-e8a52f2d9776’, {});

Create Ubuntu VM on Microsoft Azure

  1. Open up your favorite browser and navigate to Azure’s dashboard at portal.azure.com
  2. Click on the + Create a resource button on the top of the left hand menu

3. Search for Ubuntu and select Ubuntu Server 16.04 LTS. This version is certified to work with Striim out of the box.

4. Select Create

5. Enter the information for your VM. For this demo, I’m using a password as authentication type. For a more secure connection for production workloads, select SSH public key and generate it through terminal if you’re on a Mac. Click OK when you’re done entering the connection information.

6. Choose a size for your VM. I’m using D2s_v3 for this demo. However, choose a larger size if need be for production workloads. Note that you can always scale the VM after creating it if you find your initial choice is not sufficient. Press Select to continue.

7. Configure the additional Settings of the VM. If you need high availability for your configuration, select it here and specify your Availability set. As I’m only using this VM for demo purposes and don’t need high availability, I’ll skip it.

8. The important piece here is to open up the specific ports that you need to access on the VM. Make sure to open HTTP and SSH, as we’ll need them for connecting to the VM and Striim. Select OK when you’re done.

9. Azure will validate your Ubuntu VM, and make sure everything is correct. Make sure everything looks good on your end as well, and select Create.

10. It may take awhile to deploy the VM, so just be patient until it is deployed. When the VM is properly deployed, it will show up under All resources in your Azure Dashboard


Download and Configure Striim on your Ubuntu VM

Download Free Trial hbspt.cta.load(4691734, ‘e285e62c-9abc-45bb-857d-e8a52f2d9776’, {});

  1. Navigate to your Azure Dashboard and select the Ubuntu VM you just created.

2. First, ensure the correct ports are open in the Networking pane on the Azure portal (Striim needs to have the following ports open: 1527, 5701, 9080, 9300, 49152-65535, and 54237). You can find more information about the required ports in Installation and Configuration Guide of Striim’s documentation.

3. Select Connect in the top middle of the screen and copy the Login using VM local account address.

4. Note: these instructions are for a Mac. Open up a new Terminal window and paste the SSH command you copied earlier from the Azure portal. There is a slightly different process on Windows to SSH into a VM, and a quick Google search should get you started with PuTTY or other tools.

5. Type yes to continue, and enter the password you created through the Azure portal

6. Congratulations! Now you’re logged in to the VM you created on Azure. From here, first we’ll install Java, and then download and install Striim.

7. Following the instructions here: https://medium.com/coderscorner/installing-oracle-java-8-in-ubuntu-16-10-845507b13343, install Oracle’s JDK 8. First, add Oracle’s PPA to your list of sources, pressing ENTER when necessary:

– sudo add-apt-repository ppa:webupd8team/java

8. Update your package repository, typing Y or yes when necessary

– sudo apt-get update

9. Install Java. There will be two screens that pop up during the installation process that require you to accept Oracle’s license terms

– sudo apt-get install oracle-java8-installer

10. To make sure Java installed correctly, type java -version to ensure that Oracle JDK 1.8.0 is installed.

11. Now that Java is installed, we can install Striim on your Azure VM. First, download Derby using wget.

– sudo su
– wget https://s3-us-west-1.amazonaws.com/striim-downloads/Releases/3.8.3A/striim-dbms-3.8.3A-Linux.deb

12. Download Striim

– wget https://s3-us-west-1.amazonaws.com/striim-downloads/Releases/3.8.3A/striim-node-3.8.3A-Linux.deb

13. Now, install both the Striim and Derby packages

dpkg -i striim-node-3.8.3A-Linux.deb
dpkg -i striim-dbms-3.8.3A-Linux.deb

14. Edit the /opt/striim/conf/striim.conffile using your favorite text editor, and enter the following fields at the top of the file:
– WA_CLUSTER_NAME: choose a unique name for the new cluster (unique in the sense that it is not already used by any existing Striim cluster on the same network)
– WA_CLUSTER_PASSWORD: will be used by other servers to connect to the cluster and for other cluster-level operations
– WA_ADMIN_PASSWORD: will be assigned to Striim’s default admin user account
– WA_IP_ADDRESS: the IP address of this server to be used by Striim
– WA_PRODUCT_KEY and WA_LICENSE_KEY: If you have keys, specify them, otherwise leave blank to run Striim on a 30-day trial license.
– NOTE: You cannot create a multi-server cluster using a trial license.
– WA_COMPANY_NAME: If you specified keys, this must exactly match the associated company name. Otherwise, enter your company name.

15. If using Vi, execute the following commands:

– vi /opt/striim/conf/striim.conf
– This edits the existing file
– I
– Type/copy and paste your properties
– Press esc key
– Type : x to save file

16. Now, we can go ahead and start up Striim as a process. Execute the following commands:
– systemctl enable striim-dbms
– systemctl start striim-dbms
– Wait ten seconds, then
– systemctl enable striim-node
– systemctl start striim-node

17. Enter the following command and wait for a message similar to: Please go to … to administer, or use console.
– tail -F /opt/striim/logs/striim-node.log

18. Finally, navigate to Striim’s Web UI located at <VM Public IP Address>:9080 and login with the information you provided during the setup process. If you’re new to Striim, we recommend you go through the quickstart located under the ? Help > Documentation button in the upper right hand corner of the UI.

You are now ready to enable continuous data movement to Azure. For technical assistance, please feel free to contact support@striim.com. For a demo of Striim’s full capabilities around moving data to Azure, please schedule a demo with one of our lead technologists.

Back to top